
My project...
#41
 07-31-2012, 02:09 AM

I have found to remove a stuck pulley is to put as much tension on it as possible then give it a good wack with a hide mallet, you are quite lucky, normally the 8mm bolts holding the puller on strip the threads in the pulley when you put too much pressure on them....
When that has happened you are left little choice but to beat the crap out of it with a lump hammer and get a new pulley
All those codes you have seem to me to point to the TCM, mine did the same when I put the manual box in and removed the TCM completely
When that has happened you are left little choice but to beat the crap out of it with a lump hammer and get a new pulley
All those codes you have seem to me to point to the TCM, mine did the same when I put the manual box in and removed the TCM completely
#42
07-31-2012, 04:26 PM

I have found to remove a stuck pulley is to put as much tension on it as possible then give it a good wack with a hide mallet, you are quite lucky, normally the 8mm bolts holding the puller on strip the threads in the pulley when you put too much pressure on them....
When that has happened you are left little choice but to beat the crap out of it with a lump hammer and get a new pulley
All those codes you have seem to me to point to the TCM, mine did the same when I put the manual box in and removed the TCM completely
When that has happened you are left little choice but to beat the crap out of it with a lump hammer and get a new pulley
All those codes you have seem to me to point to the TCM, mine did the same when I put the manual box in and removed the TCM completely
I would love to have a manual trans behind this motor, but I need to get it running right before I start into a mod like that... Do you have the 4.0 driving a five OR six speed manual trans? What did you do about the error codes?
Thanks much!!
Cheers!!!
#43
07-31-2012, 09:36 PM
Good day everyone!!
Well, I got the crank pulley off today... First things first though... Here is the finished (kind of) trunk... Painted, but it was way lighter than the factory blue, so I will have to redo this at some point... This will hold for now...
Here is the finished product... For some reason, it seems like the spare cover is angled toward the gas tank... Very odd!!
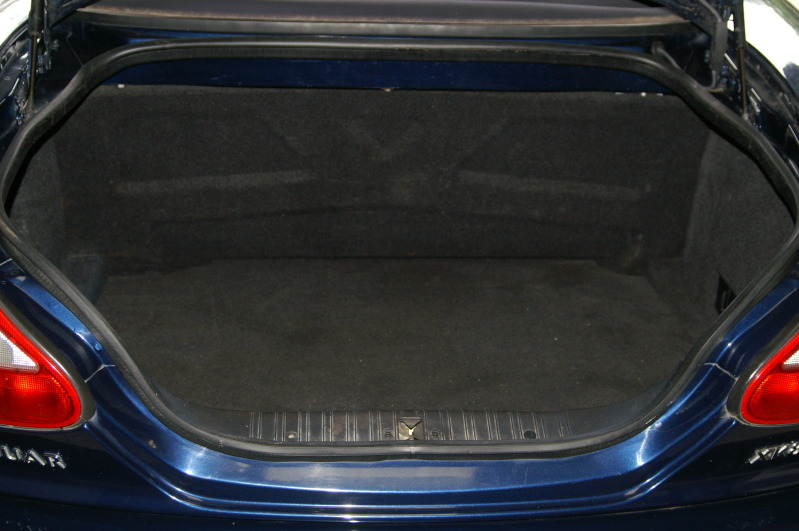
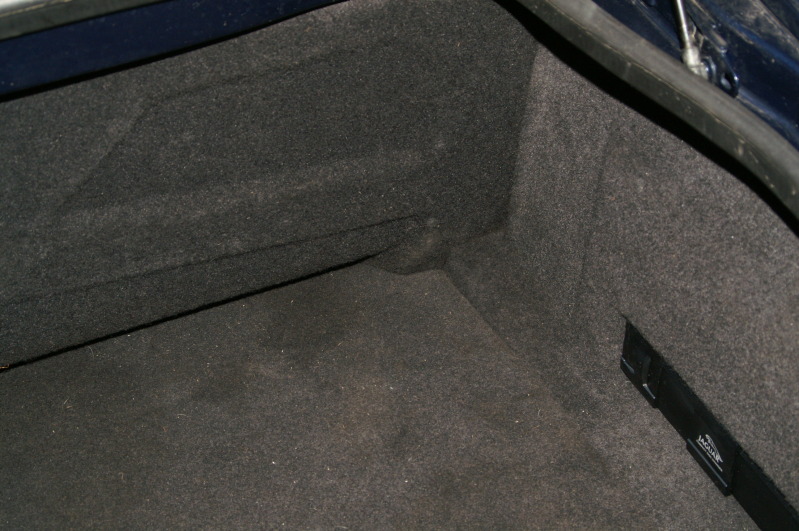
See how it doesn't match up?! Those are relays I don't want things running when I have the battery hooked up... Fuel pump and something else...

Here is the terrible spare in place with tools underneath...

And the tools all cleaned up!

and the poor condition spare...

OKAY!!! NOW THE FUN STUFF!!!
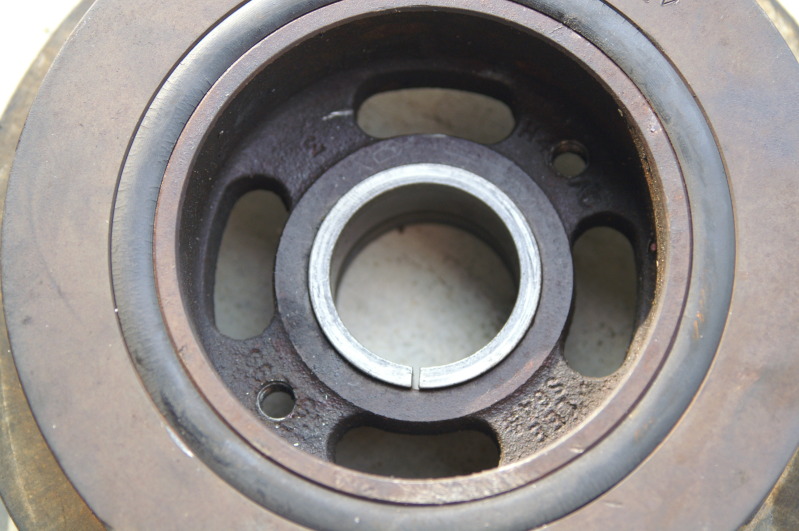
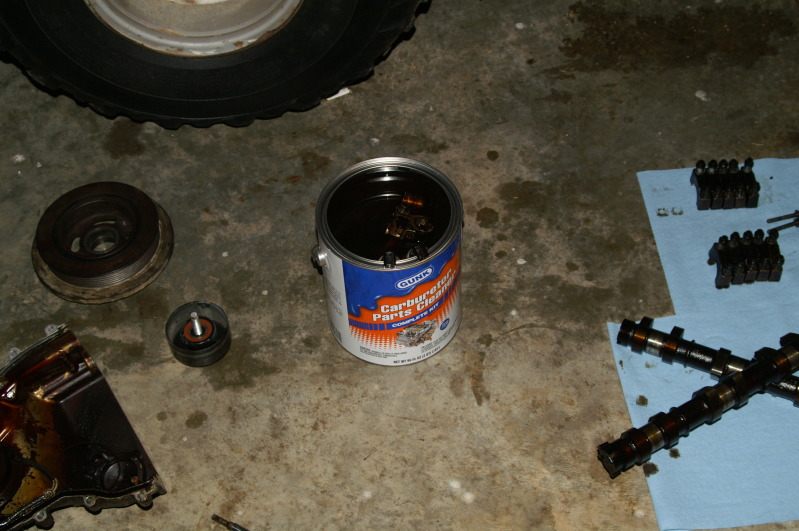
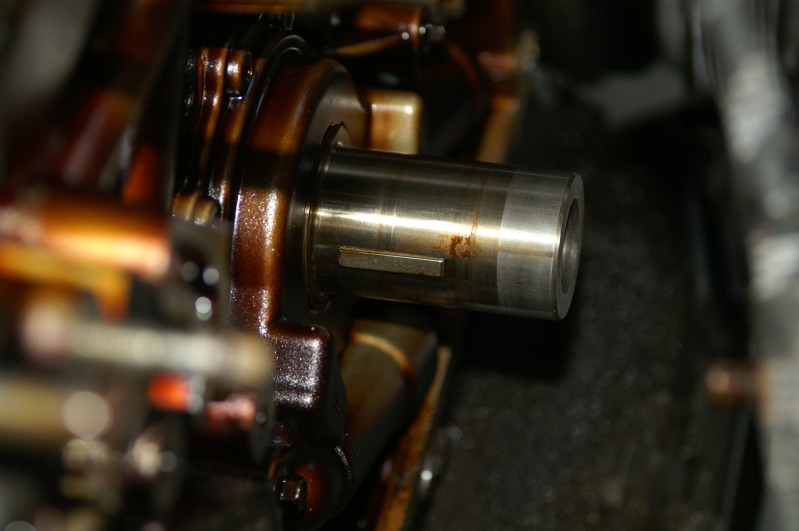
Here is the crank pulley and the locking device... Soooooo, the more you torque down on the puller, the tighter it gets!! GOOD TO KNOW!! I think the easiest way to pop this off is to spray some good stuff on it, and get a socket that fits around the steel insert; touching only the crank and give it a good solid whack!! I'd imagine you'd be able to pull the thing off by hand at that point...


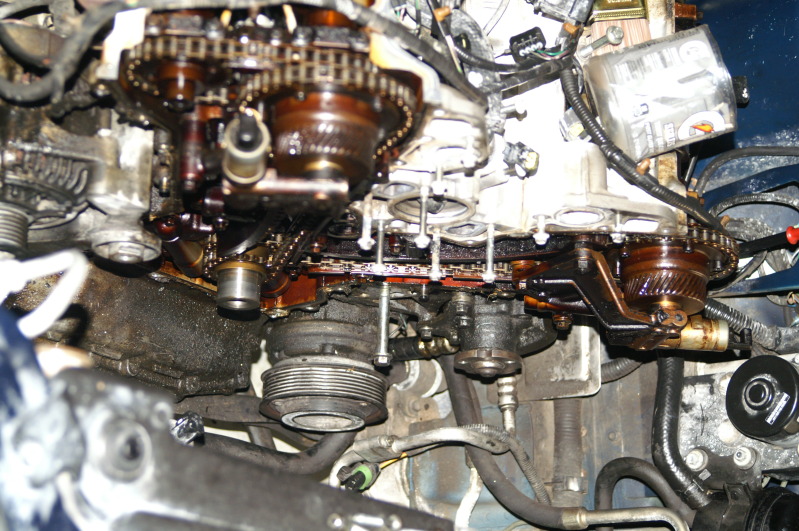
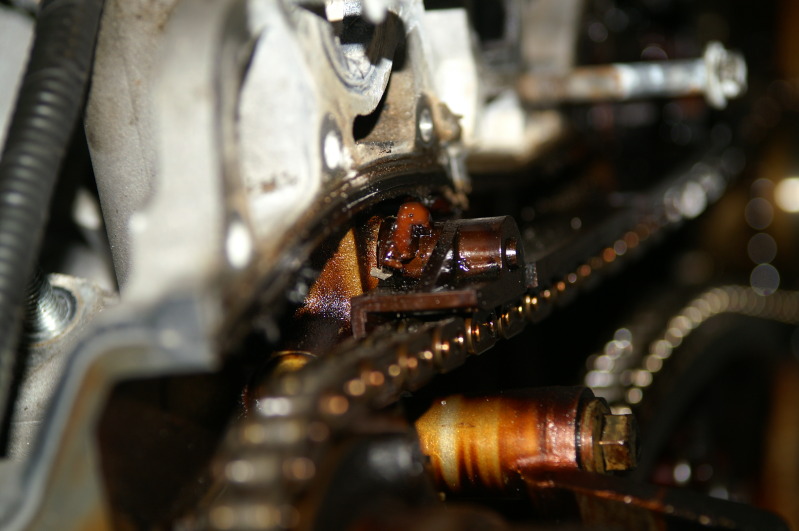
Here is the motor before I started tearing into it... Make a note everyone!!! This is the reason you CHANGE YOUR OIL!!!

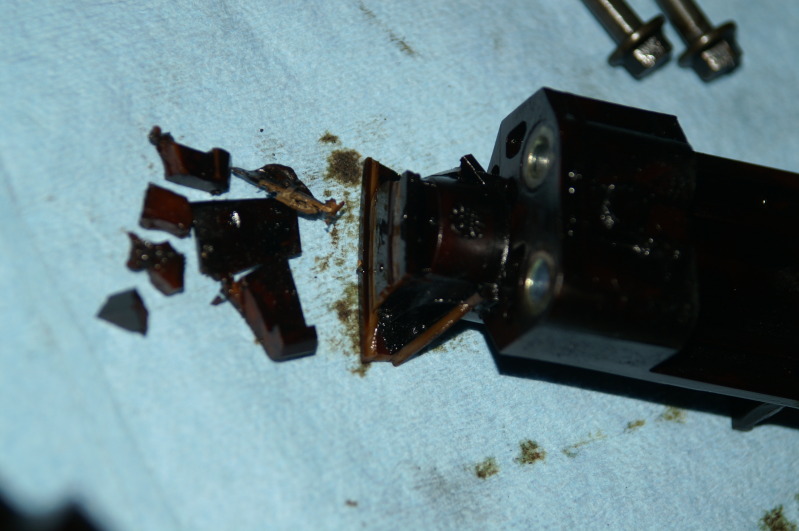
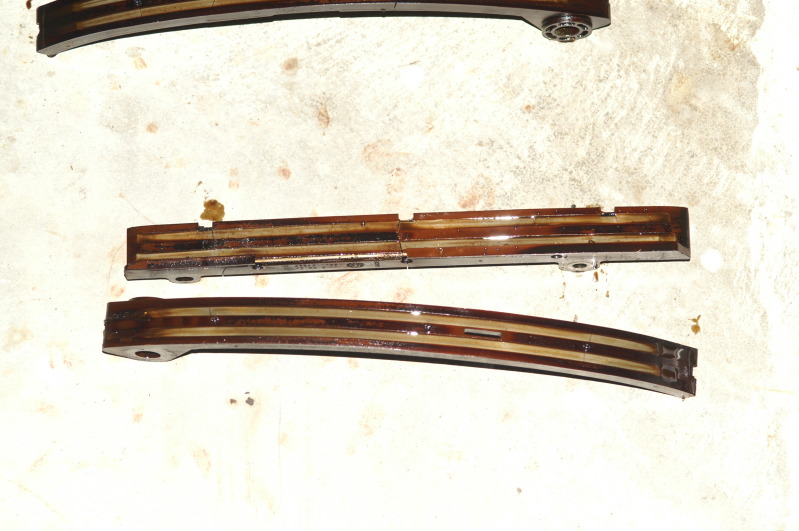
Here is another part of that broken tensioner...
The REALLY good stuff...
Pass side totally out!! But wait, there's more!!! And it gets better!!!

And another reason you change your oil... This one started to get hot, but I think I got REALLY lucky with this one!!! I doubt there was little to no oil getting through this blockage!!
And a good one next to it... Actually, this is the only one I've found so far that was blocked...

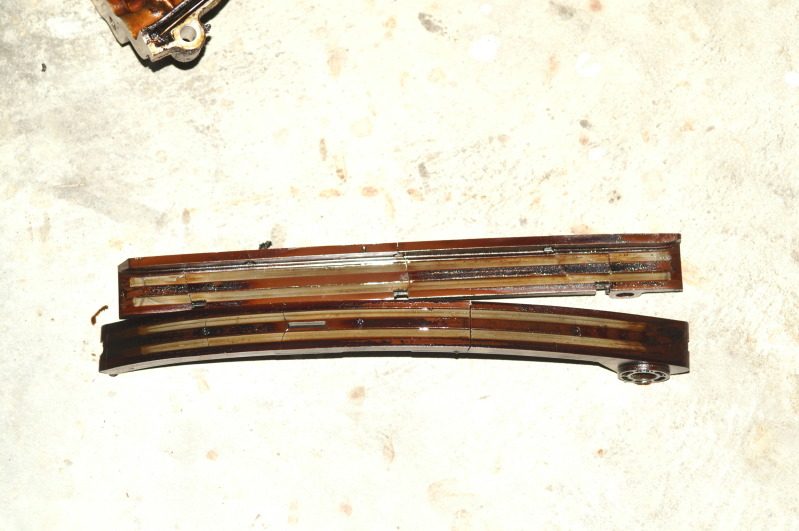
Complete tear down... A little lighter to show more detail...

And a close up of the front...

I don't think I have one rail that doesn't have some kind of crack or plastic missing... This poor motor!!


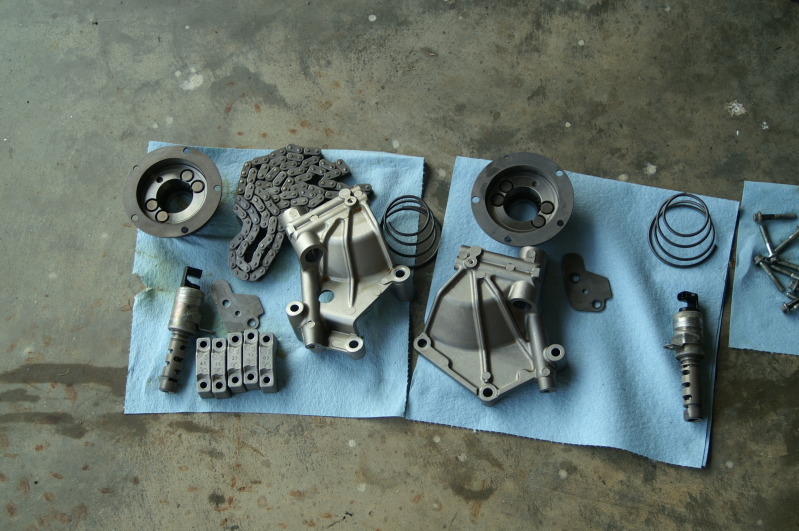
Here is the dirty drivers side, and the cleaned up pass side... I love carb cleaner in the gallon can!!! All the timing cover bolts came this clean too!!


Well, that was as far as I got tonight... More tomorrow... It would be nice to start putting it back together tomorrow... We'll see!!! I have A LOT more cleaning to do!!
Cheers everyone!!!
Well, I got the crank pulley off today... First things first though... Here is the finished (kind of) trunk... Painted, but it was way lighter than the factory blue, so I will have to redo this at some point... This will hold for now...
Here is the finished product... For some reason, it seems like the spare cover is angled toward the gas tank... Very odd!!
See how it doesn't match up?! Those are relays I don't want things running when I have the battery hooked up... Fuel pump and something else...
Here is the terrible spare in place with tools underneath...
And the tools all cleaned up!
and the poor condition spare...
OKAY!!! NOW THE FUN STUFF!!!
Here is the crank pulley and the locking device... Soooooo, the more you torque down on the puller, the tighter it gets!! GOOD TO KNOW!! I think the easiest way to pop this off is to spray some good stuff on it, and get a socket that fits around the steel insert; touching only the crank and give it a good solid whack!! I'd imagine you'd be able to pull the thing off by hand at that point...
Here is the motor before I started tearing into it... Make a note everyone!!! This is the reason you CHANGE YOUR OIL!!!
Here is another part of that broken tensioner...
The REALLY good stuff...
Pass side totally out!! But wait, there's more!!! And it gets better!!!
And another reason you change your oil... This one started to get hot, but I think I got REALLY lucky with this one!!! I doubt there was little to no oil getting through this blockage!!
And a good one next to it... Actually, this is the only one I've found so far that was blocked...
Complete tear down... A little lighter to show more detail...
And a close up of the front...
I don't think I have one rail that doesn't have some kind of crack or plastic missing... This poor motor!!
Here is the dirty drivers side, and the cleaned up pass side... I love carb cleaner in the gallon can!!! All the timing cover bolts came this clean too!!
Well, that was as far as I got tonight... More tomorrow... It would be nice to start putting it back together tomorrow... We'll see!!! I have A LOT more cleaning to do!!
Cheers everyone!!!
Last edited by bluexk8ragtop; 07-31-2012 at 09:40 PM.
#44
08-01-2012, 01:57 AM
#45
08-01-2012, 05:52 AM

Join Date: Oct 2007
Location: PHX some of the time
Posts: 117,242
Received 6,306 Likes
on
5,494 Posts
#46
08-01-2012, 07:46 AM

Senior Member
#47
08-02-2012, 05:20 PM

Just want to add my admiration - as others have said - I would have thought this little lot would have taken months! not a little over a week...
I am in the middle of recommissioning my XK8 - for a few reasons it has been laid up for a couple of years - it needs a few simple things fixing, but its threads like this that are my inspiration...
Great Job so far - keep it up!!!!
I am in the middle of recommissioning my XK8 - for a few reasons it has been laid up for a couple of years - it needs a few simple things fixing, but its threads like this that are my inspiration...
Great Job so far - keep it up!!!!
The following users liked this post:
sklimii (12-16-2012)

#49
08-02-2012, 08:42 PM

Banned
#50
08-02-2012, 09:07 PM
That is disgusting!!!!...... I have had a few horror stories myself but your engine is filthy... Kudos to you....
As to the mention of the manual box LOOK HERE, this is another thread by Jaguar Specialties and scroll to the bottom
As to the mention of the manual box LOOK HERE, this is another thread by Jaguar Specialties and scroll to the bottom
I would love to do the manual conversion, but I don't think I could justify the cost... Unfortunately!!
Thanks!!
Cheers!!
#51
08-02-2012, 09:08 PM
#52
08-02-2012, 09:10 PM
Veteran Member
Join Date: Nov 2006
Location: Glasgow, Scotland UK
Posts: 47,302
Received 9,007 Likes
on
4,113 Posts

#53
08-02-2012, 09:10 PM
Thanks!! I have to admit, I laugh every time I read your last sentence!!! I had fun today, but had to stop early for chores... Tomorrow will be interesting!!
Cheers!!
#54
08-02-2012, 09:12 PM
Just want to add my admiration - as others have said - I would have thought this little lot would have taken months! not a little over a week...
I am in the middle of recommissioning my XK8 - for a few reasons it has been laid up for a couple of years - it needs a few simple things fixing, but its threads like this that are my inspiration...
Great Job so far - keep it up!!!!
I am in the middle of recommissioning my XK8 - for a few reasons it has been laid up for a couple of years - it needs a few simple things fixing, but its threads like this that are my inspiration...
Great Job so far - keep it up!!!!
Thank you!! I have to admit, I'm transitioning from Military life to civilian life... I don't actually have a civilian job yet, so my whole day is free to tear apart the Jag... Unless chores need to be done, like this afternoon...
Cheers!!
#55
08-02-2012, 09:14 PM
Thanks!!
Cheers!!
#56
08-02-2012, 09:18 PM
I just read through this thread and can hardly believe how much you've done to this car and how fast you've done it.
I thought my car was a mess, but it's nothing compared to what you've had to fix on yours.
Can't wait to see the condition of this car by the time you are done.
I thought my car was a mess, but it's nothing compared to what you've had to fix on yours.
Can't wait to see the condition of this car by the time you are done.
I don't mind the labor to make it right... It was cheap enough, so I'm good with spending a little time on it... It is such a pretty car... Things keep failing on it though... Both seats worked when I got it, but I lost the pass seat controller last week... They want almost $100 used for those things... And there is always ONE bolt that gives me problems... Out of 40 cam cap bolts, one decided to round out on me... UGH!! Anyone have a spare cam cap bolt?!!?!
Thanks much!!!
Cheers!!
#57
08-02-2012, 09:47 PM
Good day everyone!!! Here is what we have on the menu today... I actually got tired of seeing all the parts laying around dirty... I tried to devote a little time cleaning... That got boring, so I pulled the drivers side head to see what was hiding underneath... And this is what I found.........
This was an interesting and very quick way of pulling the valve caps... This made very easy work out of pulling them, but it would not pull the shim from the caps themselves... I made a valve spring compressor specifically for this set-up, but they are in my tool box on a slow boat.... You know...

Here are some of the parts I cleaned up today... My carb cleaner is getting saturated... I will go buy a parts cleaner system tomorrow... I needed an upgrade from my old one anyway...
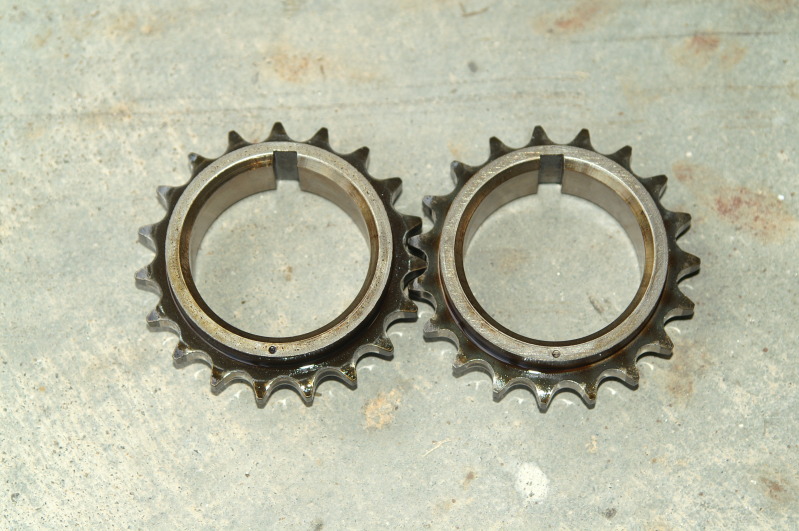
Well, I got bored watching things soak so I pulled the Drivers side head... I first wanted to see how the crank sprockets went together... I already read they are half a tooth off from each other... This is how they do that...
They are technically the same part... BUT if you flip one over, it gives you that half a tooth difference...

Put the two dots together and you have the correct set-up...

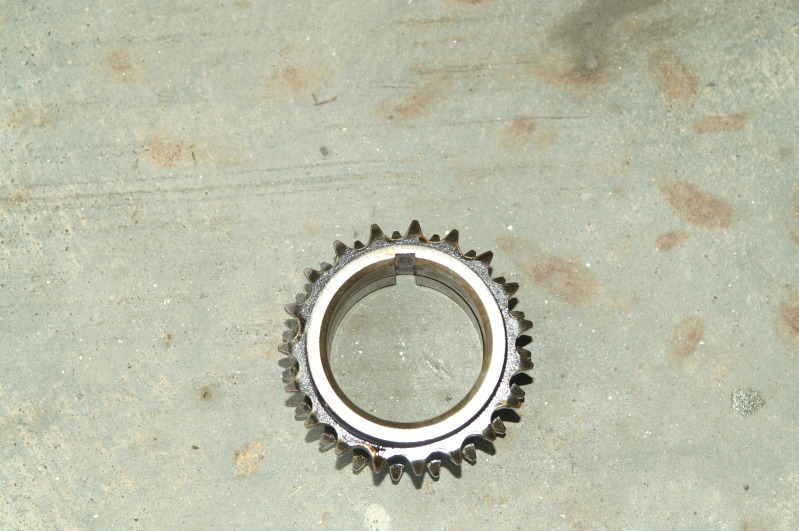
and where they go...
I don't have any pictures of me pulling the bolts... They are so long that they pop a few times as they are turned... The main pop rotated the direction of my ratchet on almost every bolt... I left the exhaust manifold attached, but that was a little heavy... Once it was free from the dowels, it was not too bad...
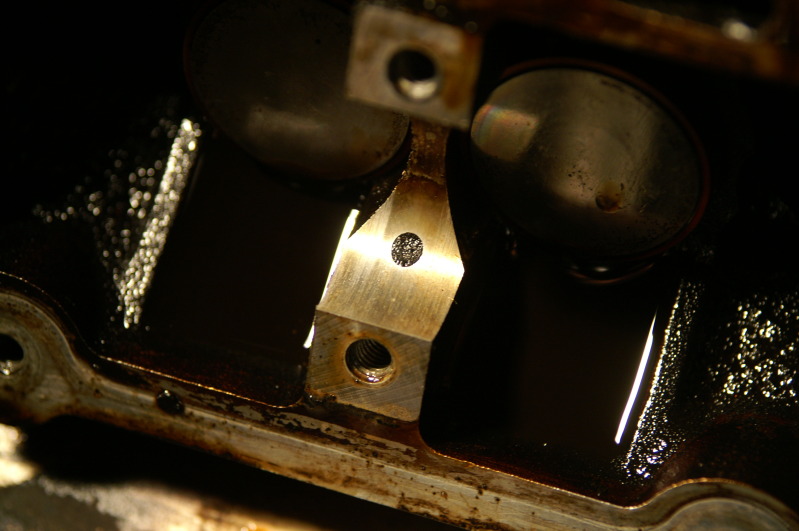
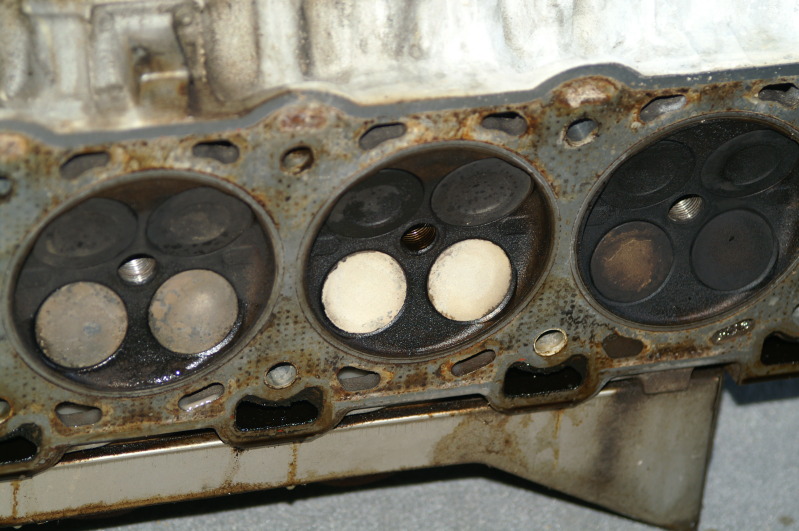
Here is the good and bad news... The gasket was good... The valve seat at the rear of the motor was dislodged... I imagine it is the same way on the pass side...


And here is the mark it made on the piston... It barely even touched it... But the cylinder was dead as a result... Same for the other bank... Essentially, I had a 6 cylinder...


And the good ones...
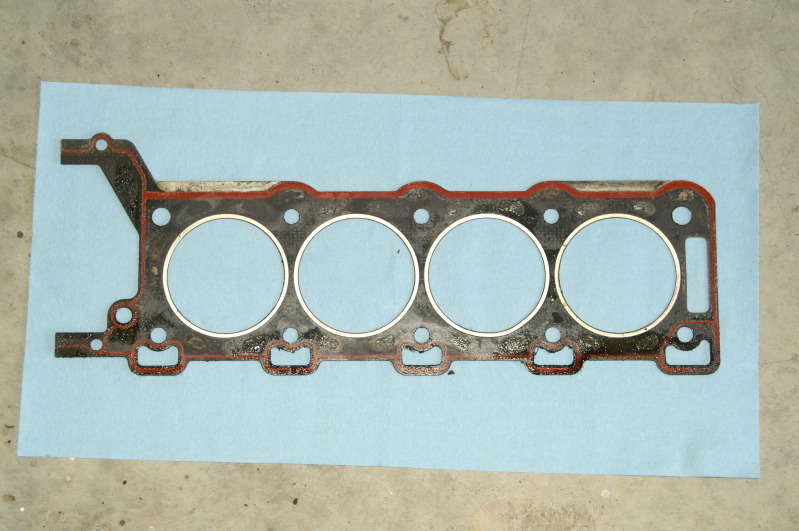
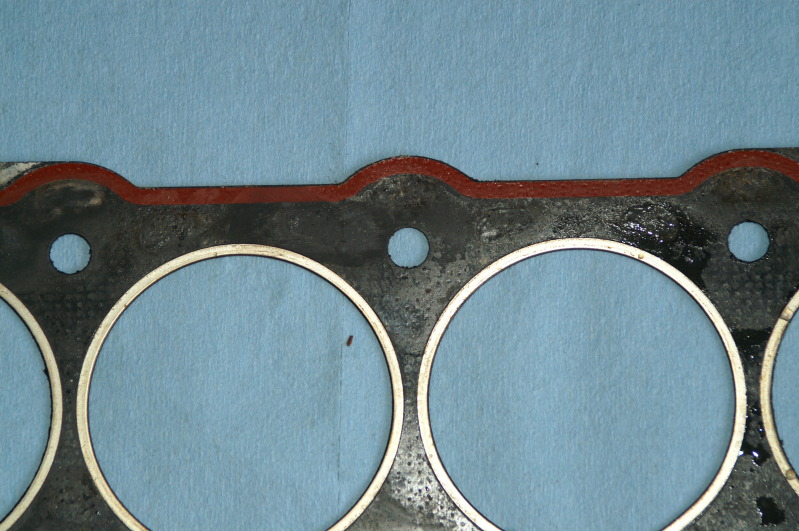
And what you have all been waiting for!!!!!!! The reason why these gaskets fail!! Wait for it!!!!!!! Wait for it!!!!
Well, maybe not... But it sounded good... ****(updated)****
Okay, that is it for today... I have to share this little tool I had to put together... I don't have my hex sockets, so I used a 10mm allen wrench... I put a 10mm 1/2 inch drive socket and two 1/2 inch drive extensions to get the cam bolts free... It worked, but I had to square off the allen wrench on the short end so it would sit flush in the bolt...


Well, that is all folks...
Have a great one everyone!!!
Cheers!!!
This was an interesting and very quick way of pulling the valve caps... This made very easy work out of pulling them, but it would not pull the shim from the caps themselves... I made a valve spring compressor specifically for this set-up, but they are in my tool box on a slow boat.... You know...
Here are some of the parts I cleaned up today... My carb cleaner is getting saturated... I will go buy a parts cleaner system tomorrow... I needed an upgrade from my old one anyway...
Well, I got bored watching things soak so I pulled the Drivers side head... I first wanted to see how the crank sprockets went together... I already read they are half a tooth off from each other... This is how they do that...
They are technically the same part... BUT if you flip one over, it gives you that half a tooth difference...
Put the two dots together and you have the correct set-up...
and where they go...
I don't have any pictures of me pulling the bolts... They are so long that they pop a few times as they are turned... The main pop rotated the direction of my ratchet on almost every bolt... I left the exhaust manifold attached, but that was a little heavy... Once it was free from the dowels, it was not too bad...
Here is the good and bad news... The gasket was good... The valve seat at the rear of the motor was dislodged... I imagine it is the same way on the pass side...
And here is the mark it made on the piston... It barely even touched it... But the cylinder was dead as a result... Same for the other bank... Essentially, I had a 6 cylinder...
And the good ones...
And what you have all been waiting for!!!!!!! The reason why these gaskets fail!! Wait for it!!!!!!! Wait for it!!!!
Well, maybe not... But it sounded good... ****(updated)****
Okay, that is it for today... I have to share this little tool I had to put together... I don't have my hex sockets, so I used a 10mm allen wrench... I put a 10mm 1/2 inch drive socket and two 1/2 inch drive extensions to get the cam bolts free... It worked, but I had to square off the allen wrench on the short end so it would sit flush in the bolt...
Well, that is all folks...
Have a great one everyone!!!
Cheers!!!
Last edited by bluexk8ragtop; 08-02-2012 at 10:19 PM.
#58
08-02-2012, 10:05 PM
Well everyone, I can't find the picture of the head gasket that I found earlier this week that showed coolant passages... All the pictures I have of the Fel-pro set don't have the coolant passages... I'm pretty sure I saw a head gasket that had the passages... It almost seems pointless not to have them if both the head and block match up... RIGHT?! There is the large rectangular one at the back of the head, but not the smaller ones above and below the cylinders... Maybe that is apart of the design and there is a method to their maddness...
Cheers!!!
Cheers!!!
Last edited by bluexk8ragtop; 08-02-2012 at 10:15 PM.
#59
08-03-2012, 02:41 AM
#60
08-03-2012, 04:00 AM
Veteran Member
Ehum, you mean increase the compression ratio of course, and my best guess for a SC would be about 0.3 points and for a NA about 0.45 if you go for the 4.2 gaskets, but please note these are best guesses.
But I fully agree that the thinner MLS gaskets from the 4.2 engine must be MUCH better, as the head gasket failure rate is extremely low compared to the 4.0 cars with these thicker composite ones.
But I fully agree that the thinner MLS gaskets from the 4.2 engine must be MUCH better, as the head gasket failure rate is extremely low compared to the 4.0 cars with these thicker composite ones.
The following users liked this post:
popeye68 (07-27-2013)