My project...
#81
 08-09-2012, 06:11 AM


Are the head bolts in these motors the torque to yield type?
I know that the modular Fords are that way and I think the rule for those is that you can reuse the bolts one time only, although it would be best to replace them after being tightened once since the yield part is actually stretching the bolt.
I know that the modular Fords are that way and I think the rule for those is that you can reuse the bolts one time only, although it would be best to replace them after being tightened once since the yield part is actually stretching the bolt.
Off to the parts store... And Ford dealership... Head gasket comparison today...
Cheers!!
#82
08-09-2012, 09:59 PM
Good day everyone!!
I got a lot done, but didn't make it to the Ford dealership to get the 3.9L head gasket for comparison of the other two... The brake line on my X5 rusted through and it took me about an hour to stop the bleeding... The lines just wouldn't crimp closed... So, I cleaned!!
Lets see... Where do I start? I had to send pictures to the dealership to get the part number for the scarf cut seals for the VVT unit... They offer the front carrier seals, but not the internal seal to the VVT... So, I have to reuse those seals but ordered the others...
There is a method to getting these together... And it does NOT involve a hammer... I'll spell it out if someone wants me to... Oh, did I mention you don't use a hammer to get these to mesh together?! Ahem...
I did a display of how this works for those that haven't taken this apart... But I did it without the chain sprocket...

Here are the new 4.2L gaskets... I will open them when I do the comparison with the 3.9L Ford and 4.0L Jag gaskets...
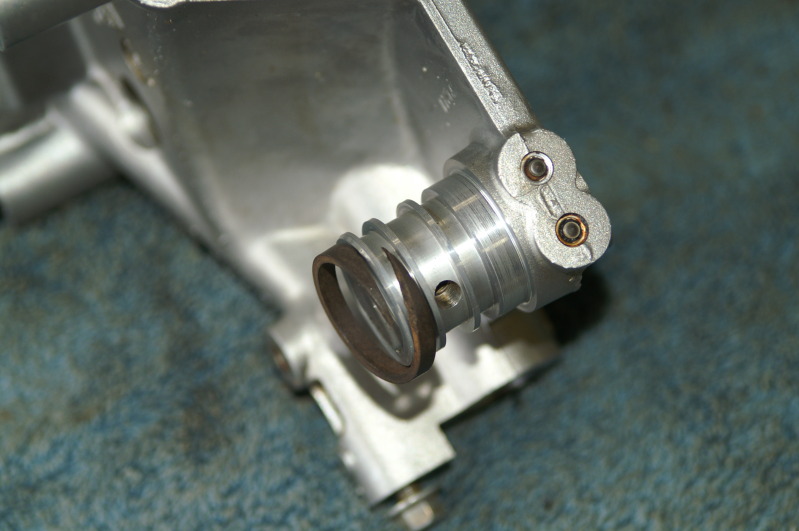
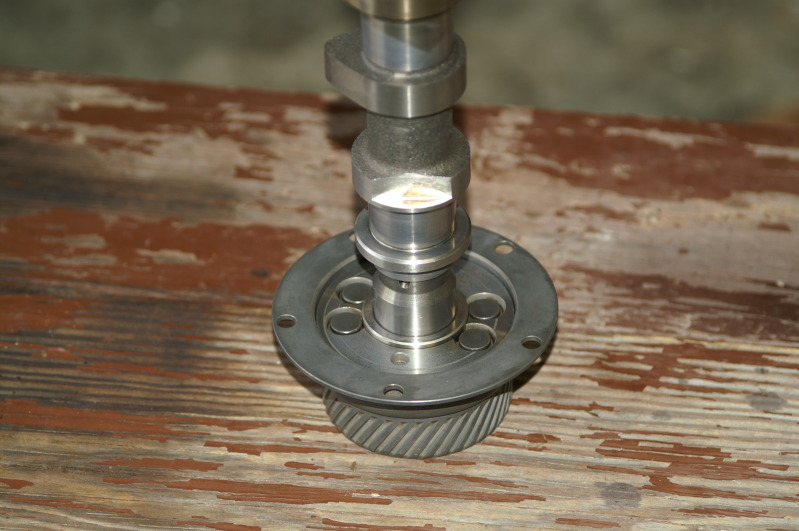
Okay, here is the VVT without the sprocket... Notice the flat spot and cam lobes... Those should be pretty much in the same location, but the VVT unit will be rotated...

Here is the same thing from another angle...

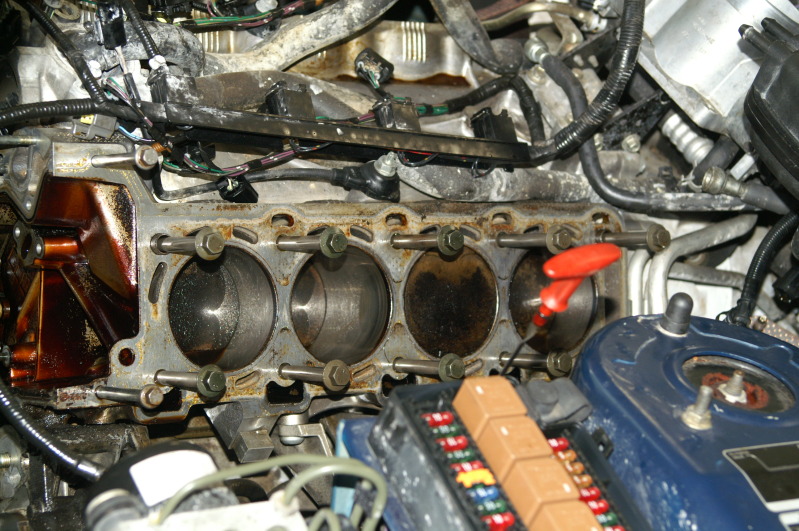
Here I am chasing threads and purging the water out of the bolt holes... Make a note of the mark on #4 piston...
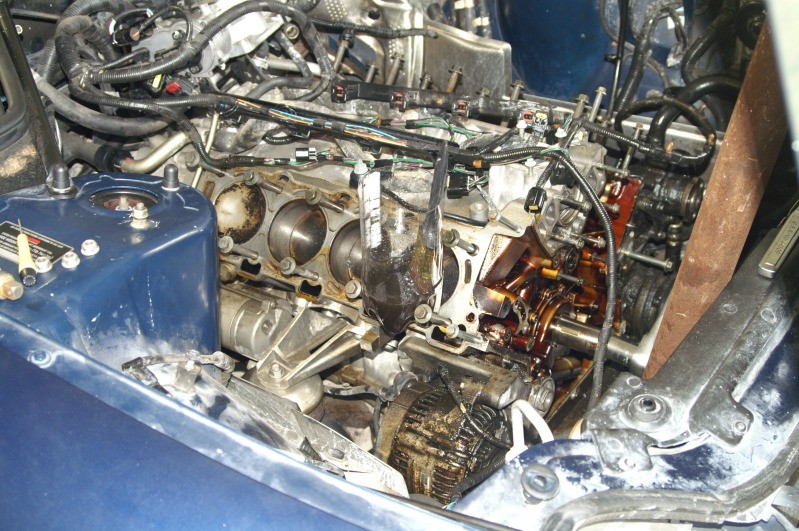
This is how dirty the rest of the motor is... I made a mess cleaning this stuff, but it got cleaned up right away...

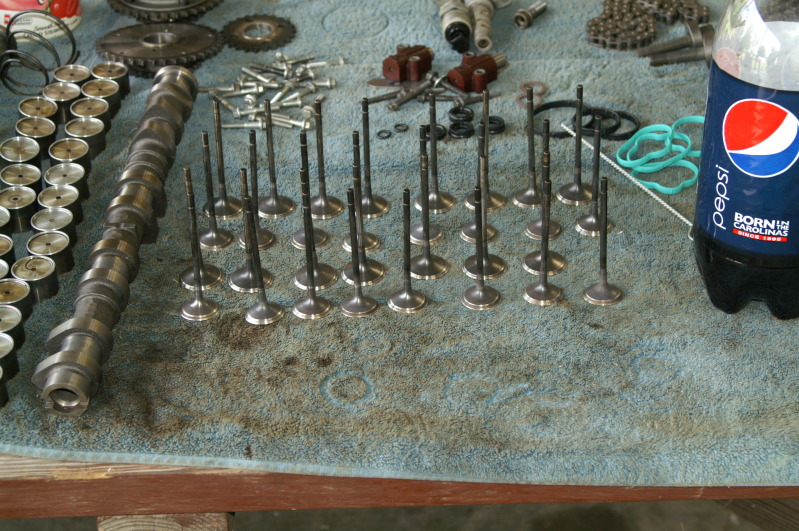
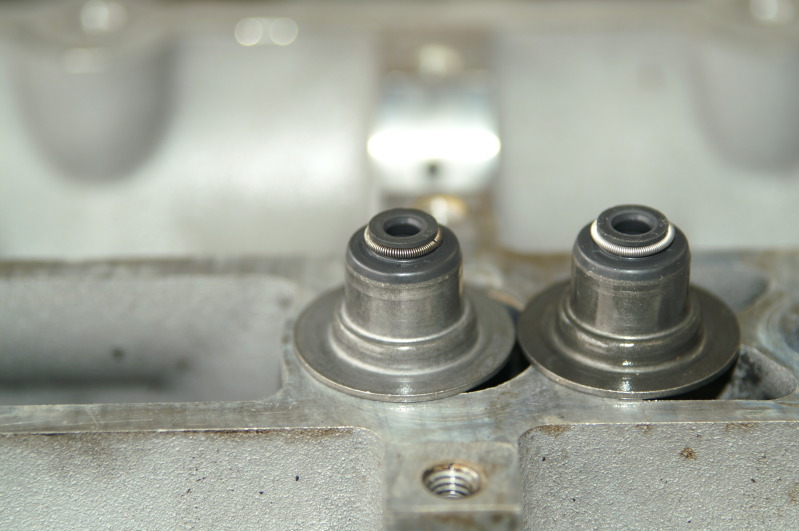
Here are all the valves cleaned up... This doesn't take long when you have a drill and some sandpaper or emery cloth... I found it actually went quicker to run the valve in the cleaner solution on the emery cloth, much quicker...
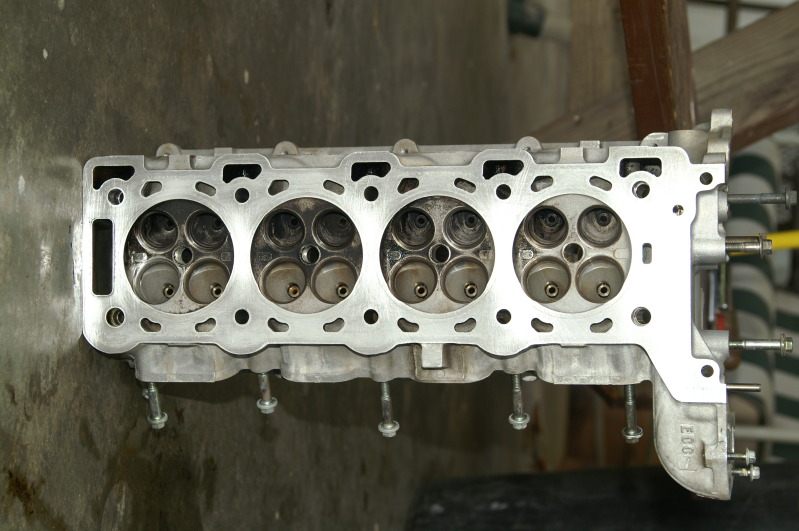
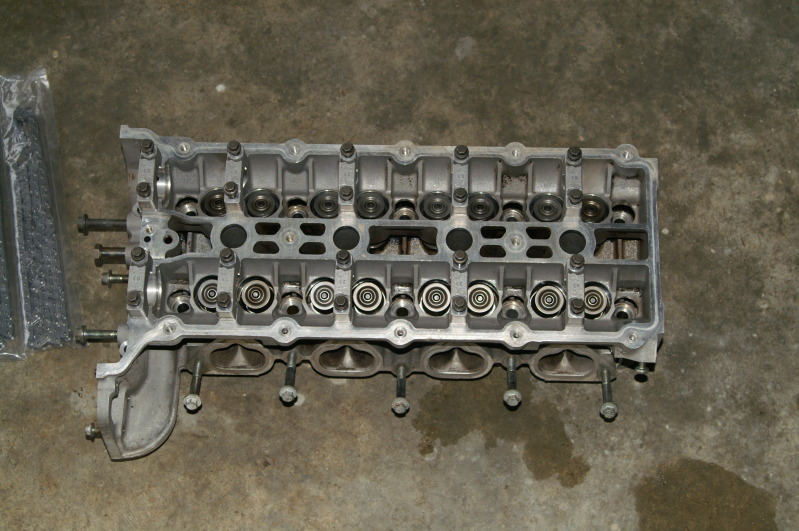
The head near completion... I ordered the Rotunda valve spring compressor... it is a rather basic simple tool... only cost me just over $13 with shipping... I'm kind of on hold until I get it too...
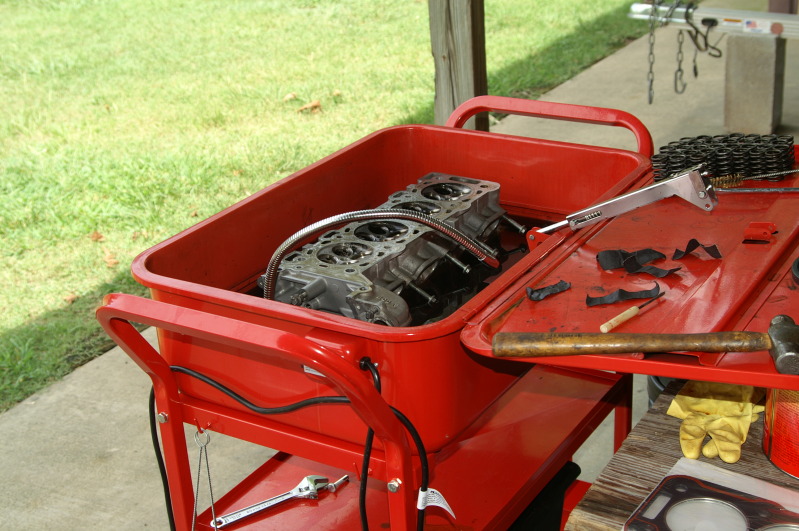
New parts washer... It works great!!
This isn't to keep me cool because I really don't mind sweating when I work... Anyone guess what this is really for?!

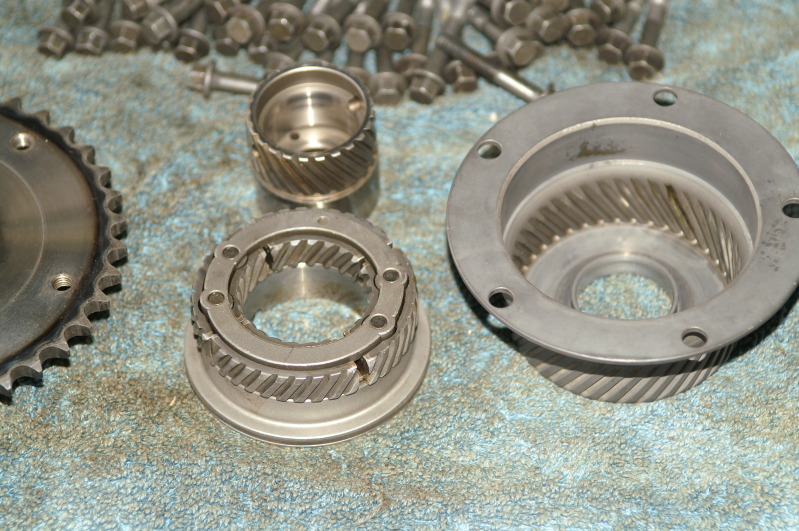
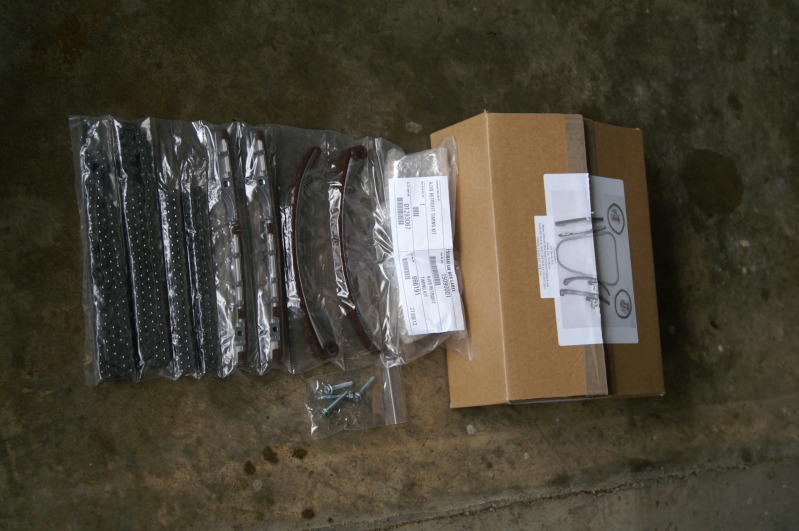
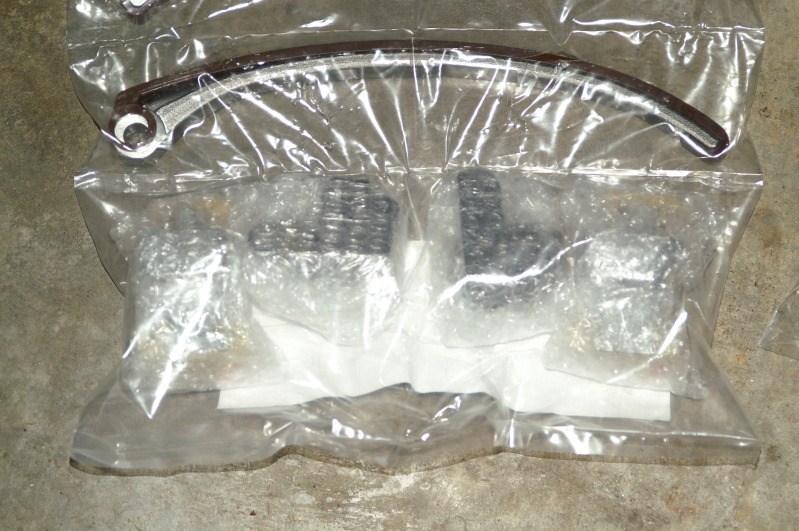
The new chains and tensioners!! All neatly packaged...
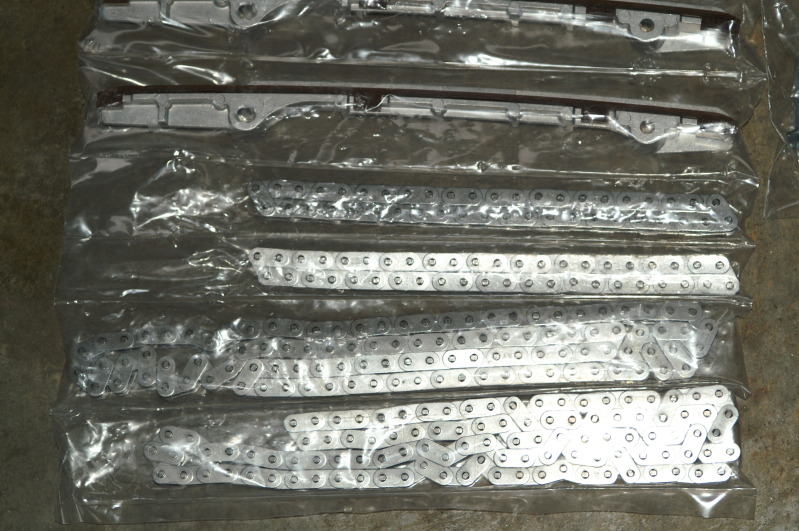

These are hard to see, but they are the new tensioners...
Here is the head ready for the valve spring compressor...
Anyone notice something odd about this seal?! This is strike two against Parts Geek!!! I am soaking two old seals in the hopes I can use the spring from one of them for this!!!

All clean... about an hour or so to get it like this... I think I am overdoing it... But!!! Make a note of this knock sensor in this picture... I noticed just before closing up shop that it had melted... I think it will probably be a safe bet to get two new knock sensors and I have to get two new cam position sensors due to the mounting tab crumbling to dust... I didn't notice how bright these were until I got them loaded on the computer... That mark on the number 4 and number 8 pistons is from the valve seat issue (harder to see in these pictures)... #8 doesn't bother me too much, but #4 has me worried about lasting forever... I don't know how much abuse these pistons can take... I have my fingers crossed with this one!!

Notice how clean the alt is now...
And this is what we got right before I cleaned up for dinner... One of the great things about summer!!! Thunderstorms!!! And we need the rain!!

Well, that is it for now... I did get my used parts in today also... I just opened the box... My shifter, power steering pump and pulley, gas cap, coil cover, fuel hose, and engine cover (wrong one, but the rest is good) all got here... If I run out of things to do to the motor, I can at least finish up the interior!!! WHOOOO HOOO!!!
Cheers everyone!!!
I got a lot done, but didn't make it to the Ford dealership to get the 3.9L head gasket for comparison of the other two... The brake line on my X5 rusted through and it took me about an hour to stop the bleeding... The lines just wouldn't crimp closed... So, I cleaned!!
Lets see... Where do I start? I had to send pictures to the dealership to get the part number for the scarf cut seals for the VVT unit... They offer the front carrier seals, but not the internal seal to the VVT... So, I have to reuse those seals but ordered the others...
There is a method to getting these together... And it does NOT involve a hammer... I'll spell it out if someone wants me to... Oh, did I mention you don't use a hammer to get these to mesh together?! Ahem...
I did a display of how this works for those that haven't taken this apart... But I did it without the chain sprocket...
Here are the new 4.2L gaskets... I will open them when I do the comparison with the 3.9L Ford and 4.0L Jag gaskets...
Okay, here is the VVT without the sprocket... Notice the flat spot and cam lobes... Those should be pretty much in the same location, but the VVT unit will be rotated...
Here is the same thing from another angle...
Here I am chasing threads and purging the water out of the bolt holes... Make a note of the mark on #4 piston...
This is how dirty the rest of the motor is... I made a mess cleaning this stuff, but it got cleaned up right away...
Here are all the valves cleaned up... This doesn't take long when you have a drill and some sandpaper or emery cloth... I found it actually went quicker to run the valve in the cleaner solution on the emery cloth, much quicker...
The head near completion... I ordered the Rotunda valve spring compressor... it is a rather basic simple tool... only cost me just over $13 with shipping... I'm kind of on hold until I get it too...
New parts washer... It works great!!
This isn't to keep me cool because I really don't mind sweating when I work... Anyone guess what this is really for?!
The new chains and tensioners!! All neatly packaged...
These are hard to see, but they are the new tensioners...
Here is the head ready for the valve spring compressor...
Anyone notice something odd about this seal?! This is strike two against Parts Geek!!! I am soaking two old seals in the hopes I can use the spring from one of them for this!!!
All clean... about an hour or so to get it like this... I think I am overdoing it... But!!! Make a note of this knock sensor in this picture... I noticed just before closing up shop that it had melted... I think it will probably be a safe bet to get two new knock sensors and I have to get two new cam position sensors due to the mounting tab crumbling to dust... I didn't notice how bright these were until I got them loaded on the computer... That mark on the number 4 and number 8 pistons is from the valve seat issue (harder to see in these pictures)... #8 doesn't bother me too much, but #4 has me worried about lasting forever... I don't know how much abuse these pistons can take... I have my fingers crossed with this one!!
Notice how clean the alt is now...
And this is what we got right before I cleaned up for dinner... One of the great things about summer!!! Thunderstorms!!! And we need the rain!!
Well, that is it for now... I did get my used parts in today also... I just opened the box... My shifter, power steering pump and pulley, gas cap, coil cover, fuel hose, and engine cover (wrong one, but the rest is good) all got here... If I run out of things to do to the motor, I can at least finish up the interior!!! WHOOOO HOOO!!!
Cheers everyone!!!
Last edited by bluexk8ragtop; 08-09-2012 at 10:21 PM.
#83
08-10-2012, 05:13 AM
Veteran Member
Join Date: Nov 2006
Location: Glasgow, Scotland UK
Posts: 47,302
Received 9,010 Likes
on
4,113 Posts

#85
08-10-2012, 07:58 PM
Cheers!!!
Last edited by bluexk8ragtop; 08-10-2012 at 08:53 PM. Reason: spelling, or lack thereof...
#86
08-10-2012, 08:32 PM
Good day everyone!!!
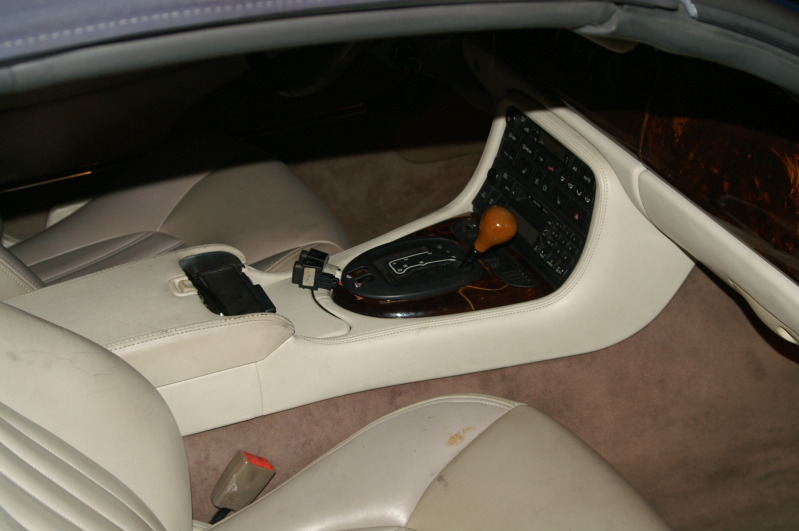
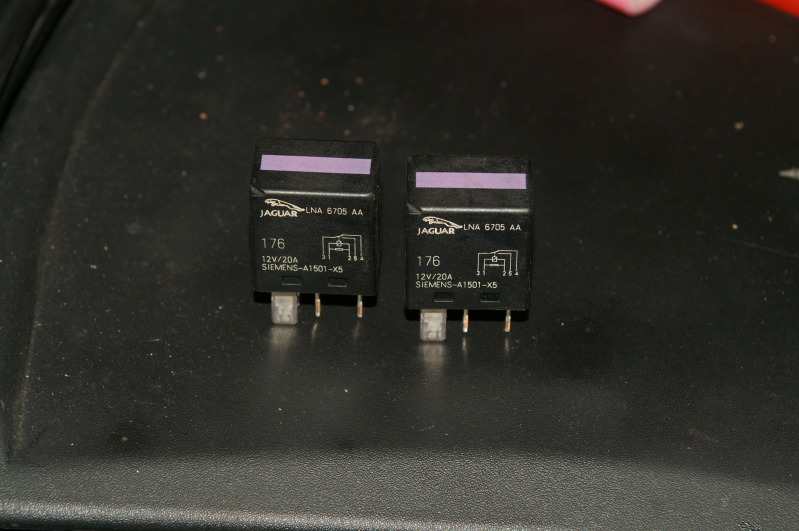
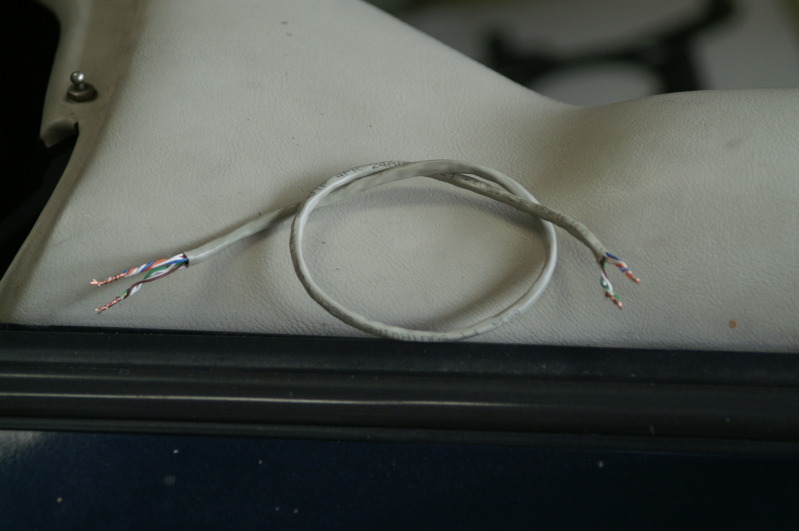
It was a productive day, but I didn't get to assemble the motor yet... I think the good news is my gearbox fault message went away after I hooked up the new (to me) shifter assy... I even get this little alarm when I pull it out of park without the motor running, or turn the key off with it in something other than park... I installed my new (to me) power steering pump... The center console is in... I got two of the four relays I need for my back side windows... Okay, here are the 44 pictures I took today... Well, a majority of them...
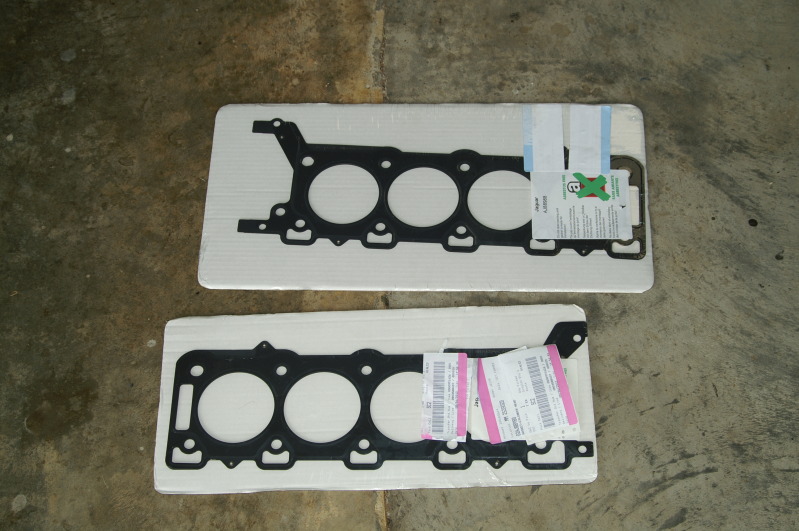
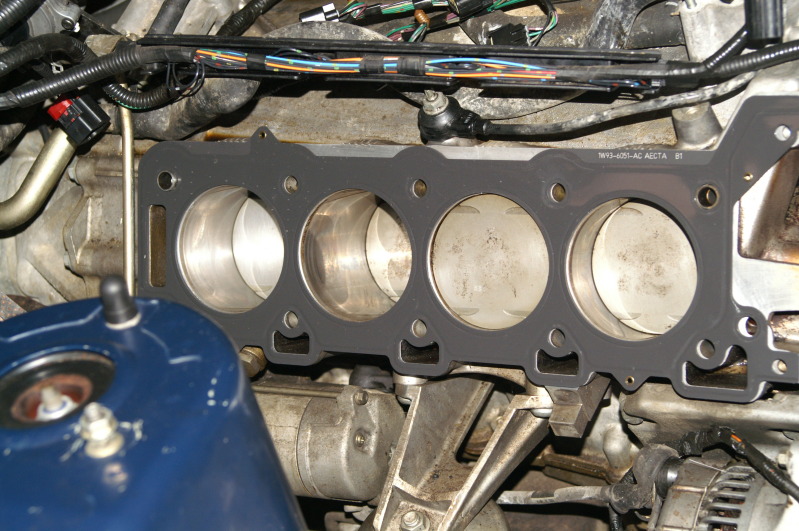
Do I save the comparison for last or get it out of the way first?! Hmm... Okay, first... Here is the 3.9L Ford gasket for the 2003 T-bird and Lincoln LS... IT WON'T WORK!!! Don't waste your money on this idea!!! This is the 4.2L and 3.9L together...


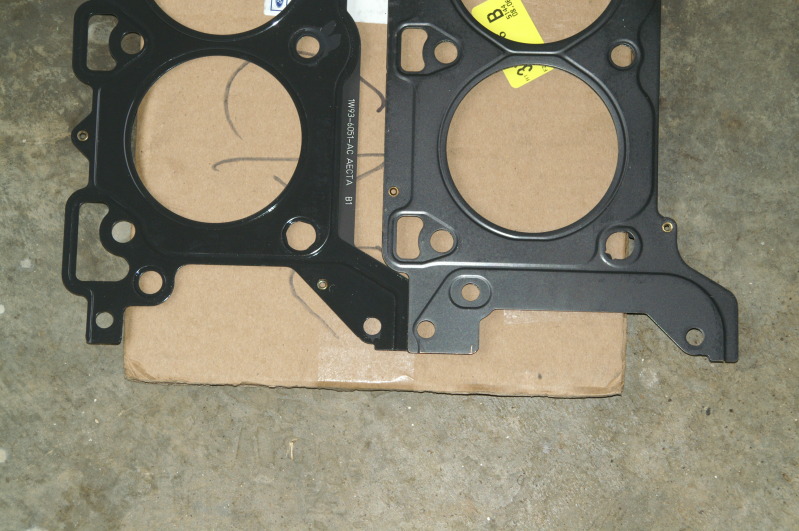
And the 3.9L on the block... Notice the coolant passages and the bigger front oil return that DO NOT match up...
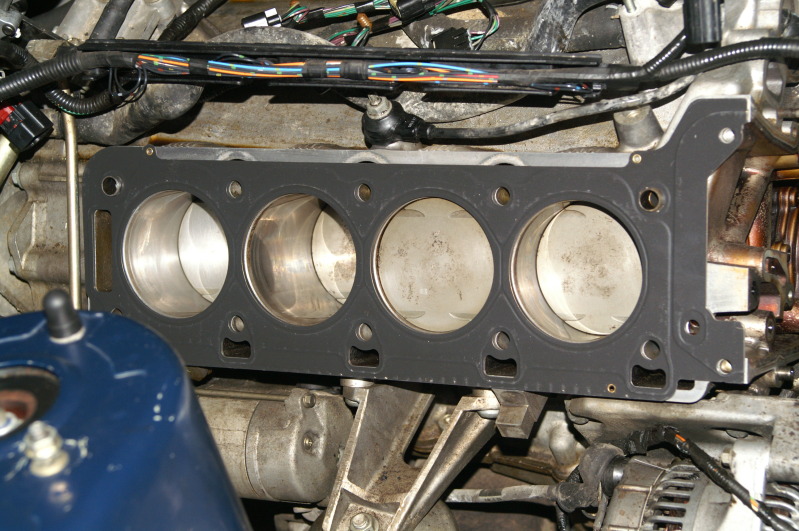
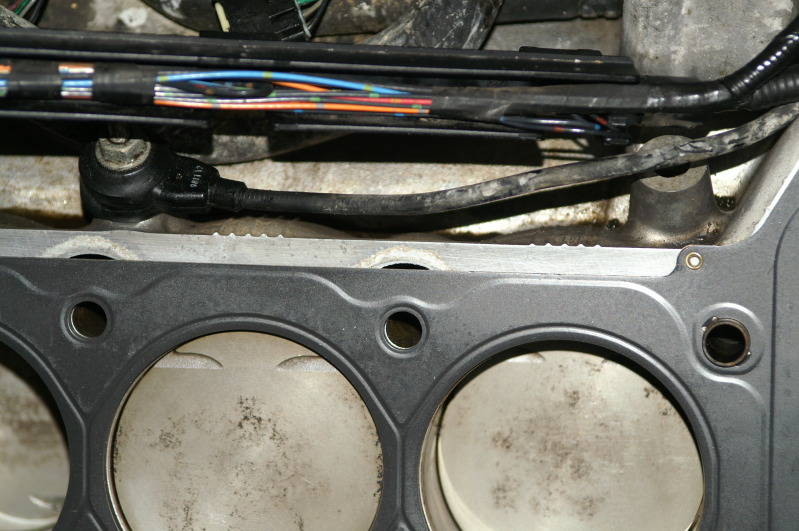
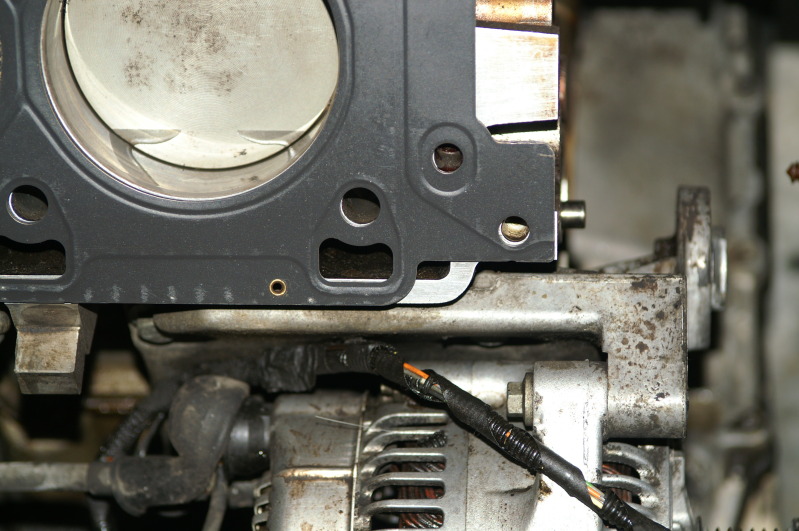
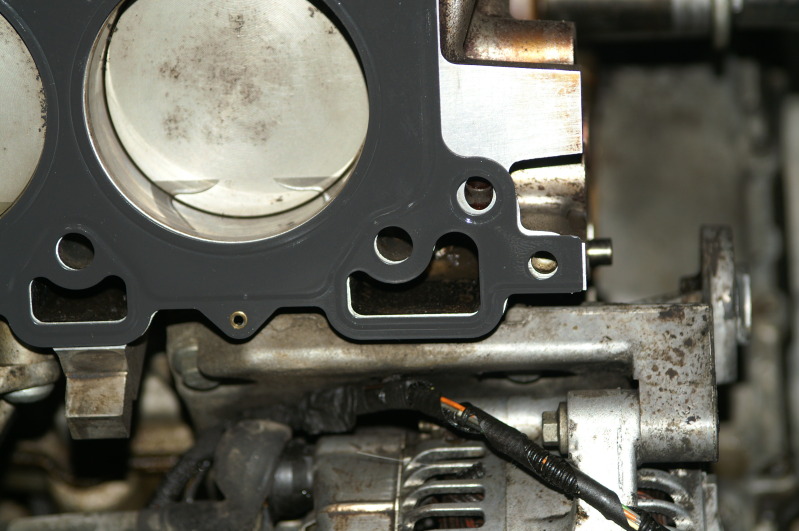
And the one I'm going to use... The perfect fit 4.2L...
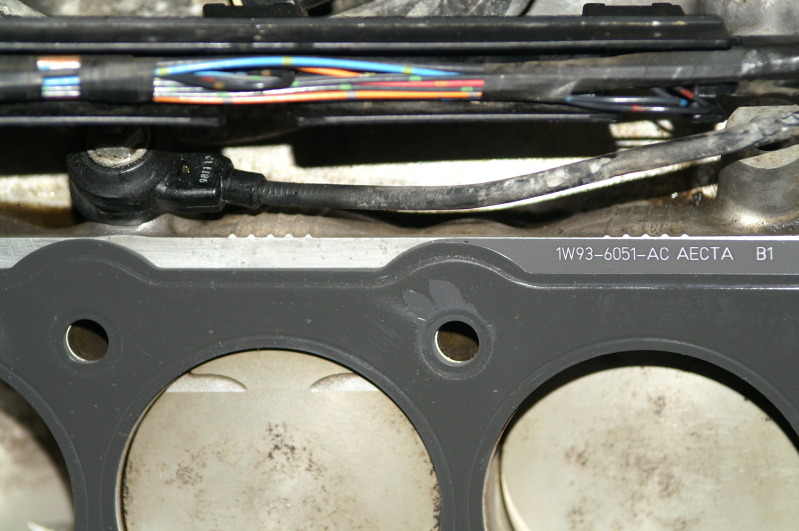
And the stock, thick 4.0L version... I left it in the wrapper, just in the slightest off chance Parts Geek think outside the box for once!!! I'm not holding my breath!!!
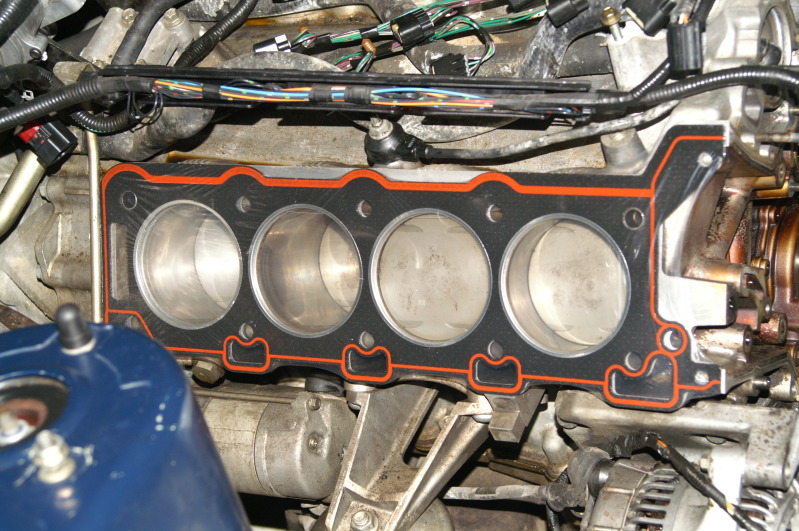
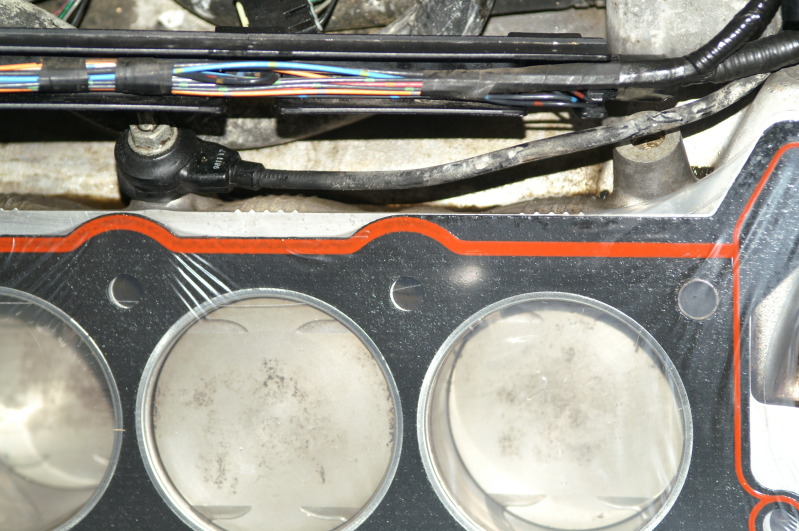
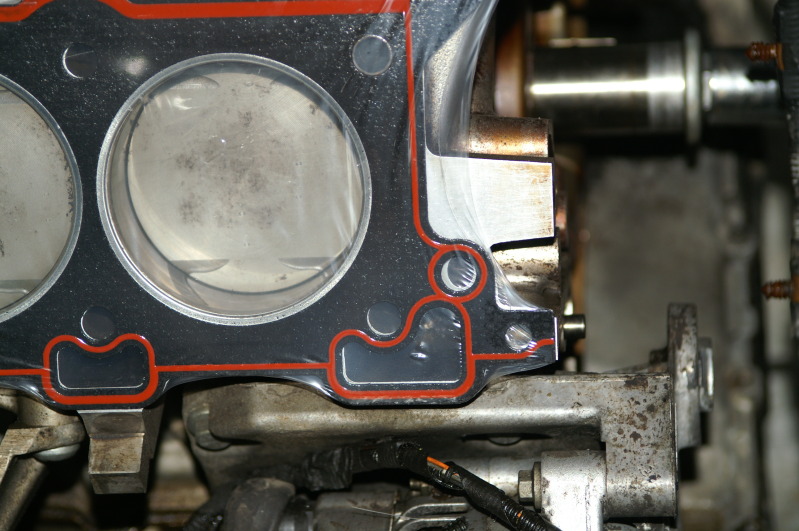
So, obviously the 3.9L won't work... The Ford and Lincoln versions have different blocks and heads... The 4.2L is a perfect fit as is the stock 4.0L, but thinner is better and proven to be more reliable...
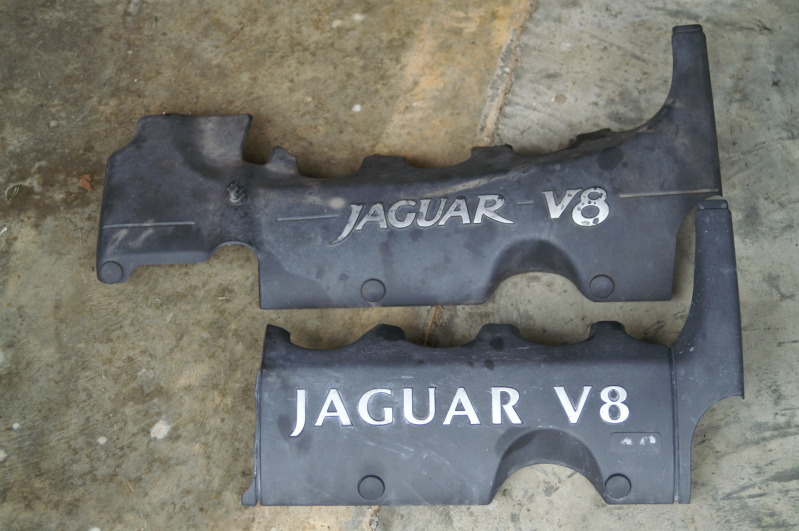
Now, on to the rest of the day!!! New engine cover that doesn't match my broken one... Rats!! Gotta keep looking... Anyone need this?!
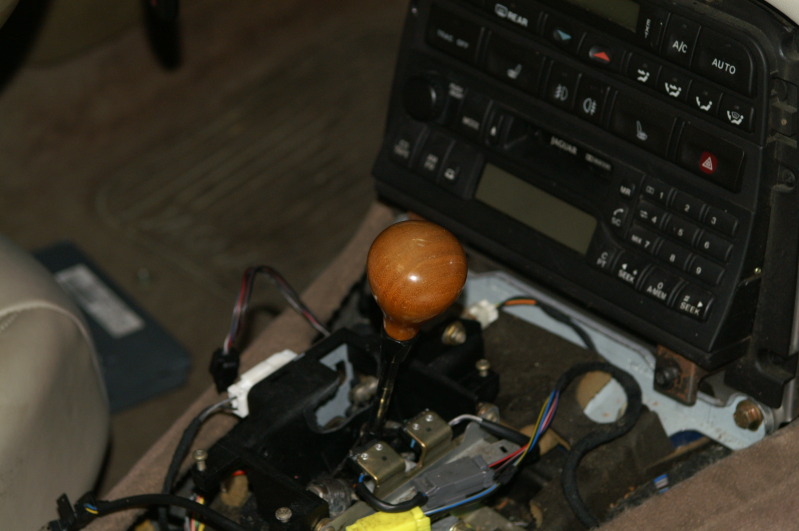
New shifter assy... Knob wasn't as good as my original, so they got swapped...

Oh, you have to make sure the assy is in the correct location before you tighten all the mounting bolts down... I figure you have four that are all finger tight so you can move the shifter about... Once everything is put back on except the Sport and cruise switch holder, tighten the one that you can see straight down, and you're good... If you are really CDO (like OCD, but in alphabetical order as it should be!!), you can pull everything back off to tighten the other three bolts... My CDO got to me...

Two of the four relays I need to power the rear windows... I think I will add a toggle to do these manually for a while...
And my temp rear side window switch... It is sitting where the window would be if it was up...
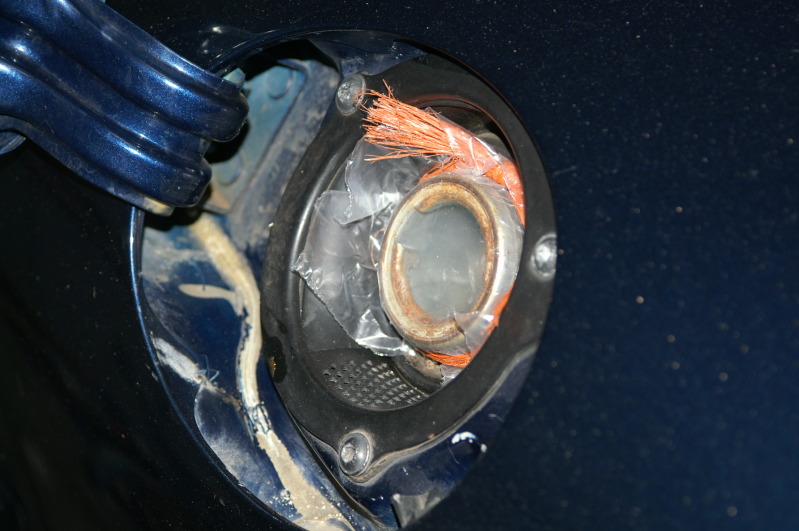
New gas cap to replace my old one... I still need that latch, and some super glue remover to get rid of that ugliness!!!!
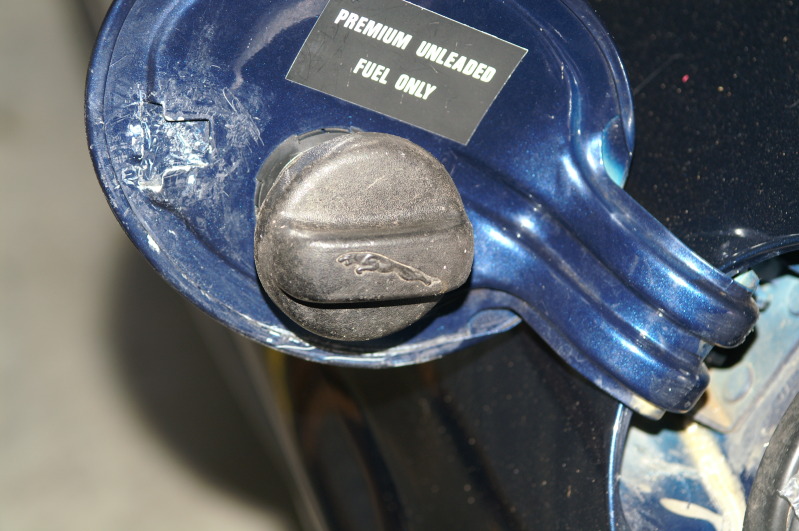
And the "old one".........
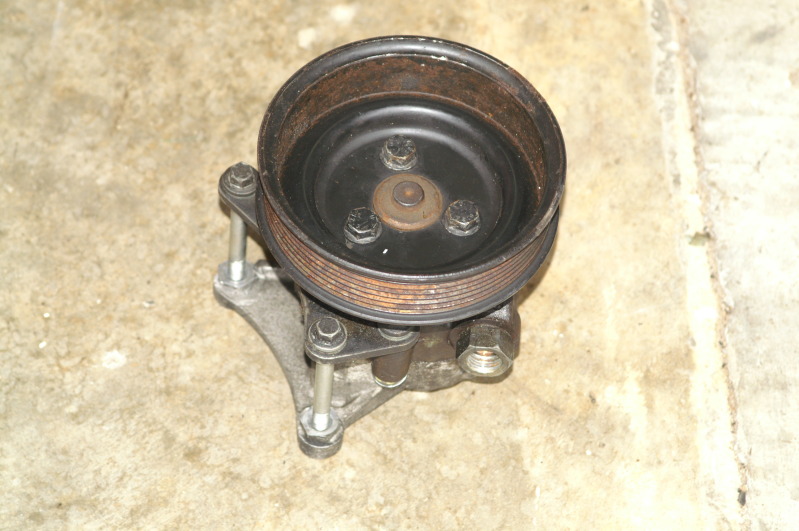
New PS pump with mounting hardware... I used my old hardware as it was in better shape...
My son cleaning the valve covers... The last little bit of cleaning... FINALLY!!!

The new shifter assy had different adjustments on the main cable... But it works... I hope!!!

There are notches for the one washer...

The mess under my original shifter assy... I still have no idea what those little T5 screws are for... They were in my old shifter and one in this new shifter...

Some things are there for a reason... Interesting how they thought of us when this pump was designed... Or maybe it was an accident in our favor...
My fix for another Parts Geek mess up... I used an old seal spring for the new seal... Looks pretty much identical, just a little dirty by comparison... Both seals are new, just the spring is old...
I found this just "hanging out"... UGH!!!!
Guessing it goes here... So, that's where I put it...

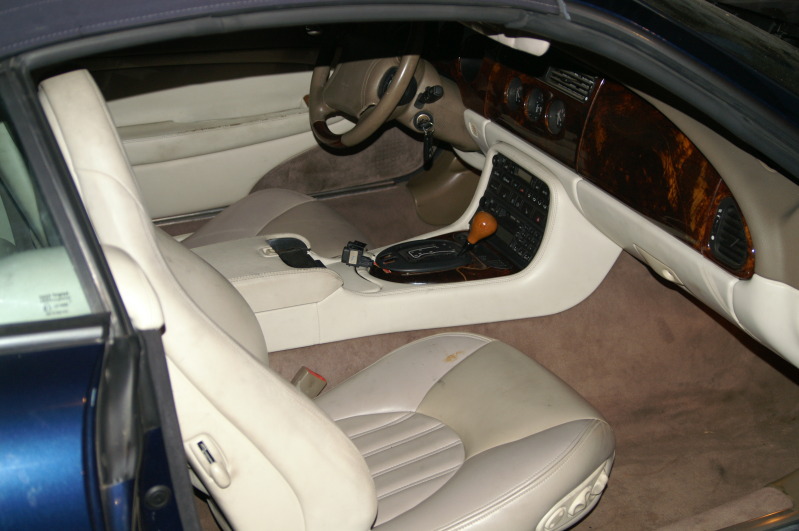
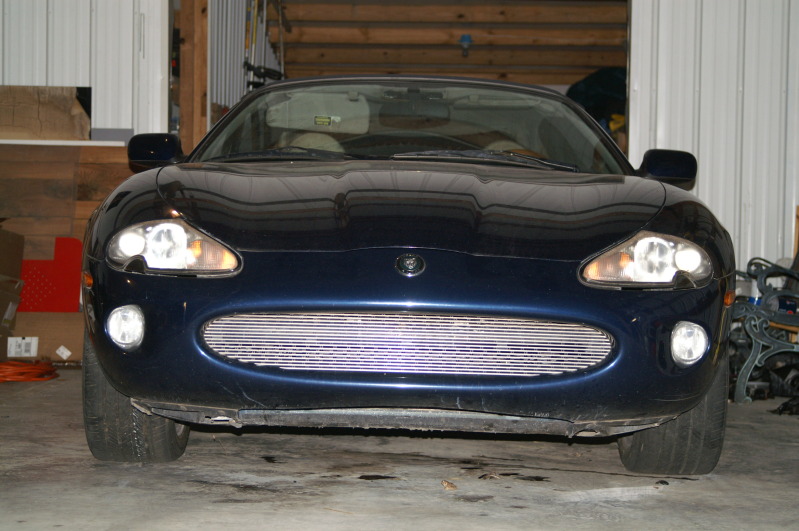
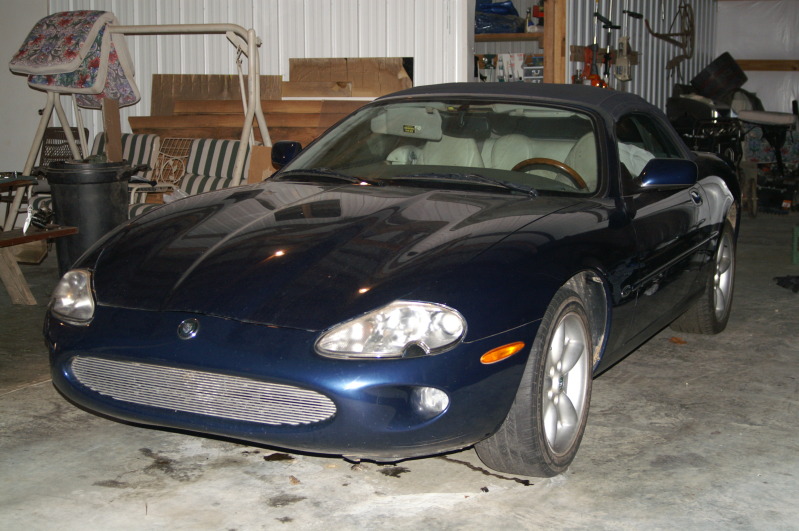
I buttoned everything up this evening to wash it, but I didn't want to wrestle with getting it back up in the spot it's in now... So, the bath will have to wait... Still a gorgeous car!!! I want the other front grille... Anyone wanna trade?! FYI, I still have an 01 tail light up for grabs... And now a 97 DS engine cover... Almost done!!!

That's all for tonight... I tried to get this on before midnight... Did a little better tonight...
Cheers everyone!!!
It was a productive day, but I didn't get to assemble the motor yet... I think the good news is my gearbox fault message went away after I hooked up the new (to me) shifter assy... I even get this little alarm when I pull it out of park without the motor running, or turn the key off with it in something other than park... I installed my new (to me) power steering pump... The center console is in... I got two of the four relays I need for my back side windows... Okay, here are the 44 pictures I took today... Well, a majority of them...
Do I save the comparison for last or get it out of the way first?! Hmm... Okay, first... Here is the 3.9L Ford gasket for the 2003 T-bird and Lincoln LS... IT WON'T WORK!!! Don't waste your money on this idea!!! This is the 4.2L and 3.9L together...
And the 3.9L on the block... Notice the coolant passages and the bigger front oil return that DO NOT match up...
And the one I'm going to use... The perfect fit 4.2L...
And the stock, thick 4.0L version... I left it in the wrapper, just in the slightest off chance Parts Geek think outside the box for once!!! I'm not holding my breath!!!
So, obviously the 3.9L won't work... The Ford and Lincoln versions have different blocks and heads... The 4.2L is a perfect fit as is the stock 4.0L, but thinner is better and proven to be more reliable...
Now, on to the rest of the day!!! New engine cover that doesn't match my broken one... Rats!! Gotta keep looking... Anyone need this?!
New shifter assy... Knob wasn't as good as my original, so they got swapped...
Oh, you have to make sure the assy is in the correct location before you tighten all the mounting bolts down... I figure you have four that are all finger tight so you can move the shifter about... Once everything is put back on except the Sport and cruise switch holder, tighten the one that you can see straight down, and you're good... If you are really CDO (like OCD, but in alphabetical order as it should be!!), you can pull everything back off to tighten the other three bolts... My CDO got to me...
Two of the four relays I need to power the rear windows... I think I will add a toggle to do these manually for a while...
And my temp rear side window switch... It is sitting where the window would be if it was up...
New gas cap to replace my old one... I still need that latch, and some super glue remover to get rid of that ugliness!!!!
And the "old one".........
New PS pump with mounting hardware... I used my old hardware as it was in better shape...
My son cleaning the valve covers... The last little bit of cleaning... FINALLY!!!
The new shifter assy had different adjustments on the main cable... But it works... I hope!!!
There are notches for the one washer...
The mess under my original shifter assy... I still have no idea what those little T5 screws are for... They were in my old shifter and one in this new shifter...
Some things are there for a reason... Interesting how they thought of us when this pump was designed... Or maybe it was an accident in our favor...
My fix for another Parts Geek mess up... I used an old seal spring for the new seal... Looks pretty much identical, just a little dirty by comparison... Both seals are new, just the spring is old...
I found this just "hanging out"... UGH!!!!
Guessing it goes here... So, that's where I put it...
I buttoned everything up this evening to wash it, but I didn't want to wrestle with getting it back up in the spot it's in now... So, the bath will have to wait... Still a gorgeous car!!! I want the other front grille... Anyone wanna trade?! FYI, I still have an 01 tail light up for grabs... And now a 97 DS engine cover... Almost done!!!
That's all for tonight... I tried to get this on before midnight... Did a little better tonight...
Cheers everyone!!!
Last edited by bluexk8ragtop; 08-10-2012 at 08:44 PM.
#87
08-10-2012, 08:41 PM
Veteran Member
#88
08-10-2012, 10:42 PM

Banned
I've searched for that Gunk in the gallon can with the dipper, seems readily available in the U.S. but can't find it anywhere in the UK for sale.
Same goes for other things like left hand drill bit kits.
I asked about the cleaner because those parts look new now, a total transformation, and i spent about 8 hours cleaning my throttle body the hard way, with emery paper and a polish similar to Solvol Autosol.
It's just not fair
Actually, the pics showing the 3.9L gasket exposes a few flaws, but still amazing results.
And i'm gobsmacked by the speed with which you've torn that car apart and put it back together.
Wicked
Last edited by Roadhogg; 08-10-2012 at 10:48 PM.
#89
08-11-2012, 06:16 AM

#90
08-11-2012, 07:14 AM
Veteran Member
Join Date: Nov 2006
Location: Glasgow, Scotland UK
Posts: 47,302
Received 9,010 Likes
on
4,113 Posts

A big +1 on comments by WhiteXkr Roadhogg and tarhealcracker from me.
Its the one thread I look for when scrolling through the forum to see where we're at today, look at every single picture and read every comment.
Once its running sweet as a nut, I'm wondering what else bkue might have in store for us..............a bodywork thread or a paint thread perhaps?
Kudos to you blue and thanks for sharing
#91
08-11-2012, 10:00 AM
#92
08-11-2012, 10:57 AM

Veteran Member
I did a full engine restoration on an XK150S which included the main block, head, carbs (3), transmission and overdrive in my younger days. The engine was a lot like yours as it was badly gunked up and required regrinding the crank and cams to clean up the scoring. Strangely enough the cylinders and pistons were in great shape. Had fun doing it but after finishing the complete unit with the engine ready to install sitting there all painted correctly with the gold head and black chrome exhaust manifiod, polished aluminum components the body was next. Since that was not my skill area and circumstance dictated I sell the project I did so for a song. Of course that was in the mid 70s. Worse car decision I ever made.
#93
08-11-2012, 11:04 AM
Good day everyone!!!
I really appreciate all the great comments!! I'm glad yous guys and gals like reading what I post as much as I like posting...
Good news!! I got my valve spring compressor today... I'm glad too because I wasn't going to get anything done otherwise...
More to come in a few or so hours...
Cheers everyone!!!
#94
08-11-2012, 08:52 PM
Good day everyone!!
Well, today was productive, but it didn't produce lots of pictures... Same thing over and over again... 32 valves seems like 100 when you take a couple minutes per just to get the tiny little keepers in place...
Here is my new valve spring compressor... I didn't expect bolts with the two main parts, but hey... Bonus!!

Here is the starting point...

And down... I put a washer on the end to keep them from wearing so much...

That's one complete... Now on to the next...

Okay, both are finally done... Ready to go on the motor... First, on goes the manifold... Why? Because that is how I took it off (with the manifold on the head)...

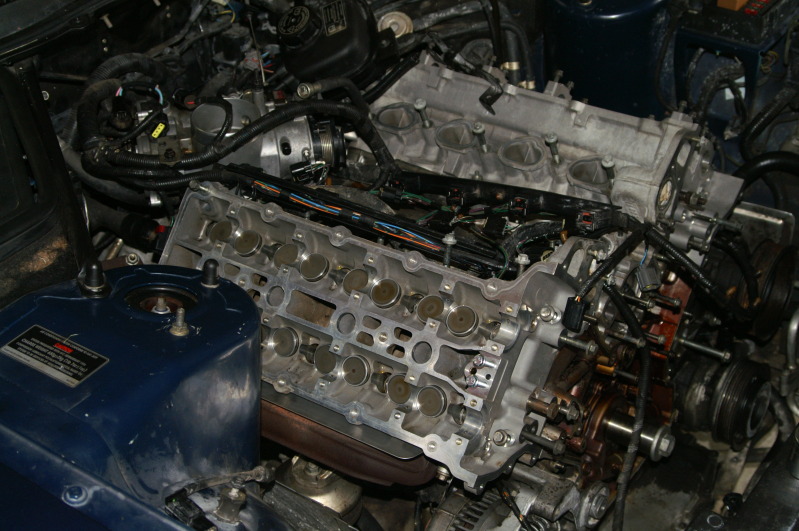
And the finished top end (almost)... I wish I could get it running tomorrow, but I don't think I will rush through Sunday in that hopes because I will end up missing something...


Okay, I need some advice on this one... I read on another post that the valve seat coming out caused the exhaust gases to blow back into the intake... Well, that is plastic and it got melted... It happened to mine too, but not really bad... SHOULD I REPLACE THE INTAKE?!?!


And this one has a hairline crack at the injector...

Here are the cam cap bolts... I rounded one (or my son did) and one got damaged somehow so they both got tossed in the recycle bin... I used the old secondary tensioner bolts as a replacement, but they are a hair longer (but better because they use more threads)... Go ahead and use them or get new to match the rest?! I don't want my CDO to get the best of me here...

That is all for today... I didn't get the spring compressor until afternoon or so... Half day of work...
Cheers everyone!!!
Well, today was productive, but it didn't produce lots of pictures... Same thing over and over again... 32 valves seems like 100 when you take a couple minutes per just to get the tiny little keepers in place...
Here is my new valve spring compressor... I didn't expect bolts with the two main parts, but hey... Bonus!!
Here is the starting point...
And down... I put a washer on the end to keep them from wearing so much...
That's one complete... Now on to the next...
Okay, both are finally done... Ready to go on the motor... First, on goes the manifold... Why? Because that is how I took it off (with the manifold on the head)...
And the finished top end (almost)... I wish I could get it running tomorrow, but I don't think I will rush through Sunday in that hopes because I will end up missing something...
Okay, I need some advice on this one... I read on another post that the valve seat coming out caused the exhaust gases to blow back into the intake... Well, that is plastic and it got melted... It happened to mine too, but not really bad... SHOULD I REPLACE THE INTAKE?!?!
And this one has a hairline crack at the injector...
Here are the cam cap bolts... I rounded one (or my son did) and one got damaged somehow so they both got tossed in the recycle bin... I used the old secondary tensioner bolts as a replacement, but they are a hair longer (but better because they use more threads)... Go ahead and use them or get new to match the rest?! I don't want my CDO to get the best of me here...
That is all for today... I didn't get the spring compressor until afternoon or so... Half day of work...
Cheers everyone!!!
Last edited by bluexk8ragtop; 08-11-2012 at 08:56 PM.
#95
08-12-2012, 01:19 PM
Good day everyone!!
Well, I have decided to temp fate with the intake manifold as the heat didn't appear to do that much "damage"...
I looked over the torque for the cylinder heads in the spec sheet I have thanks to this forum... It is nm, but can convert to 1st round of 15 foot pounds, then the 2nd round of 26 foot pounds, then 90 deg for all, then another 90 deg for all... The issue I have is I get vibration from the bolt on the measure stages... the 90 deg are easy... If I start off with 26-32 foot pounds across the board at random, the final result could be nearly 10 times the difference after the 180 deg is finished... I've proven this on a BMW I did when I was stationed in Germany... Is there a magical way to keep the bolts from vibrating when they are tightened? I tried cleaning out the bolt holes, adding a light coat of gear oil, putting a washer between the head and bolt, but nothing works... I think hardened bolts would come in handy here...
Thoughts here?!
Thanks all!!!
#96
08-12-2012, 01:36 PM
Veteran Member
I will admit I have not rebuilt an engine to the extent that you are but is there a reason not to use molybdenum grease?
It is ideal for metal-metal contact surfaces under pressure and I've used this to good effect when threading stainless bolts into stainless threads and also steel bolts into aluminum.
It is ideal for metal-metal contact surfaces under pressure and I've used this to good effect when threading stainless bolts into stainless threads and also steel bolts into aluminum.
#97
08-12-2012, 02:22 PM
I will admit I have not rebuilt an engine to the extent that you are but is there a reason not to use molybdenum grease?
It is ideal for metal-metal contact surfaces under pressure and I've used this to good effect when threading stainless bolts into stainless threads and also steel bolts into aluminum.
It is ideal for metal-metal contact surfaces under pressure and I've used this to good effect when threading stainless bolts into stainless threads and also steel bolts into aluminum.
Thanks!!!
Cheers!!
#98
08-12-2012, 02:39 PM
Good news!!!
I was discouraged at first because it didn't work right away... So, I figured there was still too much other crap down in there that didn't evaporate out when I chased the threads all the way down... So, I pulled out the air compressor and a section of tube... I put about 150 PSI of air to force anything out and then some to further dry it... Redid the grease idea and Waal-la (however you spell it)!!!! I wonder if it will vibrate regardless of how much force is applied... No vibration up to 26 foot pounds, which is good enough for me...
Thanks a lot ccfulton!!!!
Cheers!!
#99
08-12-2012, 05:34 PM
Veteran Member
Glad it worked out. Moly grease and moly paste is used in all kinds of applications where you have metal to metal contact under pressure and galling is a risk.
I have made the mistake of putting stainless bolts into a stainless fitting without greasing them. It was hard going in and squealed the whole way. Worse yes, when it came time to remove the bolt it might as well have been welded in.
I have made the mistake of putting stainless bolts into a stainless fitting without greasing them. It was hard going in and squealed the whole way. Worse yes, when it came time to remove the bolt it might as well have been welded in.
#100
08-12-2012, 05:55 PM
Good day everyone!!
Happy Sunday!!
As it turns out, there was too much crap still in the bolt holes for anything to make a difference... I had to blow the crap out with the compressor, then the gear oil worked to get the accurate initial numbers... Here is the weird part... After I did the 180 deg in two stages, there were still bolts that didn't seem like they had the same torque the others had... It was odd... So, most of them were about 85 foot pounds or thereabouts... I didn't want to keep turning the weaker ones for fear of pulling out threads... Can anyone say, "NEW BLOCK"!? This will last or it won't... I'll start over if I have to!!
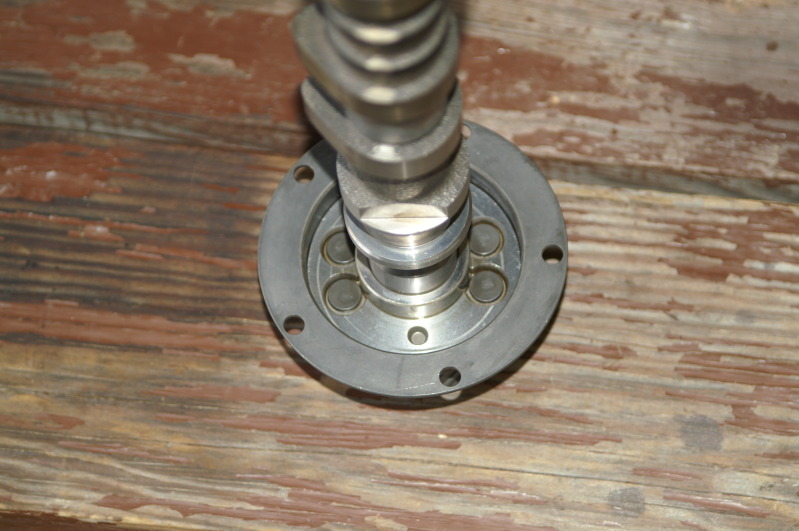
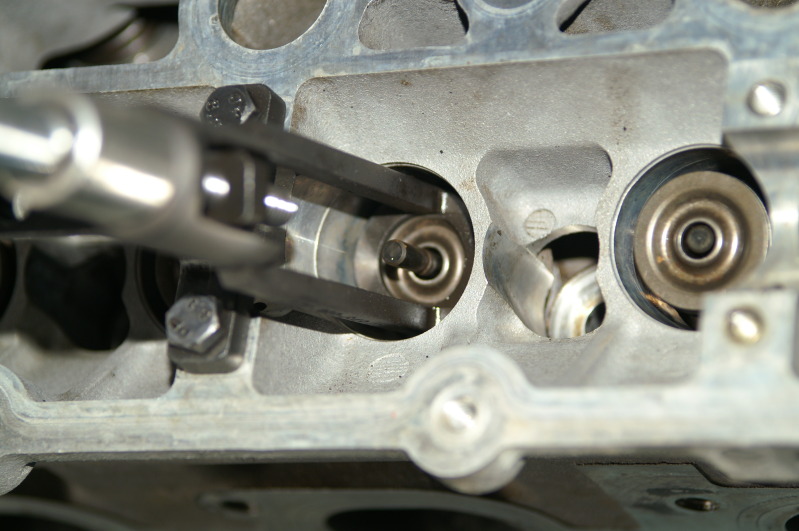
First things first... I have to make a point that if you take the primary chain off the DS (drivers side) head, you have to remove the intake camshaft as the primary sprocket teeth are too close to the cylinder head edge...

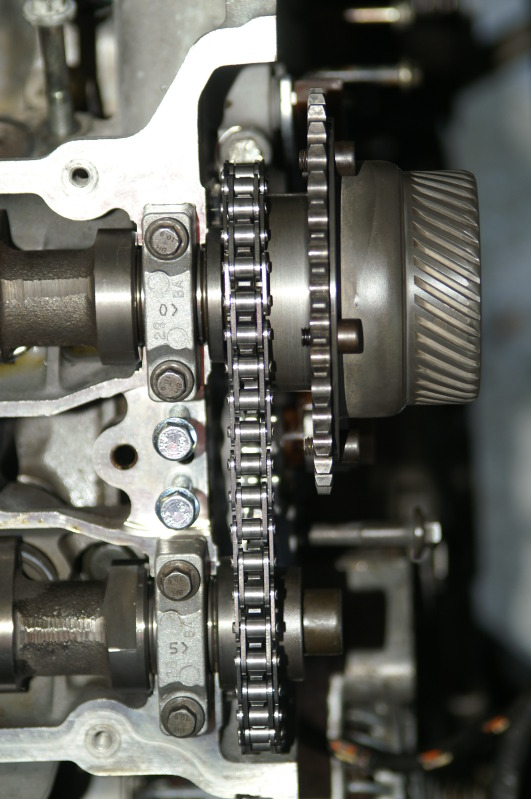
This VVT for the DS isn't fully on the camshaft... Notice how close the teeth are to the head... Added note that it was near impossible for me to turn the VVT assy if it was pressed all the way on the camshaft... This secondary chain is on an angle due to the VVT not on fully... Notice the gap that you won't see on the next picture of the PS...

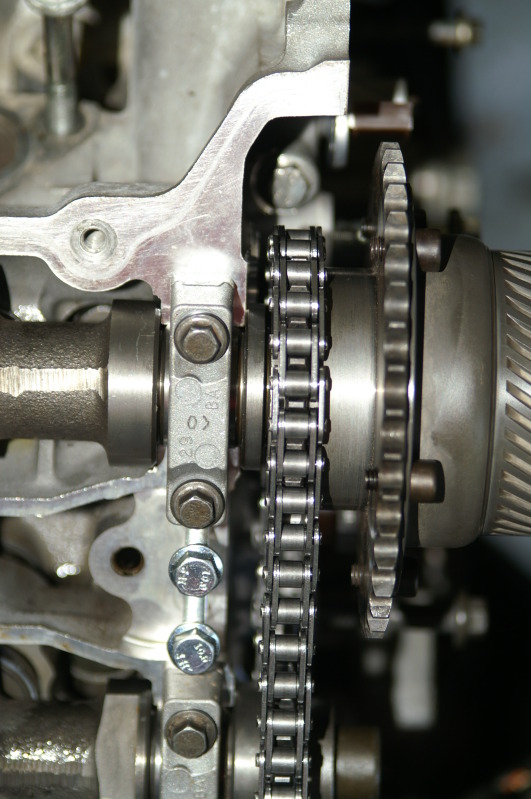
PS on fully... Secondary chain is straight... No gap...
Here it is with everything on, but NOTHING tight except the heads...


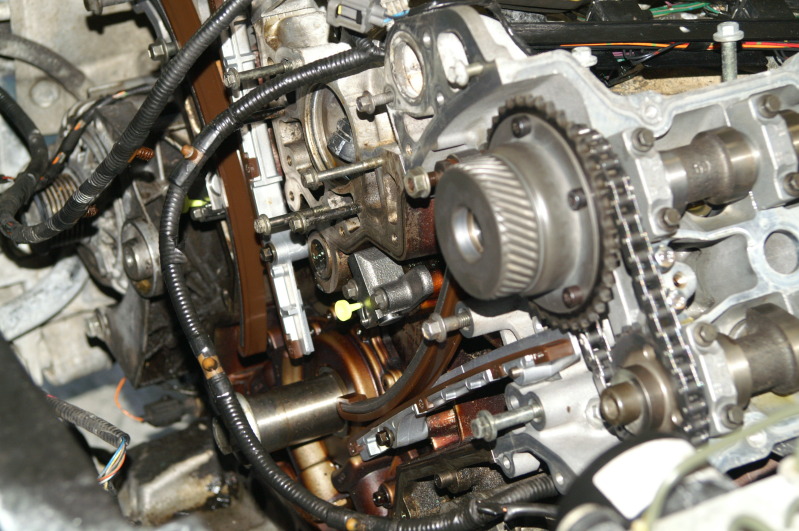
My methods might not be to the liking of everyone, but I don't tighen down everything that has oil pressure (except stuff I didn't break open; connecting rods, main bearings) so I can see the clean new oil flowing from all the places I took apart... If I don't see clean oil, there is a blockage still and that needs to be corrected before things are tightened... No primary chains and the cams are in there but no lobes are putting pressure on the valves... ALL valves are completely closed with no spark plugs... Cam caps are loosened by 3 turns...

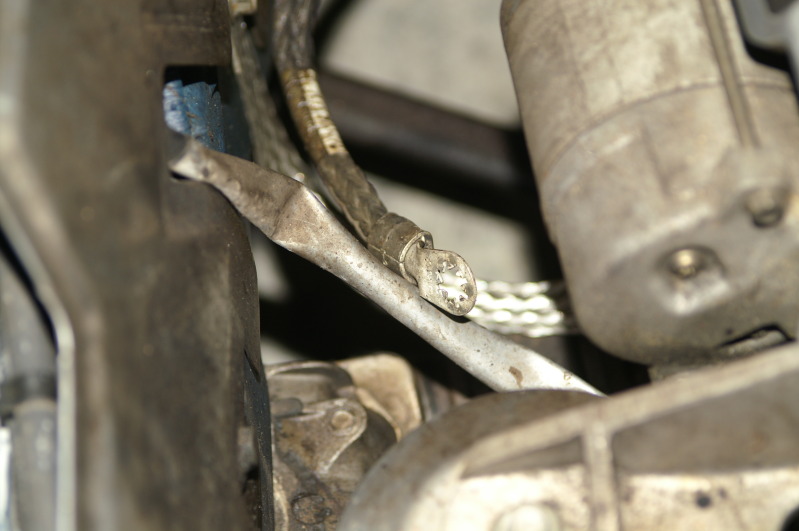
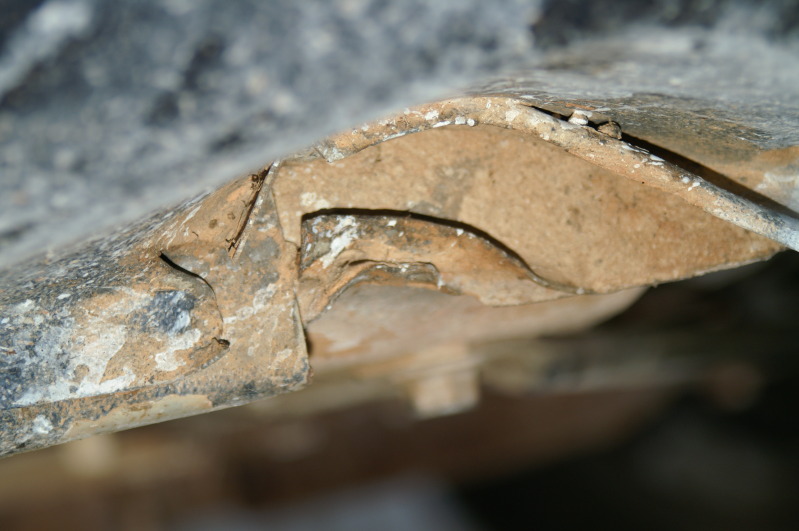
This is the surprise I got when I went to jack up the car to pull the oil plug which turned out to be another surprise... This is the pass side just behind the front tire...


And lastly, this new rail doesn't like the old bolt... Both rails are exactly the same, as are the tensioner guides... Heck, the primary tensioners are exactly the same too... They are off the block by about 1/4 inch to let any crud escape the oil passages... This bolt is threaded on as far as it will go... Maybe I will swap a cam cap bolt with this one...


Well, that is all for today...
Cheers everyone!!!
Happy Sunday!!
As it turns out, there was too much crap still in the bolt holes for anything to make a difference... I had to blow the crap out with the compressor, then the gear oil worked to get the accurate initial numbers... Here is the weird part... After I did the 180 deg in two stages, there were still bolts that didn't seem like they had the same torque the others had... It was odd... So, most of them were about 85 foot pounds or thereabouts... I didn't want to keep turning the weaker ones for fear of pulling out threads... Can anyone say, "NEW BLOCK"!? This will last or it won't... I'll start over if I have to!!
First things first... I have to make a point that if you take the primary chain off the DS (drivers side) head, you have to remove the intake camshaft as the primary sprocket teeth are too close to the cylinder head edge...
This VVT for the DS isn't fully on the camshaft... Notice how close the teeth are to the head... Added note that it was near impossible for me to turn the VVT assy if it was pressed all the way on the camshaft... This secondary chain is on an angle due to the VVT not on fully... Notice the gap that you won't see on the next picture of the PS...
PS on fully... Secondary chain is straight... No gap...
Here it is with everything on, but NOTHING tight except the heads...
My methods might not be to the liking of everyone, but I don't tighen down everything that has oil pressure (except stuff I didn't break open; connecting rods, main bearings) so I can see the clean new oil flowing from all the places I took apart... If I don't see clean oil, there is a blockage still and that needs to be corrected before things are tightened... No primary chains and the cams are in there but no lobes are putting pressure on the valves... ALL valves are completely closed with no spark plugs... Cam caps are loosened by 3 turns...
This is the surprise I got when I went to jack up the car to pull the oil plug which turned out to be another surprise... This is the pass side just behind the front tire...
And lastly, this new rail doesn't like the old bolt... Both rails are exactly the same, as are the tensioner guides... Heck, the primary tensioners are exactly the same too... They are off the block by about 1/4 inch to let any crud escape the oil passages... This bolt is threaded on as far as it will go... Maybe I will swap a cam cap bolt with this one...
Well, that is all for today...
Cheers everyone!!!
Last edited by bluexk8ragtop; 08-12-2012 at 06:00 PM.