Norma Push & Seal R type connector on Octopus hose.
#1
#2
Join Date: Apr 2014
Location: Jersey, Channel Islands
Posts: 4,150
Received 2,381 Likes
on
1,545 Posts
That doesn't look right: I don't recognise the white plastic collar - it's not part of the connector, which is supposed to be locked in place by the snap ring:
https://www.jaguarforums.com/forum/x...nector-102883/
Or you could just do away with Norma and replace with short lengths of rubber hose and pipe:
https://www.jaguarforums.com/forum/x...option-151462/
https://www.jaguarforums.com/forum/x...nector-102883/
Or you could just do away with Norma and replace with short lengths of rubber hose and pipe:
https://www.jaguarforums.com/forum/x...option-151462/
#4
The picture was one I intended to add to another thread that better gets into describing how to remove this end of the octopus hose, to better help others. This end of the hose is sealed by the o-ring and held on by the collar (which slides forward to close the notched fingers onto the flared section of metal pipe). This picture shows the hose collar in the unlocked position with a fuel line removal tool holding the notched fingers away from the flare so that it can be removed. This particular set of fuel line removal tools (about $10 from amazon or ebay - a set of 5 that are all white and clip onto a black plastic holder) is the one to use with success. I have a nicer metal set of multi-colored fuel line removal tools, and a cheap plastic multi-colored set as well. Both these sets have thinner material on the round part, but they are not tapered at the end. However, this inexpensive white set of fuel removal tools which is rather thick, is tapered on the end and results in quite easily backing off the notched fingers to make removal of this hose possible. I should have better labeled the picture. The line does currently have the white tool removed and the collar slid forward to the locked position.
I do remember somewhere in JTIS it talking about that hose hole and possible bleeding, but I can not find that when I need it. So coming back to my question:
Is that hole suppose to leak until all air is out of the heater area?
After getting that hose off successfully, that last thing I want to do is chop it, but that is my backup plan.
#5
#6
That hole is not for bleeding, and should not be leaking once hose is replaced.
If you're trying to bleed the system - I've always removed top cap of thermostat housing. Begin filling through expansion tank till coolant just reaches top of thermostat housing - replace top cap. Fill expansion tank - not all the way. Start vehicle with heater on full heat. Let it run up to temp and top off expansion tank as needed.
Regardless - replacing any coolant hoses, they shouldn't be leaking. I've done many octopus hoses on XK's/XJ's... If it's leaking, there's an issue with the hose. May need to do parts warranty.
Are you using genuine or aftermarket
#7
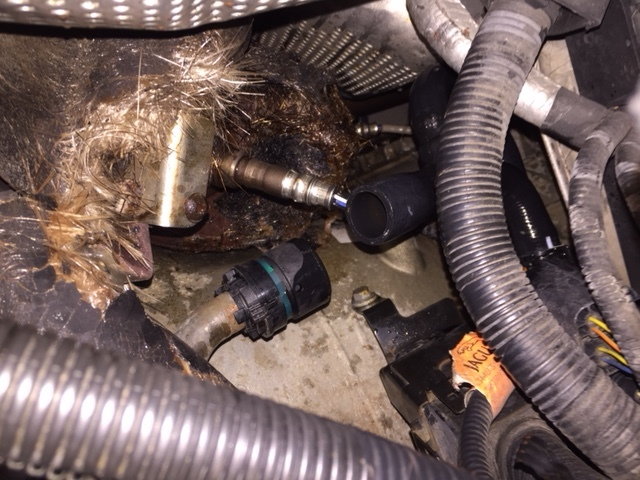
Eurospare Octopus Hose separating at 17 psi. This is right side of car under Air Tube.
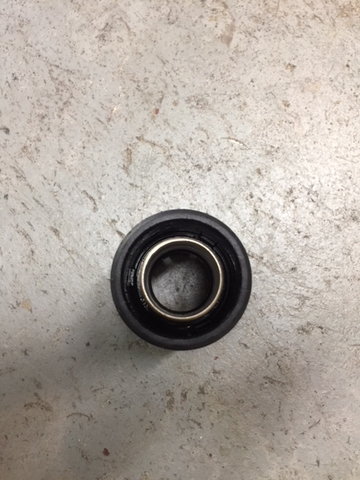
Norma R type connector top view. There appears to be no type of glue or adhesive used.
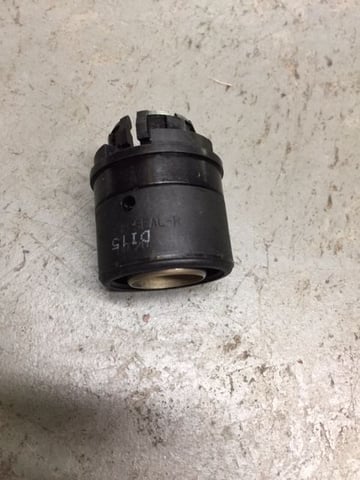
Norma R type connector side view.
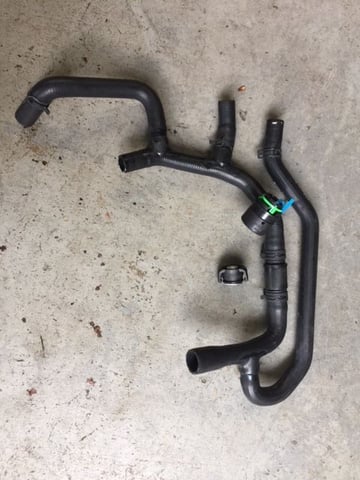
Other Norma Connector on Eurospare blew out at 15 psi. Fortunately I took both good sides of Eurospare and combined them to make a good one. This is one with both bad sides which may get me a refund for being defective. They shouldn't blow off at just above working cap pressure.
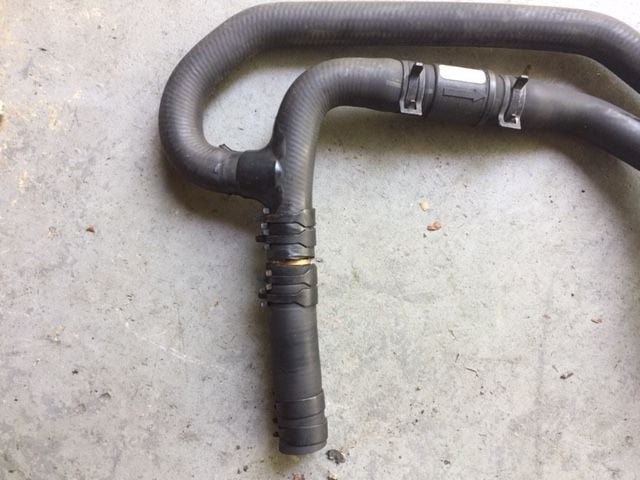
Old hose fix. This is now my spare in case Eurospare hose fails me. Use spring type connectors!!!
I just wanted to add a couple more things about the octopus hose in the case it saves others some time.
1. In the Norma Push and Seal R connector, changing the O-ring may solve a leak for most. In my case the plastic connector had a perfectly straight longitudinal crack along the whole connector. I changed the O-ring two times, and it still leaked. The crack was on the bottom of the connector, and I thought it was a seam left over from the manufacturing process because I had looked under it with an inspection mirror and it was perfectly straight.
2. Sometime early in your life you should buy Flexible Hose Clamp Pliers.
3. I strongly recommend never using tradition screw type radiator hose clamps...they will eventually loosen and leak over multiple temperature cycles of the engine and the seasons. Even though it is often recommended to replace the spring and / or ear clamps, I have never had them leak even if I continued to use the originals after many removals and installs.
4. I cannot recommend the EuroSpare octopus hose. I do not know if they are the OEM for Jaguar; I suspect they are. I bought 2 and they both failed. After installing I pressure tested my radiator system. The radiator cap is rated for between 14-15 psi. I pressure tested the first hose at 17 psi and the Norma Push and Sear R connector separated from the Hose. The second hose I pressure tested at 15 psi and the other Normal connector (with 2 ears) separated from its hose. Not sure if these were defective hoses or Norma connects just are not strong. In my experience I normally pressure test cars to 20 psi to ensure no cooling system leakage, but then again, I never had Norma type connectors on radiator hoses. These hoses are slid between a metal inner and plastic outer. The metal inner then seems to be expanded out or bulged in a section causing the hose to be compressed between the metal inner and plastic Norma outer. There appears to be no glue or epoxy substance. Once the hose pops out it slides in and out of the Norma connector too easily. As a side note, for those fixing their old hose by cutting and using a barbed male to male connector with a length of hose, I think you could probably just pull off the normal connector rather than cut so you have a little extra length to work with before the tube splits into 2 tubes. Then again, maybe these two hoses are only part of a defective batch.
5. To change the octopus hose the only things that have to be removed are the air tube on the right (between MAF and throttle body) and the coolant expansion tank on the left. After doing this 3 times, it only takes about 1 hour (this is assuming none of the hoses are stuck, otherwise you can double or triple this time).
6. Liquid dish soap is very useful putting hoses back on.
7. Save the old OEM hose, you may want to make a spare with a metal barb and 3/4" radiator hose.
8. As mentioned elsewhere there is a zip tie on the original octopus hose in the middle, but behind the rubber flap on the top of the transmission. It cannot be easily seen, but if you know it is there it is easy to cut with snips. Avoid nearby wires.
9. Two flat head screwdrivers are all that are needed to disconnect the Norma connector with the 2 ears on the left side. To install you simply press it on.
10. In hindsight, I would have put my octopus hose in with No Norma connectors at all. While Norma might be OEM, they are the weakest part of the the cooling system. They are generally adequate, but I would have preferred a single spring clamp on each end that has the Norma connector. The Norma connectors on the old original hose seem very tight on the OEM hose.
Last edited by Red1bw; 08-29-2018 at 10:37 AM.
