When you click on links to various merchants on this site and make a purchase, this can result in this site earning a commission. Affiliate programs and affiliations include, but are not limited to, the eBay Partner Network.
Sat Nav Conversion to "CarPlay" with Multi-Gauge Display "How To"
When I found a beautiful, low-mileage XKR coupe for sale a year and a half ago, I jumped at the chance to buy it. It was Jaguar racing green metallic with tan leather Recaro seats, 20” BBS Detroit alloy wheels, cross-drilled Brembo brakes with red calipers, and Alpine premium in-car entertainment (ICE) system. There were, however, three things I wanted that it lacked: a modern navigation system and the ability to make hands-free phone calls and play music from my iPhone.
After considerable thought and research (along with some invaluable advice from Steve Klonsky, TheJagWrangler) I found a way to kill all of these “birds” with one “stone” while adding a four-gauge display with “analog” clock and a rear-view backup camera. When I connect my iPhone 6S Plus to a lightning cable coming out of the coin holder located in front of the gearshift, the phone’s screen is mirrored on the in-dash navigation screen and its audio output plays through the car’s Alpine premium ICE system.
With this one simple connection, I now have all of the following:
A current navigation system with turn-by-turn voice directions, using either the Maps or Google Maps apps
With a subscription to AppleMusic, the ability to play anything in the vast iTunes library using the Music app
Hands-free phone calling, using Siri voice command and the Phone app
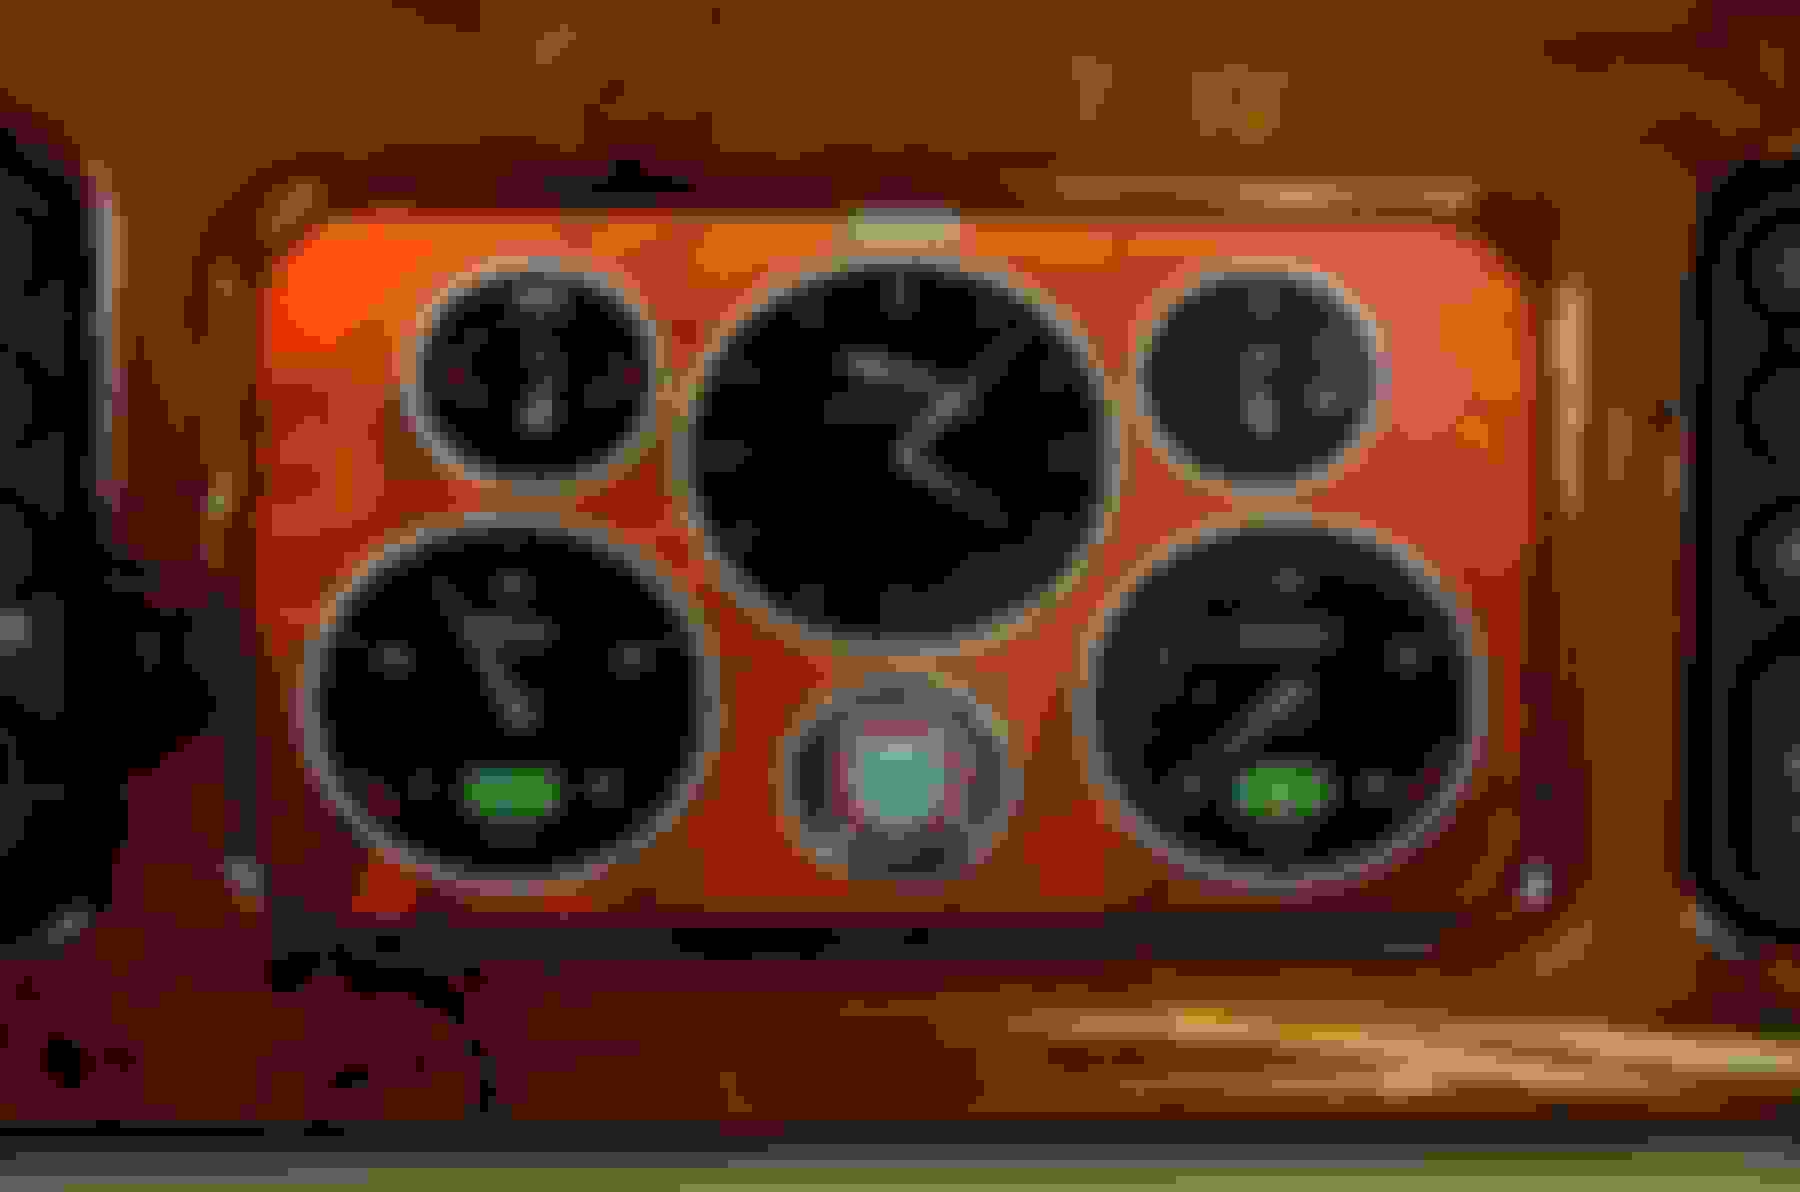
A four-gauge engine monitoring display with analog-style clock, showing oil pressure, supercharger boost, battery charge, and coolant temperature
An automatic rearview backup camera
Best of all, the entire installation looks “stock” – the only visible modification is a groove in the “change holder” in front of the gearshift, where I place the phone.
I worked on the project off and on for about six months; total cost of materials was about $1,000.
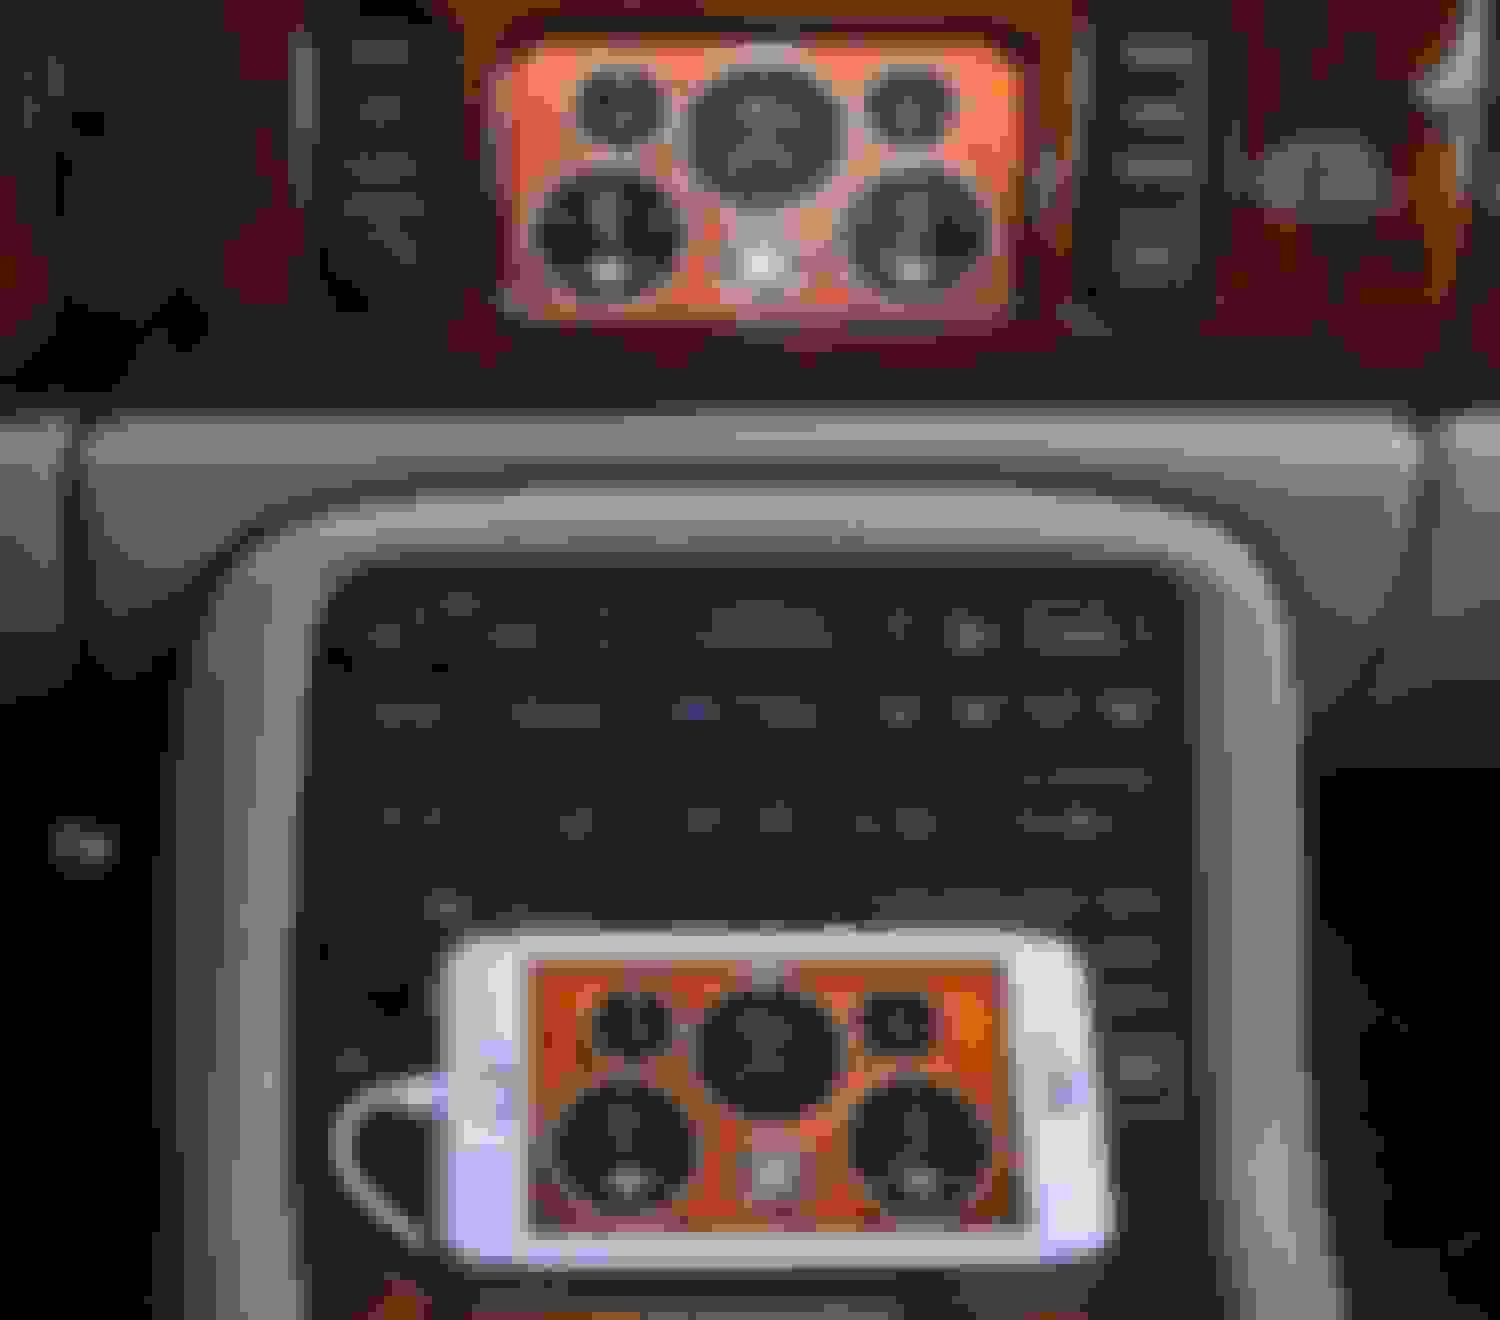
Dashboard video screen mirrors iPhone 6S Plus
CarOS app emulates Apple CarPlay
DashCommand app displays gauges and clock
Display automatically switches to backup camera when in reverse gear
INSTALLATION PART 1: NavTool 3.0
The heart of my system is a device called NavTool 3.0, which is located in the trunk and spliced into the video wiring that connects the navigation DVD-ROM player to the dashboard video screen. An HDMI cable runs from NavTool, under the back seat, to the center console, where it plugs into an Apple Lightning Digital A/V adapter. To charge the iPhone, an Aukey CC-C5 Car Charger USB-A to Lightning Cable connects power from the cigarette lighter to the lightning input on the A/V adapter. A female-to-male lightning cable extension runs from the A/V adapter output and up through the “coin holder” in front of the shifter, which I modified with a Dremel tool to hold my iPhone 6S Plus. Finally, in order to play the iPhone’s audio through the ICE system, a device called AUX-JAGR Audio Adapter is needed to connect the NavTool “audio out” jack to the Alpine power amplifier. (Thanks to Steve Klonsky for this lead!)
The Parts
NavTool 3.0 (NAVTOOL INC, $300)
AUX-JAGR Audio Adapter (Discount Car Stereo, $70)
Apple Lightning to HDMI A/V Adapter (Amazon, $45)
Lightning Female to Male Audio & Video Extension Cable – 3.3’ (Amazon, $9.30)
Aukey CC-C5 Car Charger USB-A to Lightning Cable (Amazon, $20)
SecurOMax Braided HDMI Cable – 12’ (Amazon, $13)
NATIKA WD-0075 Waterproof HD Backup Camera (Amazon, $40)
40A Relay Harness, 5 Pin Bosch-Type (Amazon, $17)
CarOS app (App Store, $19.99/year)
18 gauge stereo speaker hookup wire (black and red) – 40’ (Amazon, $13)
Heat shrink tubing
Black plastic electrical tape
Plastic cable ties
Video Connections
The NavTool Company claims that the installation of NavTool 3.0 in an X100 series Jaguar XK is a simple “plug and play” affair. It is not. This is because the installation instructions they provide are for cars with a Denso navigation system, rather than an Alpine system such as mine. In fact, the company had no instructions for installing their product in my car, leaving me to figure out how to do so on my own.
BEFORE WORKING ON ANY ELECTRICAL COMPONENTS, DISCONNECT THE BATTERY. Open both doors to allow the side windows to drop. Ensure that the doors remain open until after the battery has been disconnected. Disconnect the battery ground cable.
Once the battery has been disconnected, access the stack of components (CD changer, DVD-ROM navigation control unit, and power amplifier) located in the trunk. To do so, remove the black plastic piece that covers the right- (passenger-) side taillight assembly by unscrewing the two black plastic-covered “wing nuts” that secure it. Next, gently pull out the formed piece of grey fabric on the right side of the trunk, exposing the ICE system components (CD changer, DVD-ROM navigation control unit, and power amplifier). Unscrew two sheet metal screws from the top and two from each side of the case, disconnect all wiring harnesses and cables, and slide the components out.
Plugged into the back of the Alpine DVD-ROM navigation unit are 20-pin and 16-pin connectors. The wires attached to the 20-pin connector send the “video out” signals to the dashboard video screen. The red (R), green (G), and blue (U) wires send red, green, and blue signals, respectively, while the white (W) wire in pin 7 sends the sync signal. To install the NavTool unit, you must cut the R, G, U, and W wires. Do not cut the three thick white wires (BRD) in pins 2, 4, and 6.
20-pin connector
NavTool 3.0
As shown in the photo, the NavTool unit has a plethora of wires. I did not use the green, blue, brown, and purple wires that terminate in a 4-pin connector, at the top, and simply cut them off near the black cable tie. The three black RCA plugs are inputs for Video 1, Video 2, and a backup camera. I will describe them, as well as the connections to the six (red, orange, yellow, blue, gray, black) separate wires at the bottom of the photo, later. (On the side opposite the wires, the NavTool case has an HDMI input and a 3.5 mm audio output jack.)
For now, I will focus on the 10 (yellow, green, orange, brown, red, blue, purple, black, and two gray) wires attached to the second wiring harness from the top. I noted earlier that you must cut four wires coming from the 20-pin harness attached to the navigation unit: R, G, U, and W. Having done so, you then insert the NavTool unit “in the middle” by connecting four of the 10 wires to the four wire segments coming from the 20-pin harness (“control unit” side) and another four of the 10 wires to the four segments going to the dashboard video screen (“screen” side). The specific connections are shown in the table below.
20-PIN CONNECTOR WIRING
As the table shows, NavTool’s yellow (Y), green (G), orange (O), and brown (N) wires are connected to the red, green, blue, and white wires, respectively, on the control unit (wiring harness) side. NavTool’s red (R), blue (U), purple (P), and black (B) wires are connected to the red, green, blue, and white wires, respectively, on the screen side. Do not cut the thick white (braided) wires. The two gray wires on NavTool’s 10-pin wiring harness are not needed and can be cut off.
NOTE: I soldered all of my connections, then covered them in heat-shrink plastic tubing or wrapped them in electrical tape to prevent any possibility of “shorting.”
Next to be connected are the six individual wires at the bottom of the photo. The red (R) wire is connected to an ignition-switched power source. The black (B) wire is connected to ground. The gray (S) wire is connected to the parking brake; its purpose is to prevent you from watching videos while driving. (It’s grounded when the parking brake is engaged.) Because I had no intention of using an auxiliary video source (e.g., DVD player), I permanently connected the gray wire to ground. The yellow (Y) wire connects to a push button, to allow switching among multiple video inputs. Because I am using only one video input (plus the backup camera which switches on automatically when in reverse), I had no need for this function and therefore permanently connected the yellow wire to an ignition-switched power source. The blue wire is not needed and can be cut off.
These connections can be made by splicing these four wires to one of two wires (WU or B) coming from the 16-pin connector attached to the back of the DVD-ROM navigation unit, as shown in the table below.
16-pin connector
16-PIN CONNECTOR WIRING
As the table shows, NavTool’s red (R) and yellow (Y) wires are spliced into the 16-pin connector’s white wire with the blue stripe (WU) while the black (B) and gray (S) wires are spliced into the 16-pin connector’s black (B) wire.
For NavTool to automatically switch to the backup camera, it must detect when the car is in reverse. For most cars, this is done by connecting NavTool’s orange (O) wire to the wire powering the backup lights. In Jaguars, however, the wire connected to the backup lights is always “hot” EXCEPT when in reverse, when it is grounded. I addressed this by using an SPDT switch (“horn relay”). Specifically, pin 85 of the relay is spliced into the 16-pin connector’s black (B) wire, pin 86 is spliced into the 16-pin connector’s yellow (Y) wire, pin 87 is connected to NavTool’s orange (O) wire, and pin 30 of the relay is spliced into the 16-pin connector’s white wire with the blue stripe.
[NOTE: I inserted a 5 amp inline fuse between NavTool and the control unit’s switched ignition (white with blue stripe) wire, as recommended by the manufacturer.]
For my rear-view camera, I chose the NATIKA WD-0075 Waterproof HD Backup Camera, which attaches easily to the underside of the ornamental trim piece. It has a 145 degree angle view with backup guidelines and works in extremely low light conditions (0.005 lux).
Rear-view backup camera
The backup camera has a single black wire coming from it, which then splits into two wires: one carrying the video signal from the camera (yellow connector) and one supplying power to the camera when the backup lights are on (red connector). The kit includes extensions that attach to each of these connectors. After the camera’s frame has been screwed into the underside of the trim piece, the wires are passed between the it and its rubber gasket, across the underside of the trunk lid, and into the trunk, where they are connected to NavTool. (Use an upholstery tool to remove the buttons that attach the gray fabric to the trunk lid.)
Video camera wires fastened to existing wires
I used black electrical tape and cable ties to fasten the camera’s wires to the bundle of wires that passes diagonally across the inside of the trunk lid. Next, I passed the video and power wires through the ridged plastic tubing and into the trunk, following the same path as the wires that are in the tubing.
Before proceeding, though, I had to solve three problems. First, the yellow RCA plug at the end of the video out wire was too big to fit through the tubing. Second, the extension for the power connector was too short to reach all the way to the NavTool unit, where the horn relay and ground wire connections are located. And, finally, there wasn’t enough room in the plastic tubing to accommodate the existing wires that pass through it PLUS the video extension wire and the stereo hookup wire.
To fix the first problem, after connecting the video extension wire, I cut it about 6” from the end, leaving the male RCA connector attached to the severed wire. To fix the second problem, I connected a generous length of 18 gauge paired stereo hookup wire to the red (power) and black (ground) wires at the end of the power connector extension. I was careful to separately wrap the two connections with electrical tape, so that the bare wires could not touch each other.
To deal with the third problem, I used the tip of a single-edge razor blade to very carefully make an incision along the entire length of the plastic tubing. I was then able to push the new wires into the plastic tubing, almost fully close it around all the wires, and wrap the bundle with electrical tape as I proceeded.
Backup camera wiring routed through plastic tubing
Audio Connection
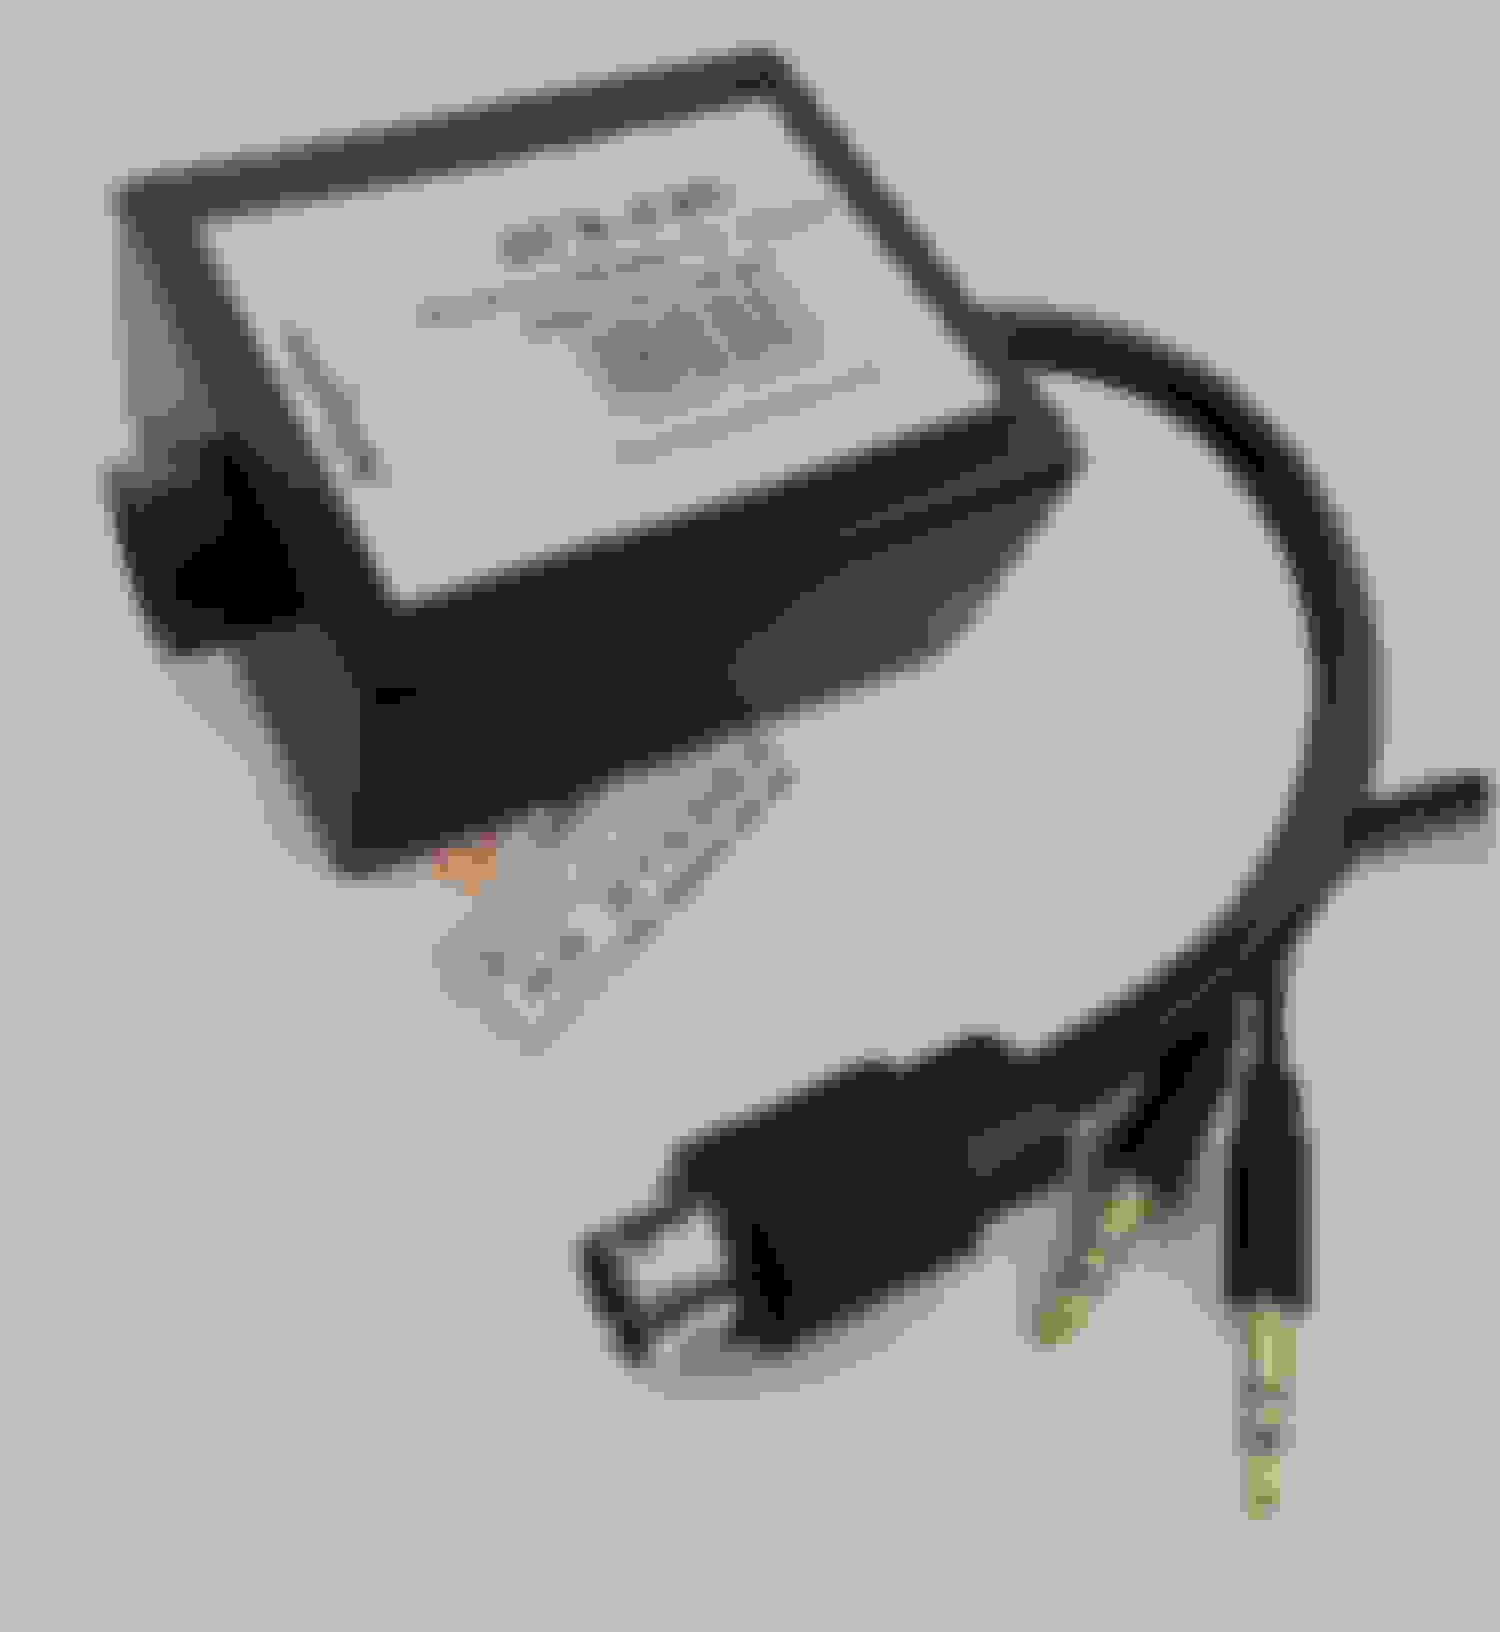
As noted, NavTool has a 3.5mm stereo mini-plug audio output jack. This is intended to connect to an AUX input on the ICE “head unit” in the dashboard. Unfortunately, however, the Jaguar’s Alpine head unit does not have an AUX input. To address this (at the suggestion of Steve Klonsky, TheJagWrangler), I bought a device called AUX-JAGR, which is inserted between the CD changer and the power amplifier. A short wire with 3.5mm male stereo jacks on both ends then connects the NavTool audio output to the AUX-JAGR audio input.
AUX-JAGR
With AUX-JAGR in place, and the iPhone connected to NavTool, audio from the iPhone plays through the ICE system when “CD Changer” is selected. (The CD changer itself, though disabled, is still necessary for NavTool and AUX-JAGR to work.) Volume can be controlled via either the head unit’s volume control knob or the steering wheel controls; music is selected using either Siri voice activation or the Music app on the iPhone’s touch screen.
Connection to iPhone
To connect NavTool to an iPhone, remove the rear seat cushion by pulling off the two black plastic “nipples” that cover the nut and bolt assemblies on the left and right sides (bottom front of cushion) and unscrewing the nuts. Slide the center seat belt buckles through their leatherette “holder,” lift the cushion out of the car and set it aside.
HDMI cable attached to NavTool (top of ICE components' case)
Connect the HDMI cable to NavTool and run it through the hole between the trunk and the right-hand (passenger’s) side rear speaker, behind the speaker, and underneath the seat cushion. (Note -- the HDMI cable I ordered was too long, so I coiled up the excess as shown in the photo. The parts list shows the correct length - 12'.)
Cable ties hold HDMI cable (black and silver) to wire bundle
A/V Adapter plugs into Lightning Female-to-Male Extension
Plug the HDMI cable into the female HDMI input of the Apple Lightning-to-HDMI A/V Adapter. Plug the A/V adapter into a 3.3-foot Lightning Female-to-Male Extension, as shown in the photo. Remove the four black screws that hold the lid of the center console in place, lift out the lid, and set it aside.
Break the glue that secures the black plastic “change holder” at the front of the center console by carefully running a couple of credit cards around its edges. Lift out the change holder and set it aside. Use a stiff, but flexible, piece of wire to “fish” the extension cable from under the back of the center console, along the left-hand side of the gear shift, and up through the hole where the change holder was located.
Open the lid that covers the cigarette lighter and plug in the Aukey charger. Run the charger’s black wire under the back of the center console and plug it into the A/V Adapter’s female lightning input. Use cable ties to secure the connections of the Aukey power wire and the lightning extension cable to the A/V adapter.
Re-attach the center console lid. Place a piece of sponge between the A/V adapter and the front edge of the back seat to ensure that wires don’t get pinched. Re-install the back seat. Re-install the the rear passenger-side speaker cover.
Test the System
Re-connect the battery grounding cable.
Turn the ignition switch to Position 2, turn on the dashboard video screen, plug the lightning connector into the iPhone and turn it on.
Push the volume button to turn on the ICE head unit and select “CD Changer”. The LED screen below the cassette deck should have a message saying “NO MAGAZINE”.
Using the iPhone touchscreen, you should be able to select any music and listen to it through the ICE system with the Music app (or Spotify or other apps). Alternatively, you can say, for example, “Hey Siri… play the Rolling Stones essentials playlist” and the selection will play.
You should also be able to select any navigation app (Apple Maps, Google Maps, Waze) using the touchscreen and see the map on the dashboard video screen while also getting turn-by-turn audio directions through the ICE system. You can choose destinations in several ways, including by using Siri voice control.
Finally, you should be able to place phone calls using Siri and answer incoming phone calls using the iPhone touch screen. You will need to set “speakerphone” as the default, because the incoming conversation is not played through the ICE system speakers.
In my next post, I'll describe what's involved in displaying engine performance information on the dashboard video screen.
Yes -- in fact, their latest offering specifically emulates Apple CarPlay on the navigation video screen. To achieve my set-up, though, you need the NavTool 3.0, which is still available.
I didn’t buy the CarPlay model of NavTool for several reasons. First, and most importantly, it wasn’t available when I purchased NavTool 3.0. Even if it had been available, however, I don’t think I would have chosen it, for the following reasons:
It appears that the CarPlay model is designed to be located in the dash, behind the head unit, and connected using RCA-type plugs. As set up for the Jaguar XK (X100 series), NavTool 3.0 is configured to be installed in the trunk – a much easier installation.
It also appears that the CarPlay model only supports apps that are officially supported by Apple CarPlay. If this is the case, then I would be unable to use DashCommand (gauges & clock), Google Maps, and other non-supported apps. With NavTool 3.0, I can select any app that I have on my iPhone.
It also appears that the CarPlay model doesn’t support the use of a rear-view backup camera.
In the CarPlay model, apps are selected using a dial and button that needs to be installed somewhere within the driver’s reach (center console?). I prefer selecting apps by using my iPhone’s touch screen.
I recently switched out the hard-wired phone connection (AUX-JAGR audio adapter) for a Bluetooth phone connection (BT45-JAG, also available from www.discountcarstereo.com).
The difference between the two is that, with Bluetooth, all audio output including phone calls is routed through the car’s speakers using a Bluetooth connection; phone input is via a separate dedicated microphone. With the hardwired connection, all audio except phone calls is routed via HDMI cable to NavTool and then back through the car’s speakers. When making a phone call, phone output is through the iPhone’s internal speaker and phone input is via the iPhone’s internal microphone, which can make it difficult to hear and be heard. Both options send the phone’s video signal via HDMI cable to NavTool and then back to the dashboard video screen.
Compared to the hardwired option, Bluetooth is more similar to the car’s OEM phone installation and the clarity of phone calls (both speaking and listening) is better. On the other hand, Bluetooth is more expensive and only works if the car was pre-wired for a telephone. If you don’t know whether your car meets this requirement, you will need to remove the center console storage compartment and look for a yellow connector like the one in the photo.
Yellow connector indicating pre-wiring for phone
Option 1 -- Bluetooth
Assuming the yellow connector is present, the next step is to purchase and install the BT45-JAG adapter kit (www.discountcarstereo.com , $160). It is not necessary to install the wireless remote control included with the kit; all of its functions will be performed by touching the iPhone screen. In addition, you can use either the microphone included with the kit or, if you prefer, a Jaguar OEM microphone (C2P17101AMN, about $135, if not already installed).
Connect the kit’s audio adapter between the CD changer and the power amplifier, as described in the instructions. After connecting the audio cable to the adapter, route it along the same path as NavTool’s HDMI cable, as described in “CONNECTION TO iPHONE,” below. Do not use the method described in the installation instructions.
Complete the installation of the BT45-JAG according to the installation instructions.
Option 2 – Hardwire Connection
If you are unable – or simply prefer not – to use the Bluetooth option, you will need to purchase and install the AUX-JAGR adapter kit (www.discountcarstereo.com, $70). The adapter box is installed between the CD changer and the power amplifier. A short wire with 3.5mm male stereo plugs on both ends then connects the NavTool audio output to the AUX-JAGR audio input.
CONNECTION TO iPHONE
To connect NavTool to an iPhone, remove the rear seat cushion by pulling off the two black plastic “nipples” that cover the nut and bolt assemblies on the left and right sides (bottom front of cushion) and unscrewing the nuts. Slide the center seat belt buckles through their leatherette “holder,” lift the cushion out of the car and set it aside.
Cable ties hold HDMI cable (black and silver) to wire bundle
Connect the HDMI cable to NavTool and run it through the hole between the trunk and the right-hand (passenger’s) side rear speaker, behind the speaker, and underneath the seat cushion. (If you are using BT45-JAG, route the kit’s audio cable along the same path.)
A/V Adapter plugs into Lightning Female-to-Male Extension
Plug the HDMI cable into the female HDMI input of the Apple Lightning-to-HDMI A/V Adapter. Plug the A/V adapter into a 3.3-foot Lightning Female-to-Male Extension, as shown in the photo. Remove the four black screws that hold the lid of the center console in place, lift out the lid, and set it aside.
Break the glue that secures the black plastic “change holder” at the front of the center console by carefully running a couple of credit cards around its edges. Lift out the change holder and set it aside. Use a stiff, but flexible, piece of wire to “fish” the extension cable from under the back of the center console, along the left-hand side of the gear shift, and up through the hole where the change holder was located.
Open the lid that covers the cigarette lighter and plug in the Aukey charger. Run the charger’s black wire under the back of the center console and plug it into the A/V Adapter’s female lightning input. Use cable ties to secure the connections of the Aukey power wire and the lightning extension cable to the A/V adapter.
Re-attach the center console lid. Place a piece of sponge between the A/V adapter and the front edge of the back seat to ensure that wires don’t get pinched. Re-install the back seat. Re-install the the rear passenger-side speaker cover.
Test the System
Re-connect the battery grounding cable.
Turn the ignition switch to Position 2 and turn on the dashboard video screen. Turn on the ICE head unit by pushing the volume button and select “CD Changer”. The LED screen below the cassette deck should have a message saying “NO MAGAZINE” or ‘NO CD.” Turn on the iPhone. If you are connecting via Bluetooth, go to “Settings,” “Bluetooth,” and select “BT-45.” Once paired, “connected” is heard on the car speakers.
Plug the lightning connector into the iPhone. By default, the iPhone’s audio output will switch to the lightning cable (even if the phone is paired via Bluetooth). If you are using Bluetooth, you need to change this setting by opening Control Center (swipe up from bottom edge of screen), then pressing and holding the Music (audio) card in the upper right-hand corner. The card will enlarge; touch the “output source” icon in the upper right-hand corner that looks like a triangle with waves emanating from it. Select BT-45. Close Control Center. (Alternatively, you can access “output source” by opening the Music app and selecting the active song shown at the bottom of the screen.)
Using the iPhone touchscreen, you should be able to select any music and listen to it through the ICE system with the Music app (or Spotify or other apps). Alternatively, you can say, for example, “Hey Siri… play the Rolling Stones essentials playlist” and the selection will play.
You should also be able to select any navigation app (Apple Maps, Google Maps, Waze) using the touchscreen and see the map on the dashboard video screen while also getting turn-by-turn audio directions through the ICE system. You can choose destinations in several ways, including by using Siri voice control.
Finally, you should be able to place phone calls using Siri and answer incoming phone calls using the iPhone touch screen. If you are not using a Bluetooth connection, you will need to set “speakerphone” as the default, because the incoming conversation will not be played through the ICE system speakers.
Thanks Ray great to see what you have done, am guessing i can go about doing the same with my 2010 XF as well ? Damn i missed the 17% off sale as the prices of their products have gone up
I should also note that PLX Devices no longer sells individual modules for measuring oil pressure and supercharger boost. Instead, they sell a "combined sensor module array" (SM-PRO) for $199.99 that includes the boost sensor built in; it also accepts input from the fluid pressure sensor kit ($89.99) which you would need to buy separately to measure oil pressure. To transmit this information to the DashCommand app via WiFi, you will also need the PLX Kiwi 2 WiFi and its iMFD Adapter. PLX Devices no longer sells the Kiwi 2, but you can still find it on eBay. PLX Devices still has some of the iMFD Adapters for $49.99:
When I found a beautiful, low-mileage XKR coupe for sale a year and a half ago, I jumped at the chance to buy it. It was Jaguar racing green metallic with tan leather Recaro seats, 20” BBS Detroit alloy wheels, cross-drilled Brembo brakes with red calipers, and Alpine premium in-car entertainment (ICE) system. There were, however, three things I wanted that it lacked: a modern navigation system and the ability to make hands-free phone calls and play music from my iPhone.
After considerable thought and research (along with some invaluable advice from Steve Klonsky, TheJagWrangler) I found a way to kill all of these “birds” with one “stone” while adding a four-gauge display with “analog” clock and a rear-view backup camera. When I connect my iPhone 6S Plus to a lightning cable coming out of the coin holder located in front of the gearshift, the phone’s screen is mirrored on the in-dash navigation screen and its audio output plays through the car’s Alpine premium ICE system.
With this one simple connection, I now have all of the following:
A current navigation system with turn-by-turn voice directions, using either the Maps or Google Maps apps
With a subscription to AppleMusic, the ability to play anything in the vast iTunes library using the Music app
Hands-free phone calling, using Siri voice command and the Phone app
A four-gauge engine monitoring display with analog-style clock, showing oil pressure, supercharger boost, battery charge, and coolant temperature
An automatic rearview backup camera
Best of all, the entire installation looks “stock” – the only visible modification is a groove in the “change holder” in front of the gearshift, where I place the phone.
I worked on the project off and on for about six months; total cost of materials was about $1,000.
Dashboard video screen mirrors iPhone 6S Plus
CarOS app emulates Apple CarPlay
DashCommand app displays gauges and clock
Display automatically switches to backup camera when in reverse gear
INSTALLATION PART 1: NavTool 3.0
The heart of my system is a device called NavTool 3.0, which is located in the trunk and spliced into the video wiring that connects the navigation DVD-ROM player to the dashboard video screen. An HDMI cable runs from NavTool, under the back seat, to the center console, where it plugs into an Apple Lightning Digital A/V adapter. To charge the iPhone, an Aukey CC-C5 Car Charger USB-A to Lightning Cable connects power from the cigarette lighter to the lightning input on the A/V adapter. A female-to-male lightning cable extension runs from the A/V adapter output and up through the “coin holder” in front of the shifter, which I modified with a Dremel tool to hold my iPhone 6S Plus. Finally, in order to play the iPhone’s audio through the ICE system, a device called AUX-JAGR Audio Adapter is needed to connect the NavTool “audio out” jack to the Alpine power amplifier. (Thanks to Steve Klonsky for this lead!)
The Parts
NavTool 3.0 (NAVTOOL INC, $300)
AUX-JAGR Audio Adapter (Discount Car Stereo, $70)
Apple Lightning to HDMI A/V Adapter (Amazon, $45)
Lightning Female to Male Audio & Video Extension Cable – 3.3’ (Amazon, $9.30)
Aukey CC-C5 Car Charger USB-A to Lightning Cable (Amazon, $20)
SecurOMax Braided HDMI Cable – 12’ (Amazon, $13)
NATIKA WD-0075 Waterproof HD Backup Camera (Amazon, $40)
40A Relay Harness, 5 Pin Bosch-Type (Amazon, $17)
CarOS app (App Store, $19.99/year)
18 gauge stereo speaker hookup wire (black and red) – 40’ (Amazon, $13)
Heat shrink tubing
Black plastic electrical tape
Plastic cable ties
Video Connections
The NavTool Company claims that the installation of NavTool 3.0 in an X100 series Jaguar XK is a simple “plug and play” affair. It is not. This is because the installation instructions they provide are for cars with a Denso navigation system, rather than an Alpine system such as mine. In fact, the company had no instructions for installing their product in my car, leaving me to figure out how to do so on my own.
BEFORE WORKING ON ANY ELECTRICAL COMPONENTS, DISCONNECT THE BATTERY. Open both doors to allow the side windows to drop. Ensure that the doors remain open until after the battery has been disconnected. Disconnect the battery ground cable.
Once the battery has been disconnected, access the stack of components (CD changer, DVD-ROM navigation control unit, and power amplifier) located in the trunk. To do so, remove the black plastic piece that covers the right- (passenger-) side taillight assembly by unscrewing the two black plastic-covered “wing nuts” that secure it. Next, gently pull out the formed piece of grey fabric on the right side of the trunk, exposing the ICE system components (CD changer, DVD-ROM navigation control unit, and power amplifier). Unscrew two sheet metal screws from the top and two from each side of the case, disconnect all wiring harnesses and cables, and slide the components out.
Plugged into the back of the Alpine DVD-ROM navigation unit are 20-pin and 16-pin connectors. The wires attached to the 20-pin connector send the “video out” signals to the dashboard video screen. The red (R), green (G), and blue (U) wires send red, green, and blue signals, respectively, while the white (W) wire in pin 7 sends the sync signal. To install the NavTool unit, you must cut the R, G, U, and W wires. Do not cut the three thick white wires (BRD) in pins 2, 4, and 6.
20-pin connector
NavTool 3.0
As shown in the photo, the NavTool unit has a plethora of wires. I did not use the green, blue, brown, and purple wires that terminate in a 4-pin connector, at the top, and simply cut them off near the black cable tie. The three black RCA plugs are inputs for Video 1, Video 2, and a backup camera. I will describe them, as well as the connections to the six (red, orange, yellow, blue, gray, black) separate wires at the bottom of the photo, later. (On the side opposite the wires, the NavTool case has an HDMI input and a 3.5 mm audio output jack.)
For now, I will focus on the 10 (yellow, green, orange, brown, red, blue, purple, black, and two gray) wires attached to the second wiring harness from the top. I noted earlier that you must cut four wires coming from the 20-pin harness attached to the navigation unit: R, G, U, and W. Having done so, you then insert the NavTool unit “in the middle” by connecting four of the 10 wires to the four wire segments coming from the 20-pin harness (“control unit” side) and another four of the 10 wires to the four segments going to the dashboard video screen (“screen” side). The specific connections are shown in the table below.
20-PIN CONNECTOR WIRING
As the table shows, NavTool’s yellow (Y), green (G), orange (O), and brown (N) wires are connected to the red, green, blue, and white wires, respectively, on the control unit (wiring harness) side. NavTool’s red (R), blue (U), purple (P), and black (B) wires are connected to the red, green, blue, and white wires, respectively, on the screen side. Do not cut the thick white (braided) wires. The two gray wires on NavTool’s 10-pin wiring harness are not needed and can be cut off.
NOTE: I soldered all of my connections, then covered them in heat-shrink plastic tubing or wrapped them in electrical tape to prevent any possibility of “shorting.”
Next to be connected are the six individual wires at the bottom of the photo. The red (R) wire is connected to an ignition-switched power source. The black (B) wire is connected to ground. The gray (S) wire is connected to the parking brake; its purpose is to prevent you from watching videos while driving. (It’s grounded when the parking brake is engaged.) Because I had no intention of using an auxiliary video source (e.g., DVD player), I permanently connected the gray wire to ground. The yellow (Y) wire connects to a push button, to allow switching among multiple video inputs. Because I am using only one video input (plus the backup camera which switches on automatically when in reverse), I had no need for this function and therefore permanently connected the yellow wire to an ignition-switched power source. The blue wire is not needed and can be cut off.
These connections can be made by splicing these four wires to one of two wires (WU or B) coming from the 16-pin connector attached to the back of the DVD-ROM navigation unit, as shown in the table below.
16-pin connector
16-PIN CONNECTOR WIRING
As the table shows, NavTool’s red (R) and yellow (Y) wires are spliced into the 16-pin connector’s white wire with the blue stripe (WU) while the black (B) and gray (S) wires are spliced into the 16-pin connector’s black (B) wire.
For NavTool to automatically switch to the backup camera, it must detect when the car is in reverse. For most cars, this is done by connecting NavTool’s orange (O) wire to the wire powering the backup lights. In Jaguars, however, the wire connected to the backup lights is always “hot” EXCEPT when in reverse, when it is grounded. I addressed this by using an SPDT switch (“horn relay”). Specifically, pin 85 of the relay is spliced into the 16-pin connector’s black (B) wire, pin 86 is spliced into the 16-pin connector’s yellow (Y) wire, pin 87 is connected to NavTool’s orange (O) wire, and pin 30 of the relay is spliced into the 16-pin connector’s white wire with the blue stripe.
[NOTE: I inserted a 5 amp inline fuse between NavTool and the control unit’s switched ignition (white with blue stripe) wire, as recommended by the manufacturer.]
For my rear-view camera, I chose the NATIKA WD-0075 Waterproof HD Backup Camera, which attaches easily to the underside of the ornamental trim piece. It has a 145 degree angle view with backup guidelines and works in extremely low light conditions (0.005 lux).
Rear-view backup camera
The backup camera has a single black wire coming from it, which then splits into two wires: one carrying the video signal from the camera (yellow connector) and one supplying power to the camera when the backup lights are on (red connector). The kit includes extensions that attach to each of these connectors. After the camera’s frame has been screwed into the underside of the trim piece, the wires are passed between the it and its rubber gasket, across the underside of the trunk lid, and into the trunk, where they are connected to NavTool. (Use an upholstery tool to remove the buttons that attach the gray fabric to the trunk lid.)
Video camera wires fastened to existing wires
I used black electrical tape and cable ties to fasten the camera’s wires to the bundle of wires that passes diagonally across the inside of the trunk lid. Next, I passed the video and power wires through the ridged plastic tubing and into the trunk, following the same path as the wires that are in the tubing.
Before proceeding, though, I had to solve three problems. First, the yellow RCA plug at the end of the video out wire was too big to fit through the tubing. Second, the extension for the power connector was too short to reach all the way to the NavTool unit, where the horn relay and ground wire connections are located. And, finally, there wasn’t enough room in the plastic tubing to accommodate the existing wires that pass through it PLUS the video extension wire and the stereo hookup wire.
To fix the first problem, after connecting the video extension wire, I cut it about 6” from the end, leaving the male RCA connector attached to the severed wire. To fix the second problem, I connected a generous length of 18 gauge paired stereo hookup wire to the red (power) and black (ground) wires at the end of the power connector extension. I was careful to separately wrap the two connections with electrical tape, so that the bare wires could not touch each other.
To deal with the third problem, I used the tip of a single-edge razor blade to very carefully make an incision along the entire length of the plastic tubing. I was then able to push the new wires into the plastic tubing, almost fully close it around all the wires, and wrap the bundle with electrical tape as I proceeded.
Backup camera wiring routed through plastic tubing
Audio Connection
As noted, NavTool has a 3.5mm stereo mini-plug audio output jack. This is intended to connect to an AUX input on the ICE “head unit” in the dashboard. Unfortunately, however, the Jaguar’s Alpine head unit does not have an AUX input. To address this (at the suggestion of Steve Klonsky, TheJagWrangler), I bought a device called AUX-JAGR, which is inserted between the CD changer and the power amplifier. A short wire with 3.5mm male stereo jacks on both ends then connects the NavTool audio output to the AUX-JAGR audio input.
AUX-JAGR
With AUX-JAGR in place, and the iPhone connected to NavTool, audio from the iPhone plays through the ICE system when “CD Changer” is selected. (The CD changer itself, though disabled, is still necessary for NavTool and AUX-JAGR to work.) Volume can be controlled via either the head unit’s volume control knob or the steering wheel controls; music is selected using either Siri voice activation or the Music app on the iPhone’s touch screen.
Connection to iPhone
To connect NavTool to an iPhone, remove the rear seat cushion by pulling off the two black plastic “nipples” that cover the nut and bolt assemblies on the left and right sides (bottom front of cushion) and unscrewing the nuts. Slide the center seat belt buckles through their leatherette “holder,” lift the cushion out of the car and set it aside.
HDMI cable attached to NavTool (top of ICE components' case)
Connect the HDMI cable to NavTool and run it through the hole between the trunk and the right-hand (passenger’s) side rear speaker, behind the speaker, and underneath the seat cushion. (Note -- the HDMI cable I ordered was too long, so I coiled up the excess as shown in the photo. The parts list shows the correct length - 12'.)
Cable ties hold HDMI cable (black and silver) to wire bundle
A/V Adapter plugs into Lightning Female-to-Male Extension
Plug the HDMI cable into the female HDMI input of the Apple Lightning-to-HDMI A/V Adapter. Plug the A/V adapter into a 3.3-foot Lightning Female-to-Male Extension, as shown in the photo. Remove the four black screws that hold the lid of the center console in place, lift out the lid, and set it aside.
Break the glue that secures the black plastic “change holder” at the front of the center console by carefully running a couple of credit cards around its edges. Lift out the change holder and set it aside. Use a stiff, but flexible, piece of wire to “fish” the extension cable from under the back of the center console, along the left-hand side of the gear shift, and up through the hole where the change holder was located.
Open the lid that covers the cigarette lighter and plug in the Aukey charger. Run the charger’s black wire under the back of the center console and plug it into the A/V Adapter’s female lightning input. Use cable ties to secure the connections of the Aukey power wire and the lightning extension cable to the A/V adapter.
Re-attach the center console lid. Place a piece of sponge between the A/V adapter and the front edge of the back seat to ensure that wires don’t get pinched. Re-install the back seat. Re-install the the rear passenger-side speaker cover.
Test the System
Re-connect the battery grounding cable.
Turn the ignition switch to Position 2, turn on the dashboard video screen, plug the lightning connector into the iPhone and turn it on.
Push the volume button to turn on the ICE head unit and select “CD Changer”. The LED screen below the cassette deck should have a message saying “NO MAGAZINE”.
Using the iPhone touchscreen, you should be able to select any music and listen to it through the ICE system with the Music app (or Spotify or other apps). Alternatively, you can say, for example, “Hey Siri… play the Rolling Stones essentials playlist” and the selection will play.
You should also be able to select any navigation app (Apple Maps, Google Maps, Waze) using the touchscreen and see the map on the dashboard video screen while also getting turn-by-turn audio directions through the ICE system. You can choose destinations in several ways, including by using Siri voice control.
Finally, you should be able to place phone calls using Siri and answer incoming phone calls using the iPhone touch screen. You will need to set “speakerphone” as the default, because the incoming conversation is not played through the ICE system speakers.
In my next post, I'll describe what's involved in displaying engine performance information on the dashboard video screen.
Ray is the Jaguar screen new and also does it reflex the iPhone or is it a new touch screen installed. Great work
Ray is the Jaguar screen new and also does it reflex the iPhone or is it a new touch screen installed. Great work
The video screen is the original one used with the car's DVD-ROM- based SatNav system; it does not have touch screen capability. With the NavTool 3.0 unit installed, the iPhone's display is mirrored on this screen (except when the car is in reverse, when it switches to the backup camera). The system is controlled via the iPhone, which sits in the old change holder, using either touch or voice command ("Hey, Siri").
Hello,
I have a 2010 XK Convertible and want to do the same upgrade but for an Android system anyone have a good place to go for a plug and play upgrade
These instructions work equally well with any kind of smart phone that has Bluetooth connectivity; they are not specific to iPhone. NavTool 3.0 mirrors the phone on the video screen and BT45-JAG connects the phone to the in-car entertainment system using Bluetooth.

 04-29-2018, 12:17 AM