When you click on links to various merchants on this site and make a purchase, this can result in this site earning a commission. Affiliate programs and affiliations include, but are not limited to, the eBay Partner Network.
I am rebuilding the complete front end on my 2001 xk8. Shocks, mounts, tie rods all bushings and ball joints every rubber piece will be replaced.
I called the jaguar dealer he told me the lower control arm ball joints are not serviceable. It looks like they may be but not for a novice i can get every single part on rockauto or elsewhere except that. I dont want to pay $600 for the whole control arm what are my options or what have you guys done? This is how worn the mounts were... dont think anyone ever fixed anything on this car suspension wise guess i will have to make up the slack.
I've moved your question from X150 for the 2006-2014 model to X100 forum for the 1996-2005 model. Members here with the same model will be able to help.
Please follow this link New Member Area - Intro a MUST - Jaguar Forums - Jaguar Enthusiasts Forum to the New Member Area - Intro a MUST forum and post some information about yourself and your vehicle for all members to see. In return you'll get a proper welcome and some useful advice about posting to the forum.
Mik - yes the lower control arms CAN BE repaired!!!!! I did it - can be a bit of a pain but - here is a link to my thread (starts off with tie rod ends but scroll down for pics of the lower control arm) https://www.jaguarforums.com/forum/x...-217025/page2/
If you are in the Summerville/Charleston SC area - bring the control arms by and I can press out the old/press in the new - had to buy a 20ton press to do mine that is currently collecting dust in my garage
The lower ball joint is serviceable, the problem is that the bevel makes using a press difficult. I know a special tool is required so that a press can be used, but in absence of it, I have read that some members have fashioned their own tool in or to be able to use a press to install the lower ball joint.
Another option you can go with if you have an angle grinder, is to grind off a bit of the control arm at two perpendicular sides to create enough of a flat surface to be able to use a press. This is what I did and can report I have had no issues. What you are removing is not a structural component of the control arm.
Most places don't want to tackle it because of the angled face which makes it difficult to press in the new ball joint. I have a 6x6 block of wood to put under the control arm - it has some give but is strong enough to absorb the pressure. Just let me know - be glad to help out
Finally, after reading for a year I can contribute something more than a "me too". I happen to be in the middle of my front suspension rebuild. It was suggested and link was forwarded to me to try the chisel trick to get the lower bushing out. If you look at the pics already posted here, the bushings have a lip you can whack with a hammer and chisel to get them out. Doesn't work so well. I have the cut and bruised thumb to prove it. Mostly my fault of course but I still don't recommend it.
First I took the 2 pieces of the lower arm apart for better access and put it in a vice. I drilled a hole through the rubber and kinda wallered it out (that's a technical term) until I could get a round tungsten carbide hacksaw blade through the hole. I assembled the saw around the bushing area and cut the outer shell of the bushing until it had a gap that received the pressure it has against the inner diameter of the bushing hole. it takes patience and care not to damage the arm but a few scratches won't ruin it.
I then drove it out easily with a proper size socket as a drift. I used a flapper sanding wheel inside the bushing hole to clean it up. I do have a hydraulic press but there was no way to support it under pressure. I had to get creative with driving it back in as many fixture or mandrel type things had to be used. I took my spindles and straight control arm to a machine shop for bearings and ball joint removal and press in.
This is my first attempt to add pics here so be patient. I also have painted removed suspension parts with POR 15, very tough and rust proofing paint.
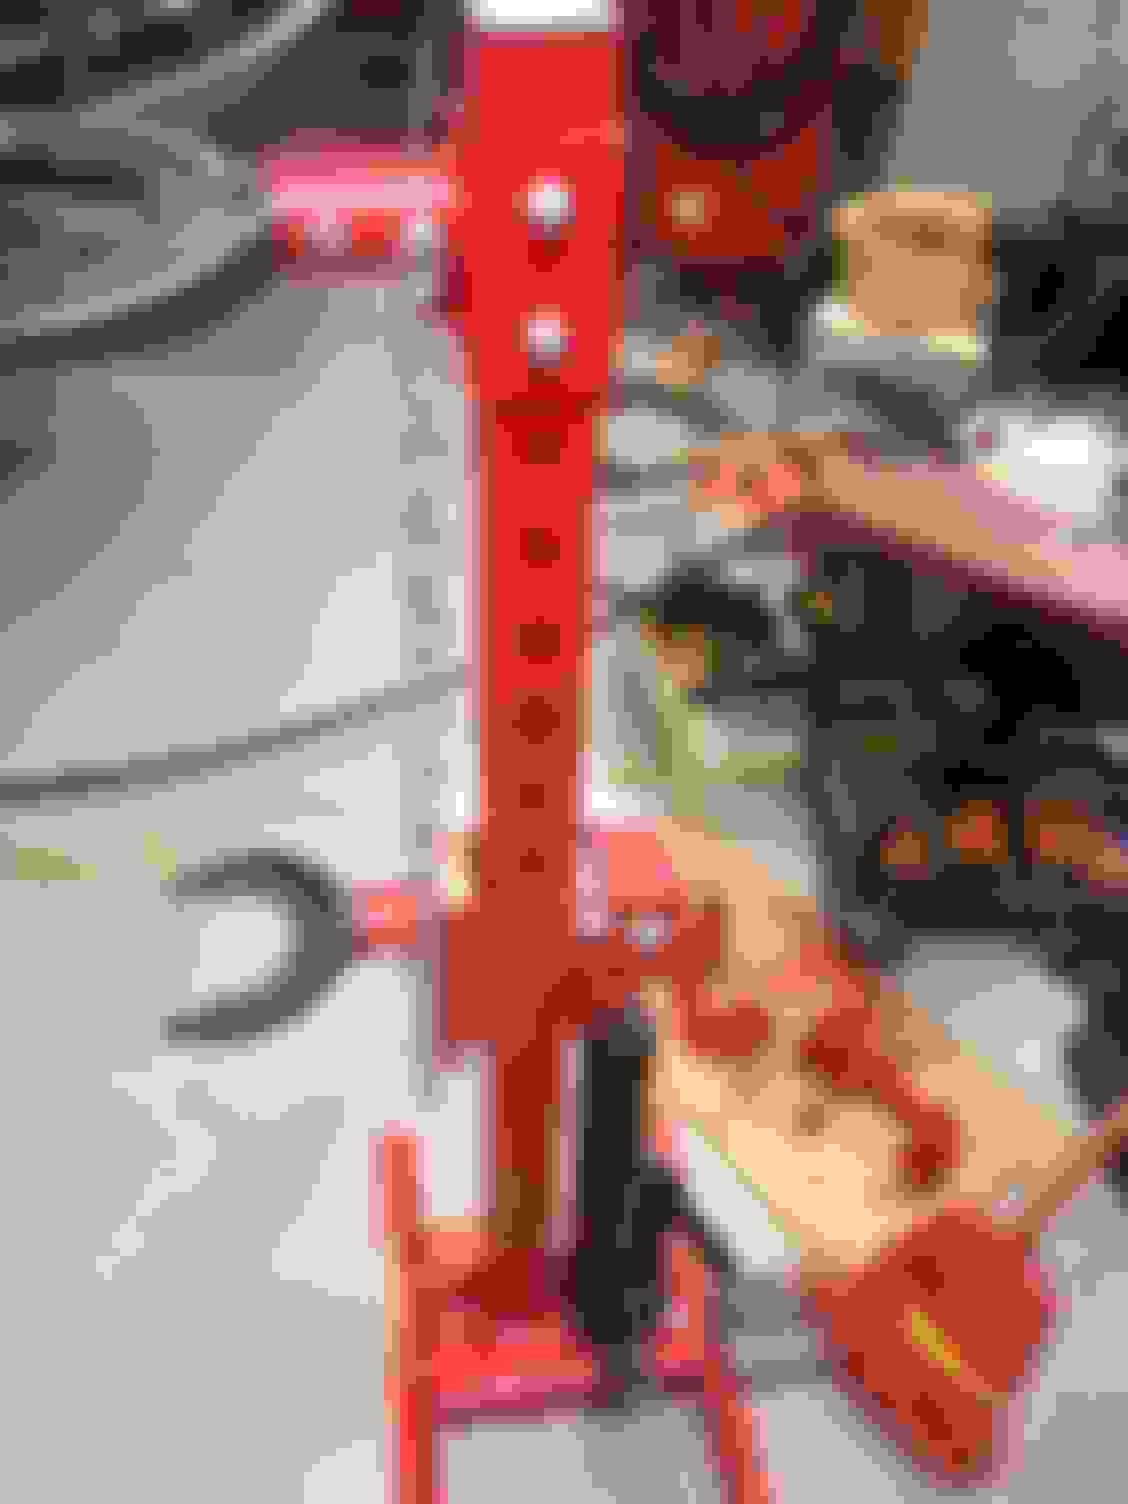
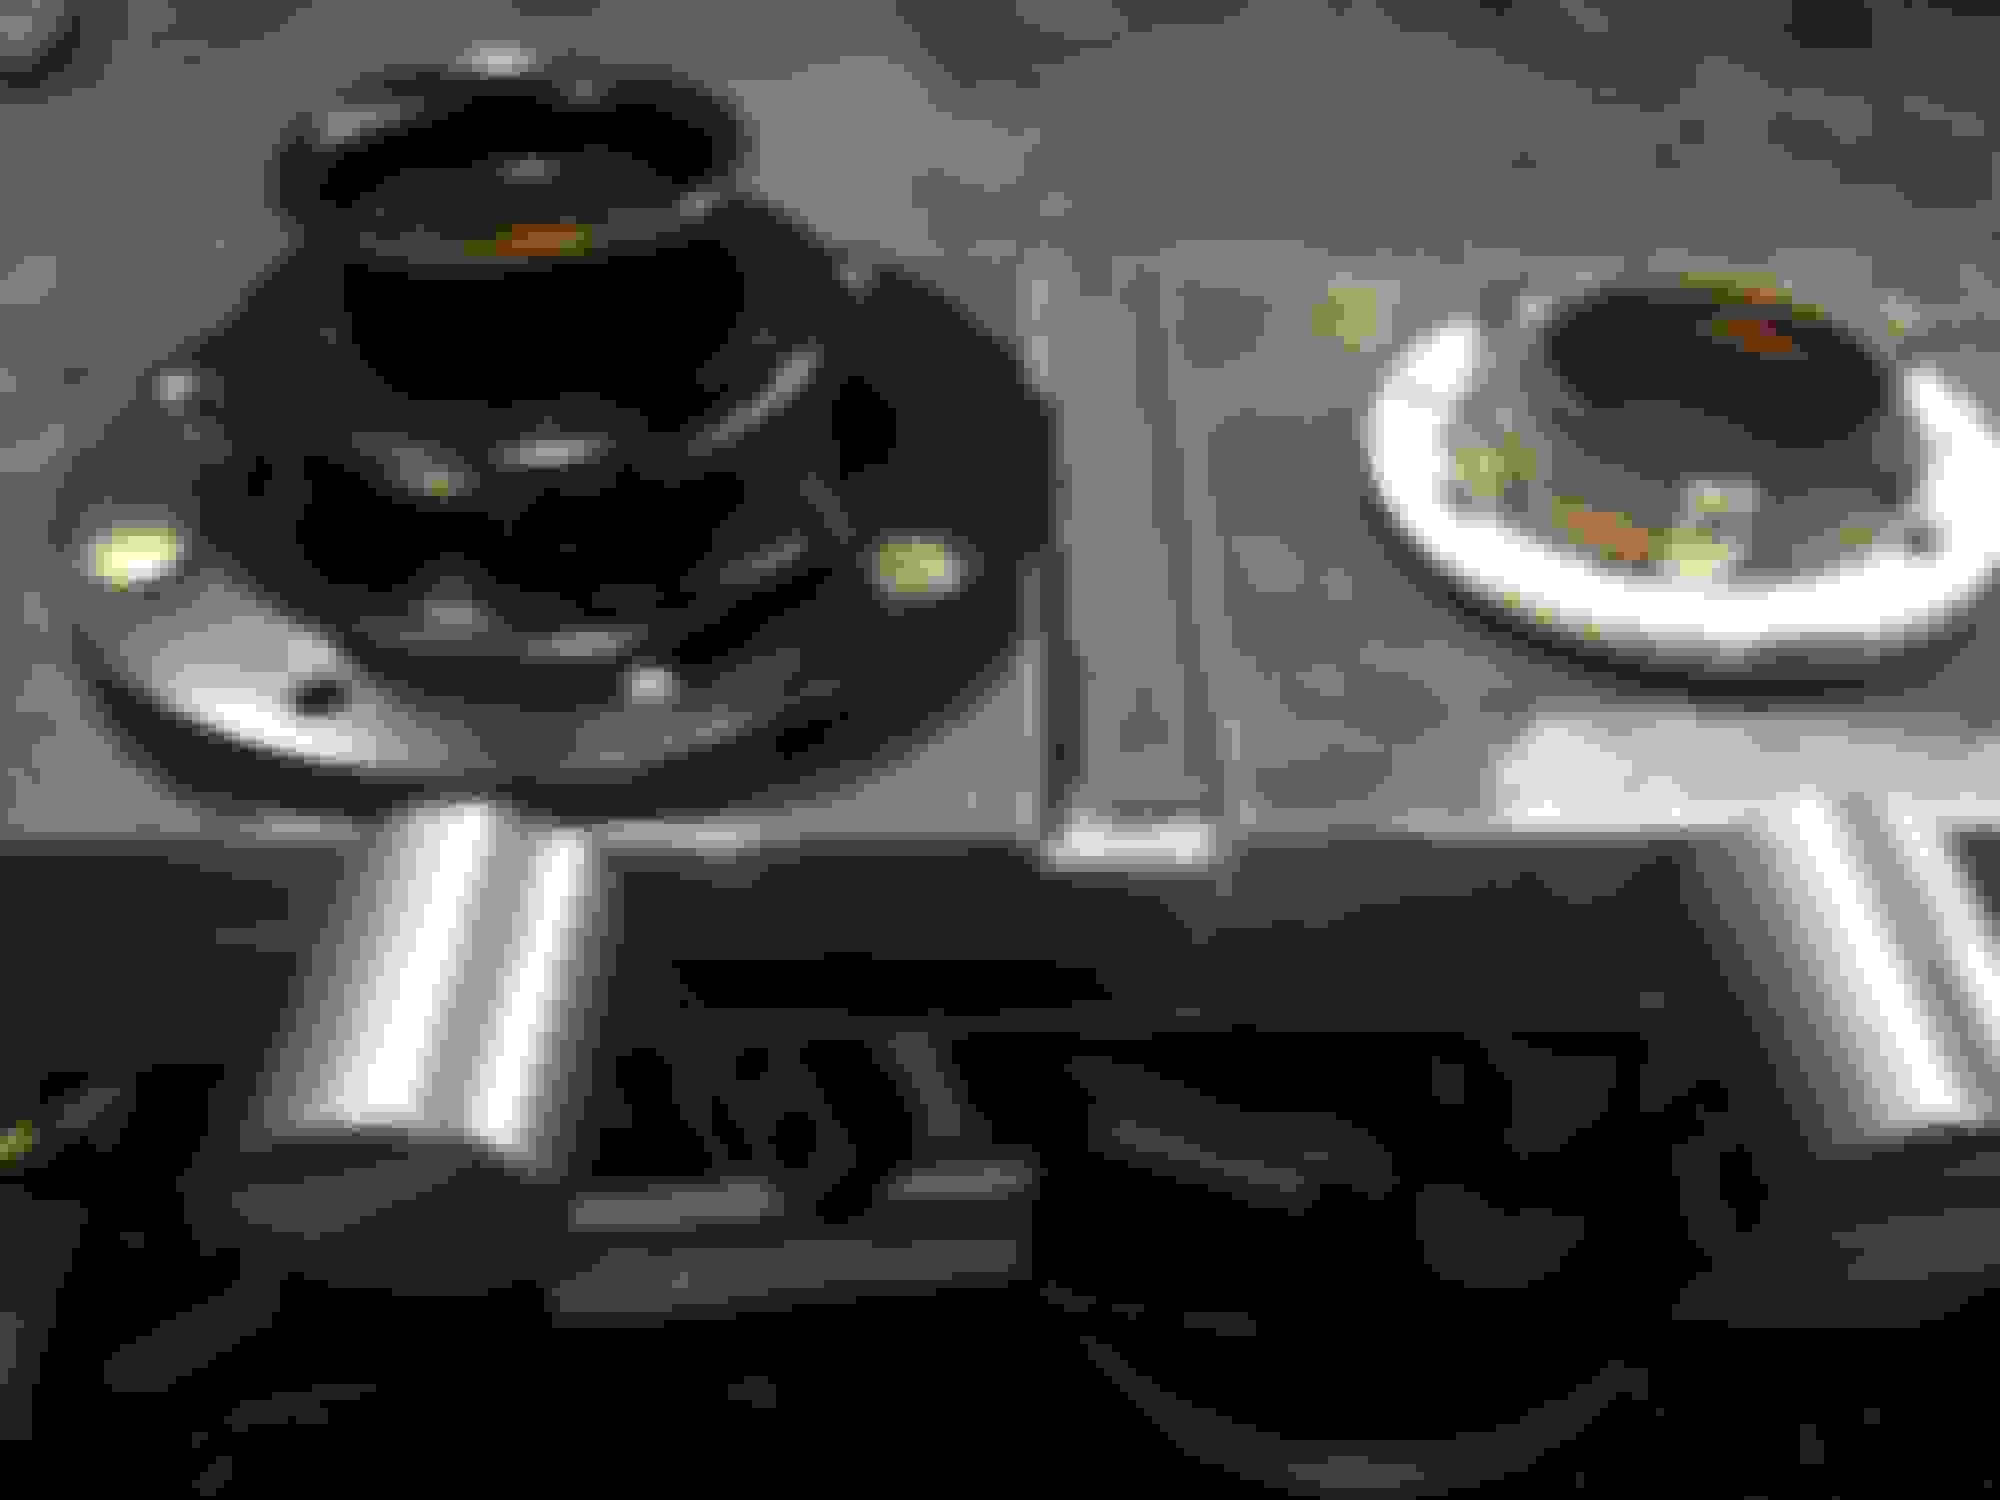
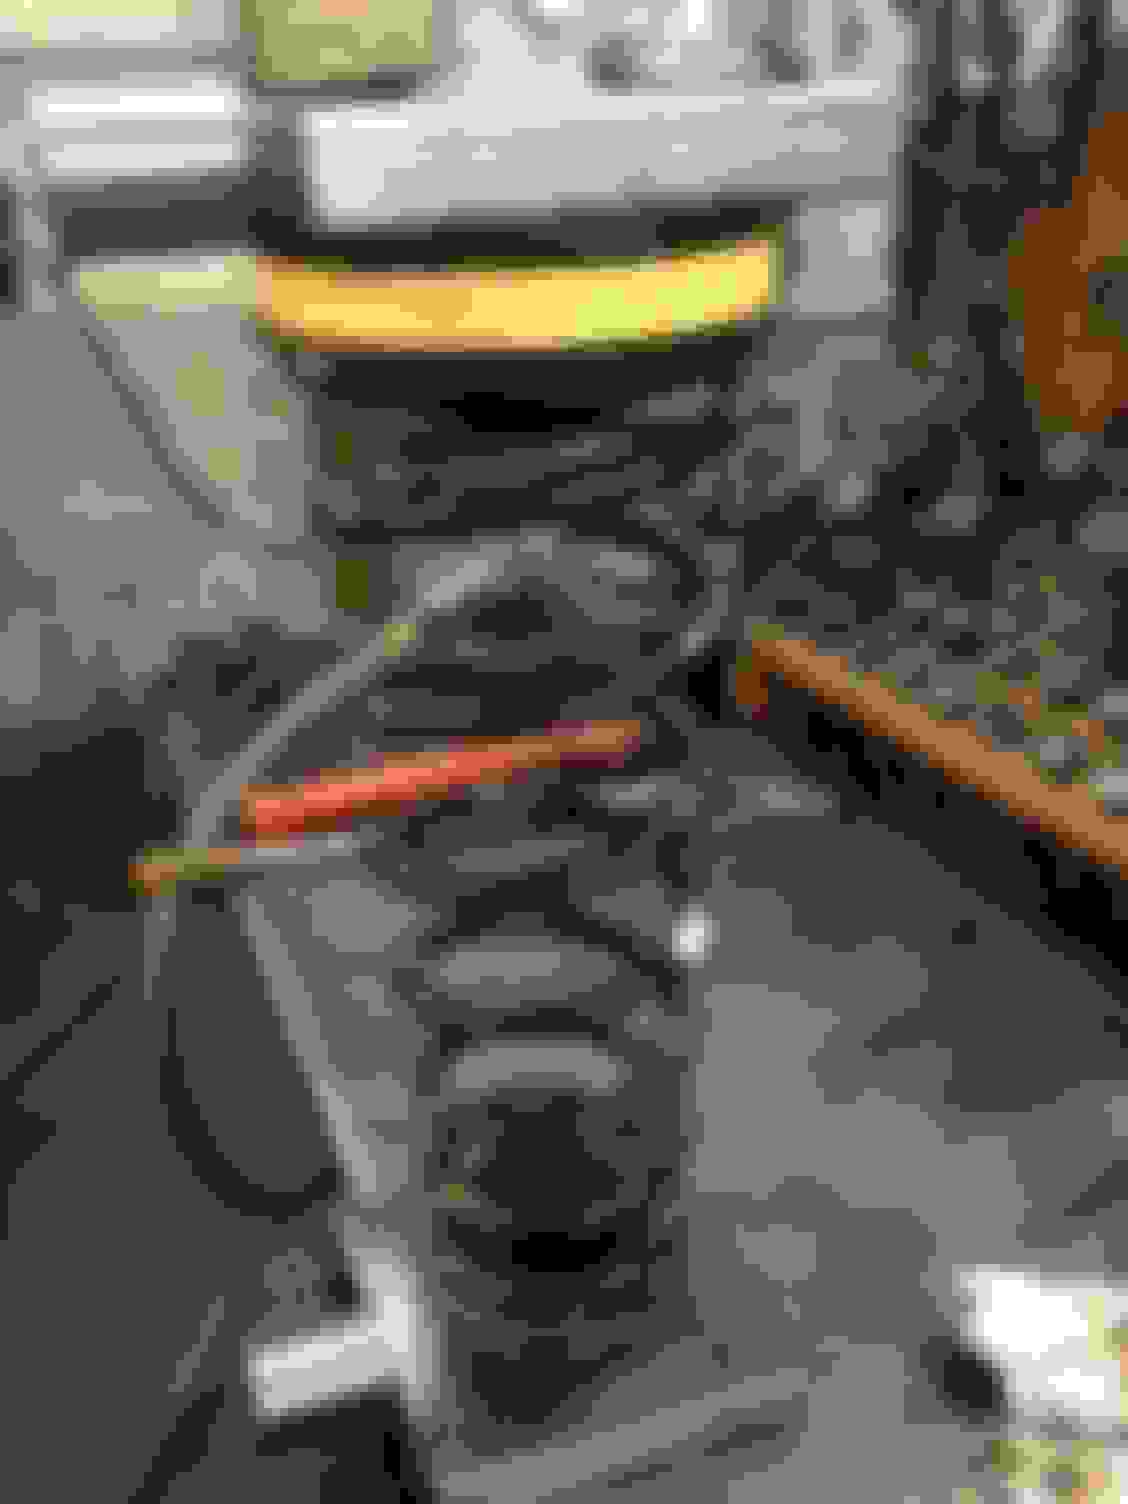
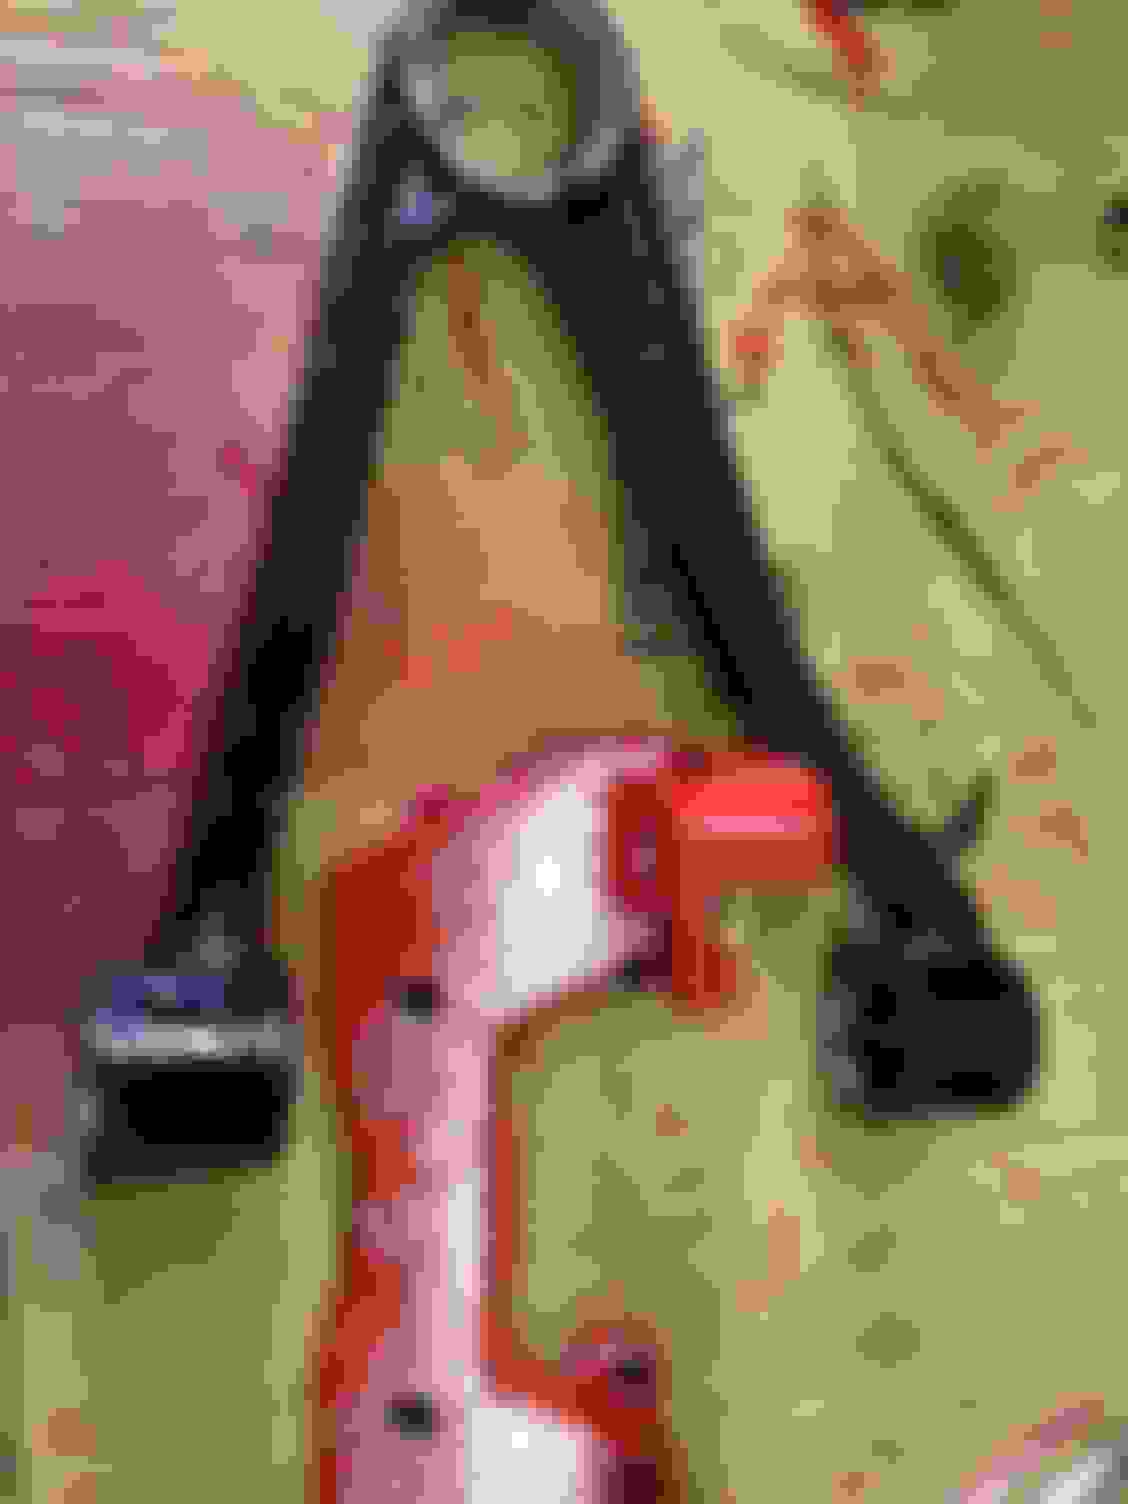
First pic is painted parts going back in. Second pic is strut compressor I bought to put the strut back together. Didn't work as you can see the lower attachment is slanting downward due to a sloppy fit. The spring popped out twice so I went to the drawing board. A friend runs a machining company and was eager to help. The third pic is the attachments we made today to replace the horseshoe shaped castings that came with the press. On the left is the top fixture upside down from how it will be used. There are holes for the mounting screws which traps it in place. On the right is the bottom fixture with a recess to keep the bottom ring from slipping out. There are holes in the middle of each to get the shock in from the bottom and the bolt on at the top. I will compress all this together as shown in the forth pic and it will be straight and safe. They still need to be welded before use and I'll update you when I put the strut together. The fifth pic is the upper arm and caliper bracket painted all nice a pretty
A big shout out to Enderle Machining in Cincinnati, OH.
Thank ya, thank ya very much. LOL I'm not taking a bow just yet but I have confidence that it'll work fine. I am more than willing to help out anyone within range to change their top mounts after I test this. Also, to add to my previous post, those plates are 6" square by 1" thick. They may not need to be that thick but it was the material at hand and overkill is better than under. The cylindrical parts have a stud going into the plat for better locating and need to be welded.
Of course, you mileage may vary. TM
Here's the result of my new attachments for the strut compressor. First is the full length sandwich and second is the finished product. Only took a few minutes with the right tools. It was easy as pie. Now if my new brake pads would get here I'll take her for a spin. TM
Thanks, designed the fixtures myself, not the post and pump part. For the record, I wrapped the job today. My brake pads came on Sunday (thanks FedEx) and I buttoned up the front end. I completed the trans fluid refill (while running, don't get me started on that one) today. So that's all front and lower bushings, strut mounts, wheel bearings, upper and lower ball joints, turned the front rotors and new pads, engine oil and filter, trans filter and fluid and sway bar bushings. And I painted the calipers and brackets.
I think I'll just drive it the rest of the summer before getting in to too much else. I may put new Continentals on the rear when I have it aligned and rebalanced. It's a good thing I like this car, LOL. TM
 05-16-2020, 08:35 AM


 TM
TM


