When you click on links to various merchants on this site and make a purchase, this can result in this site earning a commission. Affiliate programs and affiliations include, but are not limited to, the eBay Partner Network.
Oddjob,
The fact that you are doing this out of doors blows me away! I am constantly whining about the fact that I don't have a garage to work in, even when doing something as simple as replacing brake pads. To see what you've done working outside is absolutely humiliating. Thanks so much for documenting the resurrection. A great addition to the Forum info!
John
When you spend all week pressing little buttons in an over-air-conditioned office, being outside in the sun is an absolute pleasure.
And Michael, thanks for the shim info, that saved me some time. I'm sure it would be somewhere in the 3275 page manual, it's just a case of where!
So there I was in the garage last night, about to clean some parts and paint them black, when I spotted some mid-blue heat-resistant engine paint on the shelf. Couldn't resist it... It'll be interesting seeing what it looks like when it's assembled. :-)
So I fully applaud you for doing this, but I do have to ask, on the financial side of things, do you think when you are all said and done, that this will be cheaper than buying a one in decent condition. I also fully appreciate thats not the idea either, because clearly you love doing this and you also wanted to save a car.
I'll get this one oddjob. For those of us who do restoration, not just fix things as they break, it's not a job, if it's yours. Now for someone else, it sometimes turns into a big pain and that is mostly because they always are in a hurry. When you work on your own, it's do I feel like working on it today! When all is done, we look back on the results and kind of smile at the sense of accomplishment. That doesn't mean we don't cringe at the price of some of the parts, but it�s never about the money.
We all think a bit differently from one another. I could never be a restorer. My economics-first mindset makes me a maintainer. But I do appreciate beautiful restoration work. Your 1947 Triumph Roadster certainly comes to mind....
Wayne, great explanation. The slightly cliche view is that it's 'about the journey'. It's also about preventing waste, being creative, solving problems (just like others would do with a jigsaw puzzle or computer game), and then a major sense of achievement when it all comes together. Sometimes at the end of the day, and sometimes during the day, it's time to get a coffee, sit down and just stare at what you've done, like looking at a part finished work of art, for further inspiration. And the great thing here, is that when the artwork is finished, it's time for a blast down the road. Yay.
Having said that, all up parts cost is about �500 so far! Plus the doughnuts that I traded for the sheet metal. I'll do a bill of parts when it's passed it's UK MOT test and let you know how it works out.
Oh.... and am loving the forum, I just hope what I've achieved might inspire others to try a few things.
Update for this week.... Last weekend the top wishbones were stripped back out, new bushes replaced the crushed ones, new ball joint boots were fitted, and the right number of caster shims added. It all lined up nicely and moved very smoothly. Coffee and cake appeared from the house just in time to allow some time sitting and contemplating the job.
Last Tuesday, got home from work, decided some non-computer-keyboard therapy was in order, so popped out to the garage and fitted the steering rack.
It's at this point that you find out two things. Firstly, we really should have fitted the lower wishbones first, as the fulcrum bolts won't go in with the rack in the way, and secondly it's always a good move to check the threads on a second-hand subframe as otherwise, you may find that the last steering rack bolt that you fit doesn't go in. Damn.
Saturday; and following running all over surrey, trying to find a reasonable car for a friends son to buy, we managed to get some time on the Jag. As the rack had to come out again anywhow, to fit the lower wishbone, I ran a 'second' 10x1.5 tap through the rack mounts, which cleaned up the threads nicely.
The lower wishbones went in easily, just don't forget the fulcrum reinforcement, or you have to take the mounting bolts out again to fit it. Clearly not enough time spent supping coffee and staring at the job, planning the next steps. Coffee and ginger cake arrived just as the bolts were refitted.
Once the lower wishbones were in, the rack went in easily. Having already removed it twice and refitted it once, we were getting quite good at it.
Now everything was connected, and assembled in the correct order, it was time to torque it all up. It takes time checking everything, but I'm not keen on having anything come undone, so time was taken.
Finally added the blue disc caliper mount. new disc and pads. The right side is nearly finished, looks quite good I think....
Fantastic work - am following this thread with great interest.
I know it's a bit late now but .......... it is possible to get the lower bolt back in with the steering rack on the car. With the steering on full lock AND the rubber gaiter unclipped and pushed back, there's just room to slide the bolt in. Obviously, full lock the other way for the other side !!
One step forwards - eighteen back... Secondary tensioners
Over the last couple of weeks, the right side brakes have been refitted, the brakes bled, wheels fitted and it's been lowered to the ground. It looks spookily like a real car now.
Checked the lights for the MOT. Not being able to turn the hazard lights off is, I think, definitely an MOT failure. Certainly doesn't look cool. The leaking hydraulic fluid from the header rail had dripped into the centre console switches and congealed so that he buttons wouldn't move properly. Stripping the console apart wasn't too difficult. Then having washed it all in the kitchen sink, it seems to all work now. Yay! Another step forward. Maybe just one too many. Little did we know Jaguar 'Murphy' was about to strike.
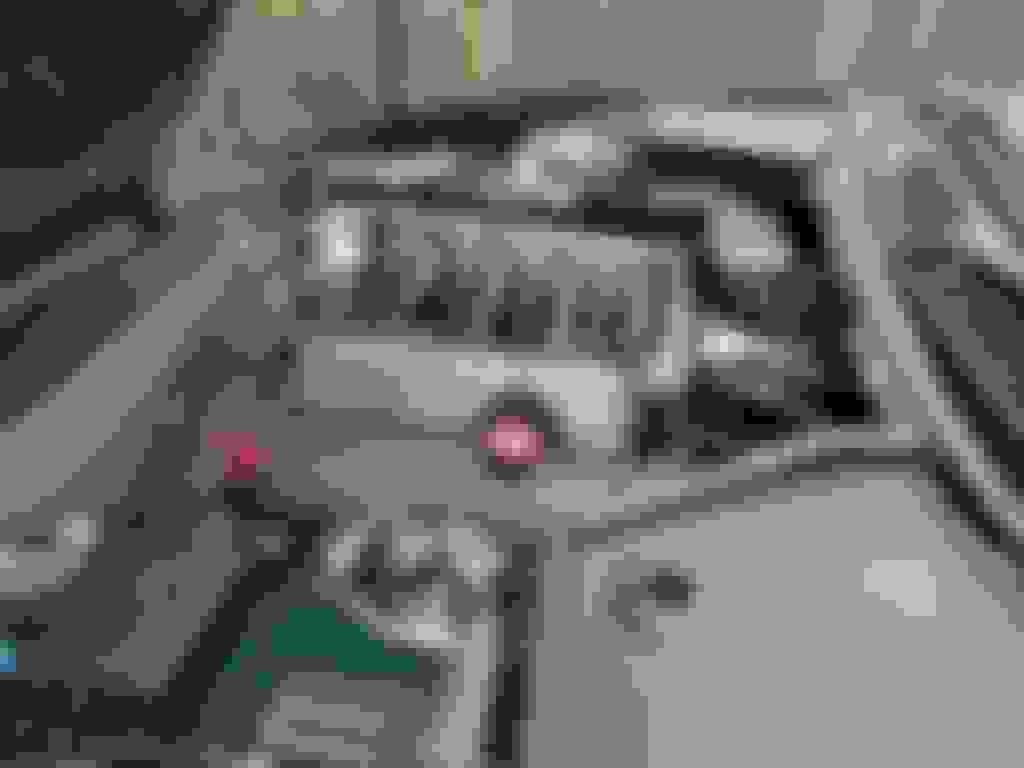
Before starting the engine again, I took the advice on just about every thread here, and decided to check the secondary cam chain tensioners. It's only done 54,000 miles so there was a possibility they may be ok? Right? It's had a full Jaguar main dealer service history. And sure enough, the left bank chain tensioner is in one piece. However, the left revealed it had started to break up. Much sipping of coffee and time spent staring at it then ensued, I suppose we were hoping that it would repair itself.
It didn't.
See the pic. The bottom slipper has broken away from the metal, and a large piece of it was still sat on the chain case. But not all of it, the rest is probably in the sump. Erk. The worse piece of news is that the chain has been damaged by the metal of the bare slipper. This must have been very, very close to terminating the engine.
Now I need to replace the chain, might as well do the whole job. So I am going to have to remove the front of the engine. It was always on the plan, as the front crank seal leaks oil, but I hadn't quite planned to do it yet. I wanted to get it an MOT so that I could move it around. Oh well... here we go....
Anyone know where I can beg or borrow maybe even hire, the special tools needed?? Any feelings on the best and most complete kit of parts to buy over here in blighty?
Cheers,
Dale.
Never let the technology get the better of you. Right?
Over the last couple of weeks, the right side brakes have been refitted, the brakes bled, wheels fitted and it's been lowered to the ground. It looks spookily like a real car now.
Checked the lights for the MOT. Not being able to turn the hazard lights off is, I think, definitely an MOT failure. Certainly doesn't look cool. The leaking hydraulic fluid from the header rail had dripped into the centre console switches and congealed so that he buttons wouldn't move properly. Stripping the console apart wasn't too difficult. Then having washed it all in the kitchen sink, it seems to all work now. Yay! Another step forward. Maybe just one too many. Little did we know Jaguar 'Murphy' was about to strike.
Before starting the engine again, I took the advice on just about every thread here, and decided to check the secondary cam chain tensioners. It's only done 54,000 miles so there was a possibility they may be ok? Right? It's had a full Jaguar main dealer service history. And sure enough, the left bank chain tensioner is in one piece. However, the left revealed it had started to break up. Much sipping of coffee and time spent staring at it then ensued, I suppose we were hoping that it would repair itself.
It didn't.
See the pic. The bottom slipper has broken away from the metal, and a large piece of it was still sat on the chain case. But not all of it, the rest is probably in the sump. Erk. The worse piece of news is that the chain has been damaged by the metal of the bare slipper. This must have been very, very close to terminating the engine.
Now I need to replace the chain, might as well do the whole job. So I am going to have to remove the front of the engine. It was always on the plan, as the front crank seal leaks oil, but I hadn't quite planned to do it yet. I wanted to get it an MOT so that I could move it around. Oh well... here we go....
Anyone know where I can beg or borrow maybe even hire, the special tools needed?? Any feelings on the best and most complete kit of parts to buy over here in blighty?
Cheers,
Dale.
Never let the technology get the better of you. Right?
SNG Barratt or Dave Roche at DCR spares will have the parts you need in a kit. Dave also hires out the required tools if I remember correctly.
Over a year has passed since I picked this car up, but hey-ho, we're not giving up yet. Happy New Year to all.
November to January has been filled with recovering from a really annoying back injury and a slightly less annoying Christmas. Note to self, I'm not 25 any more and must not lift heavy stuff again.
So no Jag progess, except for a little that I couldn't stop myself doing...
Since I'm going to do all the chains and tensioners, I thought I'd check the water pump too. Might as well order all the parts at once. As I took it out, the pump case cracked where it goes into the cam cover. Nice. Although it had the dubious black plastic impeller, it was all in one piece. Damn. However further twiddling revealed rumbly bearings which means it is just as well it's being replaced. Cool.
Then I dragged the washing-up bowl full of anti-freeze out from under the car. I'm betting that Jaguar didn't fit a cloudy yellow coolant.
Tea and chocolate hob-**** arrived at this point, so Jack and I stopped, sat down and stared at the car for a while. Yet again it didn't fix itself, so instead, we started asking questions...
Like... should we consider the cloudy yellow coolant to be a head-gasket issue?
As they are the original 1999 head gaskets, do we assume they're about to leak anyway?
If we have all the front off of the engine to do the chains, it can't be too much more hassle to do the head gaskets can it?
If we replace the head gaskets, we can also replace all the valley hoses, and the thermostat tower as we'll have all the inlet manifold out.
In Summary...
-We take the front off of the engine to do the cam chains.
-We take the bottom off of the engine to clear out the remains of the chain tensioner from the sump.
-We take the top off the engine to do the head gaskets.
Doesn't that only leave the block in the car???
I'm betting that's about �1,000 of parts alone. Any closer guesses out there??
Should we just find a second-hand steel liner engine to replace the Nikasil one? Aahh.. but might a used engine require all the same work?
More tea and biscuits required.
Oh.. and I cleaned the roof a bit more and have ordered some Renovo to make it the right colour. Apparently one-day it'll stop raining so that I can clean it up properly.
For those following this one, a very short update. New pics and posts to come. The front of the engine, both heads and the sump are off. I even remembered to video most of the task. When I get a second or two, I'll edit it and post it up....
It's taken a while, but the heads are back on the engine. There's a video on youtube of the dismantling. (search "Jaguar XK8 V8 Engine Cylinder Head Removal AJ26/AJ27 XK8") After it was dismantled, it looked like this...
Senior engineer Jack cleaning the gasket surfaces.
And now, it looks like this...
Nearly all back together
In the end we needed...
-Complete set of chains and tensioners.
-Water pump
-Valley hoses (the norma connectors came undone easily).
-Complete gasket / oil seal set.
-Three new inlet valves. The area where the valve seals rubbed was very pitted. Odd.
-New steel drive belt idler and tensioner.
The valves were way worse than I though they would be, so they were all cleaned and ground in. It tool all day to grind in 32 valves!
Now we've found out that the fuel pump has failed. So next weekend it's out with the fuel tank...

 08-04-2015, 05:43 PM