Log In
Register
Forums
General Jaguar Forums
New Member Area - Intro a MUST
Jaguar Forums Feedback & Suggestion Center
General Tech Help
Regional
Jaguar Models ( Current )
XF (X260)
F-Type ( X152 )
XE ( X760 )
E-Pace
F-Pace (X761) / C-X17
I-Pace EV
Jaguar Models ( Modern )
XF and XFR ( X250 )
XJ ( X351 )
X-Type ( X400 )
S-Type / S type R Supercharged V8 ( X200 )
XJ XJ6 / XJ8 / XJR ( X350 & X358 )
XJ XJ8 / XJR ( X308 )
XJ XJ12 ( X305 )
XJ XJ6 / XJR6 ( X300 )
XK8 / XKR ( X100 )
XK / XKR ( X150 )
Jaguar Models ( Classics )
Mark V - X 420G
MKI / MKII S type 240 340 & Daimler
XK120 XK140 XK150
E type ( XK-E )
XJ6 & XJ12 Series I, II & III
XJS ( X27 )
XJ40 ( XJ81 )
XKSS
XJ220
Other Jaguars
Other Jaguar Models / Concepts / Replicas
Diesel variants
Diesel variants - All models
Non Jaguar vehicles
Non-Jaguar Vehicles
Brand Review
Jaguar Press release
Jaguar Customer Relationship Centre
Jaguar Engines & transmissions
Wheels / Tires, Suspension & handling
Interior
Exterior
Audio/Visual Electronics
Detailing / Car care
Motorsports
Jaguar Classifieds
Marketplace
PRIVATE For Sale / Trade or Buy Classifieds
VENDOR 'For Sale' Classifieds
Official Site Sponsors
VENDOR Threads
General Interest / History
Sights N Sounds
Photography
Forum announcement archives / Forum History
Jaguarforums Merchandise
Memorial Section
News
Gallery
Tools
Car Payment Calculator
Tire Rim Calculator
Vin Decoder
Recalls
Technical Service Bulletins (TSBs)
Members List
Live Feed
Marketplace
Vendor Directory
Become a Vendor
Member Marketplace
Vendor Marketplace
Site Store
New Posts
View Dark Mode
Please register or login to enable Dark Mode.
Log In
Register
Threads
Google
Threads
Posts
Advanced
Dark Mode
Please register or login to enable Dark Mode.
Log In
Forgot your Password?
By logging into your account, you agree to our
Terms of Use
and
Privacy Policy
, and to the use of cookies as described therein.
or
Login with Google
Login with Facebook
Recent
Commented
Albums
My Pictures
My Post Pictures
Bigg Will
January 25, 2015
494
0
Sort:
Default
Default
Most Recent
LOL, they had signs out saying "Survey crew prepare to stop!"
0
2018/07/12 03:42:28
156246
CHP gets direction to waive you over and will cite or even impound your vehicle at the direction of the tester.
0
2018/07/12 03:43:11
156246
Higgins with his summer shoes on.
0
2018/12/04 13:15:39
156246
Enjoying the ride!
0
2019/02/02 21:09:23
156246
0
2019/02/02 21:12:26
156246
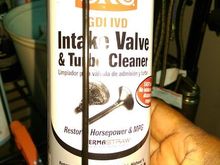
I've used this twice before with great results. With an E throttle it's impossible to do this with one person so, I just run 6 ft of vacuum line from its nozzle to the boost bypass vacuum port, allowing me to spray the can and keep the cars rpm at 2500.
0
2019/02/02 21:14:43
156246
0
2019/02/04 14:24:42
156246
Lower oil pan off, NO METAL SHAVINGs, BUT, there was some rtv sealant particles on the oil pump pick up screen, I carefully cleaned them off. my fault for using a dab of rtv to seal the oil drain bolt. Other than that the pan was all clean.
0
2019/02/04 14:41:30
156246
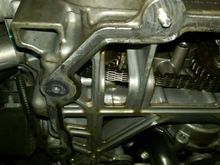
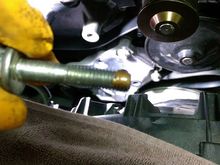
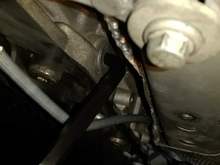
Broke this torx bolt off removing the oil pan. This bolt gets the coolant wash when the water pump goes. it's an open hole on the top so the coolant sets up as a kind of thread locker after so many heat cycles.
0
2019/02/04 14:47:36
156246
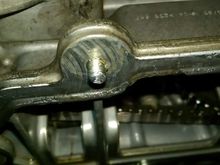
Oil pan side of the broken bolt.
0
2019/02/04 14:54:50
156246
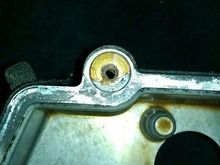
It was a pain to get out. But going slow with a big pair of Visegrips did the trick.
0
2019/02/04 14:55:33
156246
ALWAYS chase the threads of problem nuts or bolts if possible before re installing new or used hardware.
0
2019/02/04 14:58:12
156246
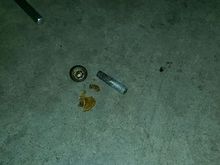
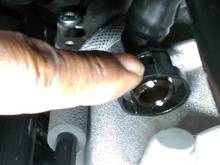
The oil level/temp sender mounts to the oil pan, nothing wrong with mine but Jag wanted $25 JUST FOR THE DAM SEAL! I found one at a local seal specialty store for $.97..lol
0
2019/02/04 15:02:17
156246
I just wonder why Jag uses so many of these weak ass torx fasteners. The stamping out of the star actually takes away metal from where you need it when a torque load (tightening or loosening) is put on it, MB found this out when they tried to use them for head bolts. I swap them out for flange bolt whenever possible.
0
2019/02/04 15:17:53
156246
0
2019/02/04 15:24:54
156246
And ran it in to the boost bypass valve vacuum port, and now I can spray the can empty from the drivers seat.
0
2019/02/04 15:29:48
156246
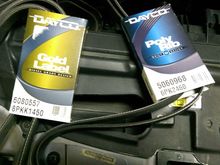
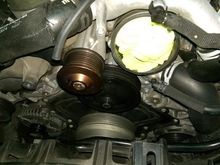
A quick note on the belts, you will have to remove eve
0
2019/02/19 22:16:52
156246
SMH...
0
2019/02/19 22:21:46
156246
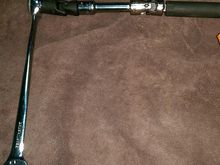
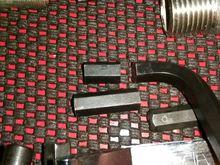
This is the set up I'm using for the plugs this time. A 13mm Gear Wrench coupled using a Gear Wrench 3/8 wrench drive. It works well and the short size not gives you a better feel for what the socket and plug are doing, it limits your torque in tightening.
0
2019/02/19 22:24:43
156246
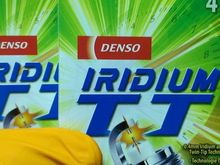
Gonna give these a try this time, the Champions I put in before did very well though.
0
2019/02/19 22:24:52
156246
0
2019/02/19 22:25:11
156246
0
2019/02/19 22:34:10
156246
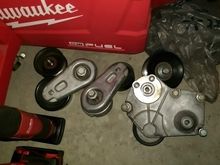
It's pretty straight forward. You will need a set of belt servicing tools to release the tensioners. Mine from Harbor freight worked just fine.
0
2019/02/19 22:35:54
156246
You will be removing all of the tensioners and idlers, so have a diagram of the set up and belt routing handy.
0
2019/02/19 22:36:02
156246
REMEMBER THIS IS AN ALUMINUM BLOCK SO EASY ON THE ANTI SEIZE! TOO MUCH CAN LET YOU OVER TIGHTEN AND RIP THE THREADS OUT.
0
2019/02/19 22:40:31
156246
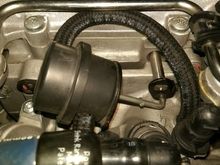
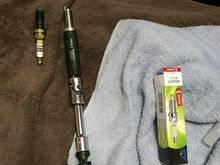
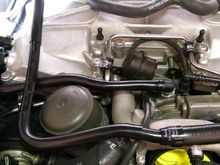
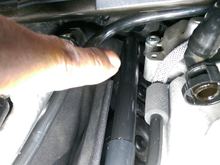
Removing this vent hose gives you more room to service the left bank plugs, mine was cut so I replaced it.
0
2019/02/23 22:47:26
156246
The best way to remove this squeeze retainer because of its location is to press one side at a time while pressing the hose back towards the firewall.
0
2019/02/23 22:48:23
156246
This is the vent tube that attaches to the top of the throttle body and back of the left valve cover, removing it will give you some much needed space when changing the plugs. Mine was cut so i was replacing it.
0
2019/02/24 00:10:29
156246
Back in the noseeum zone.
0
2019/02/24 00:11:01
156246
The best way to remove this tube is to release it from the throttle body, then while pushing it back, release the squeeze couple by pressing on one side at a time.
0
2019/02/24 00:11:57
156246
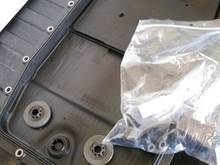
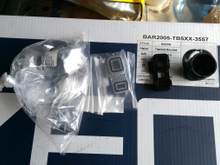
Trans service kit.
0
2019/03/21 03:46:51
156246
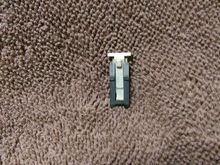
I bought this aluminum valve body seal on the advice of a buddy who races his ZF equipped BMW regularly. The plastic onon the right will deform under high loads, leading to slippage and heat.
0
2019/03/21 03:47:03
156246
The 8mm allen i cut down for the trans fill plug. The cut off section is what i use with an 8mm Gearwrench to remove the diff fill plug.
0
2019/03/21 03:47:29
156246
Simple but perfectly right for the job.
0
2019/03/21 03:48:20
156246
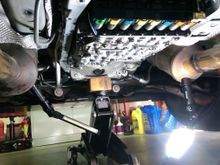
I found it easier to remove the trans mount to service the metatronic sleeve, if you do this support the trans and motor at their joining flange, this gets the jack out of the way of any trans work.
0
2019/03/21 03:48:47
156246
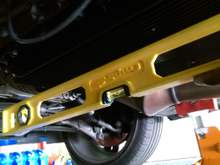
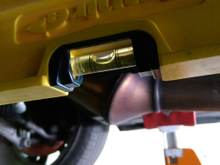
Checking for level on the trans for the fluid fill
0
2019/03/27 19:51:50
156246
Looks good, use a wet towel over the exhaust pipe to keep from getting burned by the exhaust while filling it with trans fluid.
0
2019/03/27 19:52:02
156246
Checking for level before filling.
0
2019/03/27 20:04:20
156246
Looks good, tip = a wet towel around the exhaust will keep you from getting burned as the exhaust heats up fast with the engine running for the fluid fill.
0
2019/03/27 20:04:32
156246
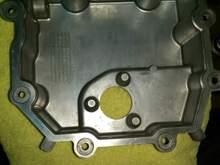
Oil pan ready for the re seal.
0
2019/03/27 23:12:27
156246
First
Page
11 of 13
Last
Go To
Page
1
...
7
8
9
10
11
12
13
11 of 13
Go To
GO
Go to page
of 13
pages
1
...
7
8
9
10
11
12
13