Log In
Register
Forums
General Jaguar Forums
New Member Area - Intro a MUST
Jaguar Forums Feedback & Suggestion Center
General Tech Help
Regional
Jaguar Models ( Current )
XF (X260)
F-Type ( X152 )
XE ( X760 )
E-Pace
F-Pace (X761) / C-X17
I-Pace EV
Jaguar Models ( Modern )
XF and XFR ( X250 )
XJ ( X351 )
X-Type ( X400 )
S-Type / S type R Supercharged V8 ( X200 )
XJ XJ6 / XJ8 / XJR ( X350 & X358 )
XJ XJ8 / XJR ( X308 )
XJ XJ12 ( X305 )
XJ XJ6 / XJR6 ( X300 )
XK8 / XKR ( X100 )
XK / XKR ( X150 )
Jaguar Models ( Classics )
Mark V - X 420G
MKI / MKII S type 240 340 & Daimler
XK120 XK140 XK150
E type ( XK-E )
XJ6 & XJ12 Series I, II & III
XJS ( X27 )
XJ40 ( XJ81 )
XKSS
XJ220
Other Jaguars
Other Jaguar Models / Concepts / Replicas
Diesel variants
Diesel variants - All models
Non Jaguar vehicles
Non-Jaguar Vehicles
Brand Review
Jaguar Press release
Jaguar Customer Relationship Centre
Jaguar Engines & transmissions
Wheels / Tires, Suspension & handling
Interior
Exterior
Audio/Visual Electronics
Detailing / Car care
Motorsports
Jaguar Classifieds
Marketplace
PRIVATE For Sale / Trade or Buy Classifieds
VENDOR 'For Sale' Classifieds
Official Site Sponsors
VENDOR Threads
General Interest / History
Sights N Sounds
Photography
Forum announcement archives / Forum History
Jaguarforums Merchandise
Memorial Section
News
Gallery
Tools
Car Payment Calculator
Tire Rim Calculator
Vin Decoder
Recalls
Technical Service Bulletins (TSBs)
Members List
Live Feed
Marketplace
Vendor Directory
Become a Vendor
Member Marketplace
Vendor Marketplace
Site Store
New Posts
View Dark Mode
Please register or login to enable Dark Mode.
Log In
Register
Threads
Google
Threads
Posts
Advanced
Dark Mode
Please register or login to enable Dark Mode.
Log In
Forgot your Password?
By logging into your account, you agree to our
Terms of Use
and
Privacy Policy
, and to the use of cookies as described therein.
or
Login with Google
Login with Facebook
Recent
Commented
Albums
My Pictures
My Post Pictures
orangeblossom
May 12, 2016
2202
0
Sort:
Default
Default
Most Recent
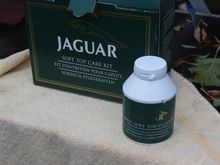
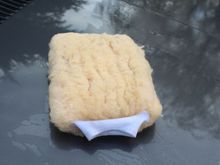
Jaguar Soft Top Cleaner that came with the Car which I have never used before but this Suff is Amazing!
0
2016/11/16 16:32:00
134274
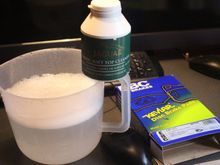
When mixed with Water it bubbles up like a Soufle (whatever that is?)
0
2016/11/16 16:33:58
134274
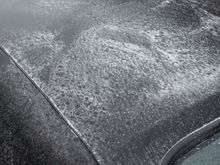
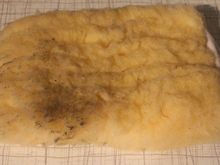
Cleaning the Soft Top in the Rain with Jaguar Soft Top Cleaner, which is Amazing!
0
2016/11/16 16:43:29
134274
0
2016/11/16 16:47:54
134274
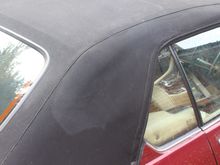
Still not dried out from the Rain of the previous day and all those little white specs are from the Car Cover which have since all blown away. But the Mould has all gone!
0
2016/11/16 16:50:41
134274
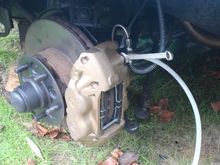
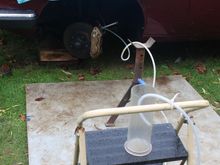
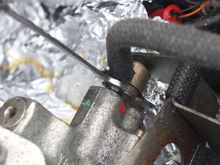
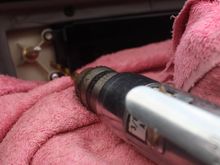
Push one end of the Tube over the Caliper Bleed Nipple (always do the rears first)
0
2016/11/17 12:34:23
134274
Have the Tube hanging down in a 'U' Bend with 'The Jack Stand' Higher than the Caliper Bleed Nipple
0
2016/11/17 12:37:38
134274
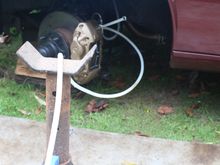
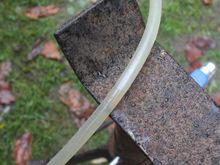
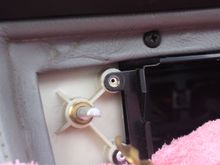
You should be able to see the Brake Fluid pushing up towards the Top of 'The Jack Stand' where I've put a piece of tape.
0
2016/11/17 12:40:44
134274
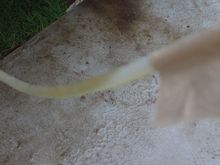
Brake Fluid being pushed uphill towards the Top of 'The Jack Stand' so when you Stop Pumping the Brake Pedal the Brake Fluid tries to Run Backwards and Automatically Stops the Air From getting back in
0
2016/11/17 12:43:34
134274
Showing the General Arrangement Protect any exposed Bodywork with Towels or something similar in case the Tube comes off, which shouldn't happen if the Tube is a good fit on the Nipple. But have some water standing by to wash off any accidental spills.
0
2016/11/17 12:48:43
134274
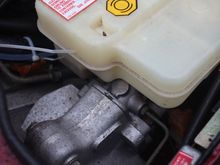
The Teves Master Cylinder/Actuator As Fitted to my 1989 and 1990 XJS V12's
0
2016/11/17 15:05:55
134274
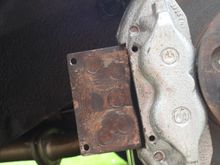
This is the Inlet of the Low Pressure Side of The Brake Pump that's the one with the Accumulator 'Black Ball' That little Spring Clip held in Place with a dab of Red 'Loctite' needs to be pulled out (easy!) but don't lose it!
0
2016/11/17 16:02:34
134274
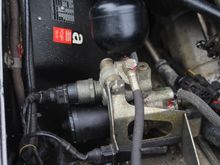
The Brake Accumulator and Pump Pack Rag all around it as its going to make a mess.
0
2016/11/17 17:25:09
134274
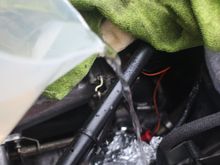
With the Tin Foil Channel in Place, Gently Rock the Braided Pipe while Pulling the Plastic Elbow out of the Pump.
0
2016/11/17 17:27:50
134274
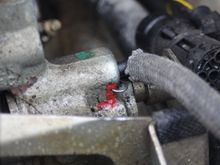
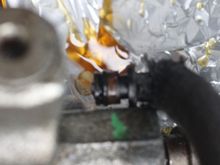
Its going to make a bit of a mess with Brake Fluid going everywhere. Just above that Green Paint you can see the Plastic Elbow with its Hard to Pull Out 'O' Ring
0
2016/11/17 17:30:43
134274
Wash any Splashes of Brake Fluid Off Immediately Afterwards, or it will Strip the Paint!
0
2016/11/17 17:34:02
134274
Cover Everything with Towels You cannot be too Careful, as this is a little job that can make a very Big Mess! Note: The Boulster in Case the Bonnet/Hood Falls down, while you are Topping up the Reservoir with Brake Fluid.
0
2016/11/17 17:36:38
134274
Spilled Brake Fluid can Strip Off Paint in an Instant so be very Careful.
0
2016/11/17 17:41:00
134274
0
2016/11/24 16:48:22
134274
My New Wash Mitt
0
2016/11/27 02:01:04
134274
Why can't I wash the dirt out as easily as a Sponge?
0
2016/11/27 02:02:10
134274
That's the Square Cut 'O' Ring on the Plastic Elbow just by that Green Paint. Do NOT pull the Elbow out, or you will have Brake Fluid going Everywhere and Keep it OFF the Paint or it will Strip it!
0
2016/11/28 02:30:05
134274
0
2016/12/07 10:40:54
134274
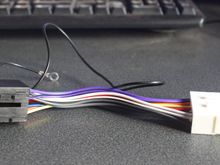
Will the Plug on the back of the Cage plug into the 'White' Adapter?
0
2016/12/07 15:07:47
134274
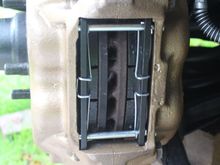
The Brake Pad was much too tight in the Calipers, which could lead to it jamming.
0
2016/12/08 03:24:07
134274
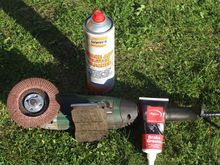
Brake Pad was too much of a Tight Fit, so I ground a bit off the Top and Bottom edge, until it slid in perfect. Keep the Brake Cleaner away from the Caliper Piston Rubbers.
0
2016/12/08 03:25:50
134274
After Grinding a bit off the Top and Bottom edges of the Brake Pads to avoid them 'Jamming' they were a much better fit. A New Brake Pad Fixing Kit also works Wonders.
0
2016/12/08 03:31:55
134274
What does the Black Box on the back of the cage do, as its still connected to the Original Plug.
0
2016/12/08 14:07:52
134274
0
2016/12/08 14:10:29
134274
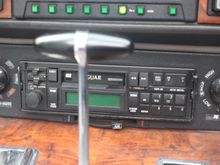
'Parting is such sweet sorrow' but now its time to upgrade you for something a bit more modern.
0
2016/12/09 08:37:18
134274
Those knobs were on that Face Plate so tight, I started looking around for a Screw to undo but with a Straight Pull and some Jiggling, they came off without breaking.
0
2016/12/09 08:47:21
134274
Gently does it but don't break those Wires on the back of the Face Plate.
0
2016/12/09 08:53:41
134274
Drilling out the Pop Rivets using a Straight Air Drill and 'Her Bath Towel' to protect the Ski Slope.
0
2016/12/09 08:57:48
134274
Drilling out the Pop Rivets was easier than I though and then I pushed the Stubs right through the holes.
0
2016/12/09 08:59:50
134274
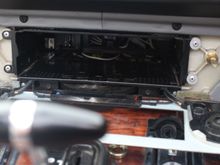
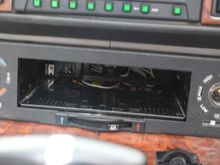
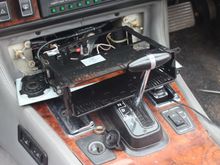
Only 4 Pop Rivets hold the Cage in place, so I just very carefully pulled it out.
0
2016/12/09 09:03:40
134274
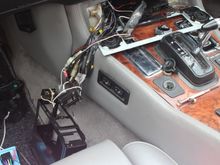
Jaguar didn't stint on the Wire it reached right down to the Floor!
0
2016/12/09 09:09:21
134274
All done with Bullet Connectors, in the event I might one day decide to Retro Fit the Original Pull Out Radio.
0
2016/12/09 09:12:42
134274
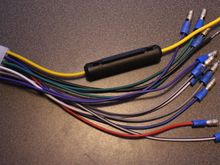
Fitting some Bullet Connectors on to the Stereo Harness.
0
2016/12/09 09:17:53
134274
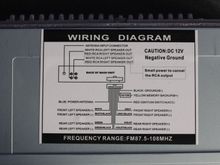
Easy Wiring Diagramme 'What could possibly go wrong' Nothing! it was all very Straightforward.
0
2016/12/09 09:20:38
134274
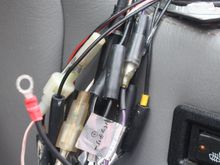
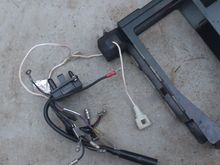
The Black Box was just glued to the Side of the Cage, so I just pulled it off and then cut it off from the Original Plug. Leaving enough in case I ever wanted to re-join it.
0
2016/12/09 09:28:26
134274
First
Page
7 of 56
Last
Go To
Page
1
...
5
6
7
8
9
...
56
7 of 56
Go To
GO
Go to page
of 56
pages
1
...
5
6
7
8
9
...
56