Log In
Register
Forums
General Jaguar Forums
New Member Area - Intro a MUST
Jaguar Forums Feedback & Suggestion Center
General Tech Help
Regional
Jaguar Models ( Current )
XF (X260)
F-Type ( X152 )
XE ( X760 )
E-Pace
F-Pace (X761) / C-X17
I-Pace EV
Jaguar Models ( Modern )
XF and XFR ( X250 )
XJ ( X351 )
X-Type ( X400 )
S-Type / S type R Supercharged V8 ( X200 )
XJ XJ6 / XJ8 / XJR ( X350 & X358 )
XJ XJ8 / XJR ( X308 )
XJ XJ12 ( X305 )
XJ XJ6 / XJR6 ( X300 )
XK8 / XKR ( X100 )
XK / XKR ( X150 )
Jaguar Models ( Classics )
Mark V - X 420G
MKI / MKII S type 240 340 & Daimler
XK120 XK140 XK150
E type ( XK-E )
XJ6 & XJ12 Series I, II & III
XJS ( X27 )
XJ40 ( XJ81 )
XKSS
XJ220
Other Jaguars
Other Jaguar Models / Concepts / Replicas
Diesel variants
Diesel variants - All models
Non Jaguar vehicles
Non-Jaguar Vehicles
Brand Review
Jaguar Press release
Jaguar Customer Relationship Centre
Jaguar Engines & transmissions
Wheels / Tires, Suspension & handling
Interior
Exterior
Audio/Visual Electronics
Detailing / Car care
Motorsports
Jaguar Classifieds
Marketplace
PRIVATE For Sale / Trade or Buy Classifieds
VENDOR 'For Sale' Classifieds
Official Site Sponsors
VENDOR Threads
General Interest / History
Sights N Sounds
Photography
Forum announcement archives / Forum History
Jaguarforums Merchandise
Memorial Section
News
Gallery
Tools
Car Payment Calculator
Tire Rim Calculator
Vin Decoder
Recalls
Technical Service Bulletins (TSBs)
Members List
Live Feed
Marketplace
Vendor Directory
Become a Vendor
Member Marketplace
Vendor Marketplace
Site Store
New Posts
View Dark Mode
Please register or login to enable Dark Mode.
Log In
Register
Threads
Google
Threads
Posts
Advanced
Dark Mode
Please register or login to enable Dark Mode.
Log In
Forgot your Password?
By logging into your account, you agree to our
Terms of Use
and
Privacy Policy
, and to the use of cookies as described therein.
or
Login with Google
Login with Facebook
Recent
Commented
Albums
My Pictures
57loboy's Photos
View Profile
Sort:
Most Recent
Most Recent
Most Comments
Albums
Photos
0
2024/09/20 09:31:34
18218
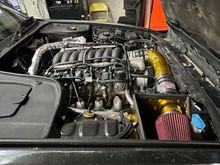
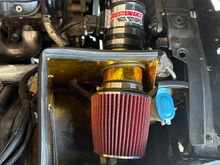
I'm pretty happy with the finished product. It closes things up nicely. Next step is to have to the tune adapted to accommodate the revised intake characteristics.
0
2024/08/18 14:47:42
18218
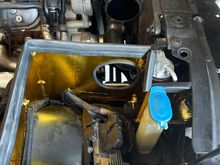
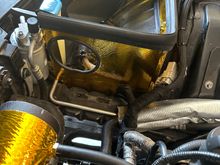
After measuring 3x, I made one cut to allow the intake tube to pass into the closed off area. The piece along the wheelwell is screwed to the inner fender and also the wheel well, hidden under the wiring loom in this pic.
0
2024/08/18 14:47:38
18218
I made the longitudinal piece such that it slid between the crush tube and fender well, and extends under the radiator support out towards the back of the headlight. It ends right next to the headlight adjuster knob. It's riveted to the piece that curves on the wheel well.
0
2024/08/18 14:47:34
18218
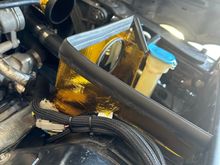
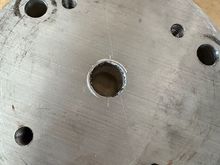
I made templates from cardboard that followed the contour of the passenger fender well and up to the height of the existing bodyline/weatherstripping for a close seal to the hood insulation. I then transferred to sheet metal. (I forget what gauge I used, but I could cut it with my jigsaw and metal scissors).
0
2024/08/18 14:47:28
18218
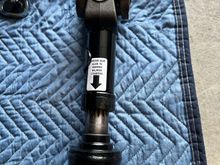
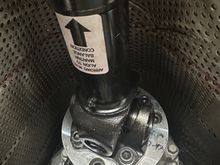
The new driveshaft has a MUCH bigger stub/slip joint.
0
2024/08/18 14:36:11
18218
0
2024/08/18 14:35:42
18218
0
2024/08/18 14:29:19
18218
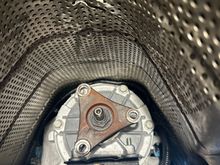
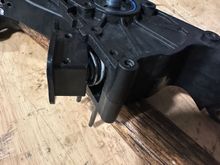
New transmission extension housing with new bushing, seal(s) and flange nut. Pretty easy install once the transmission crossmember was loosened and mount removed.
0
2024/08/18 14:28:32
18218
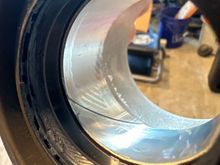
Best view of the wear induced from the vibration. The wear pattern is quite visible.
0
2024/08/18 14:28:25
18218
More wear elsewhere on the bushing.
0
2024/08/18 14:28:21
18218
0
2024/08/18 14:28:17
18218
0
2024/08/18 14:28:13
18218
0
2024/08/18 14:28:07
18218
0
2024/08/18 14:27:59
18218
0
2024/08/07 16:59:05
18218
0
2024/08/07 16:57:53
18218
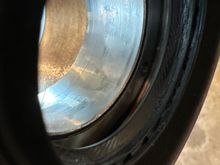
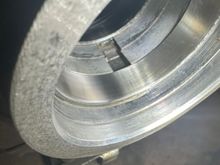
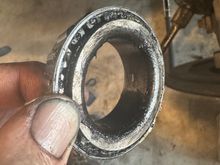
Outer bearing race where, if you zoom in, you can see the vertical marks I think are from the roller bearings.
0
2024/08/01 21:20:46
18218
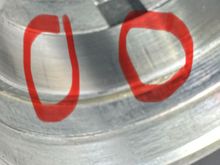
Close up of outer bearing race with vertical lines/impressions circled.
0
2024/08/01 21:20:40
18218
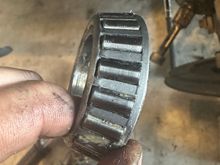
Rollers look ok, no pitting or scoring...
0
2024/08/01 17:04:35
18218
Bearings had less grease than I'm used to seeing.
0
2024/08/01 17:04:32
18218
With grease cleaned off, looks to be in ok shape, right?
0
2024/08/01 17:04:26
18218
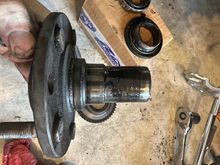
Stub axle came out easily, grease was black, spacer slid out, no shims.
0
2024/08/01 17:04:21
18218
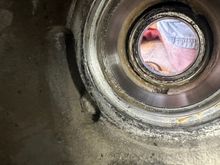
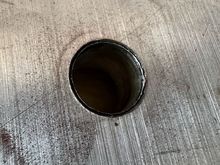
The reluctor wheel, seal and outer bearing were basically sitting here when I pulled the half shaft out. Races look ok though... Plastic from outer seal itself was very brittle/dry
0
2024/08/01 17:04:15
18218
0
2024/07/27 18:42:42
18218
Not as much contact marking as I'd have expected.
0
2024/07/27 18:42:40
18218
Thanks to stubby wrenches, I didn't have to lower trans or crossmember. Flange was very tough to get off, which surprised me as it slid right on.
0
2024/07/27 18:42:39
18218
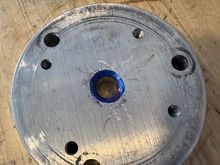
Blue ink shows no contact now and scuffs show it seats fully against the transmission.
0
2024/07/27 18:42:37
18218
I used the score line as indicator for where to chamfer the adaptor to clear it.
0
2024/07/27 18:42:34
18218
I created the scoring line here by pressing the adaptor against the transmission to see where it needed to be chamfered.
0
2024/07/27 18:42:32
18218
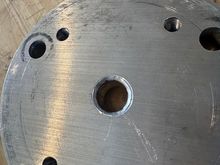
Here's the scoring on the back (trans) side of the adaptor where it wasn't fully seated on the transmission.
0
2024/07/27 18:42:30
18218
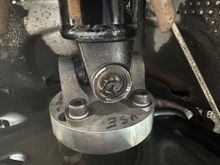
Rear adaptor looks good as it sits. Once I see what's up with the front, I may as well remove and check this one...
0
2024/07/27 09:58:17
18218
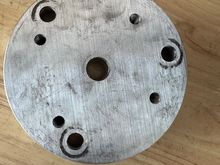
This is the front adaptor to the driveshaft, looking towards the front of the car. Lowering crossmember looks to be the easiest approach to getting at the nuts that hold the countersunk bolts on.
0
2024/07/27 09:58:13
18218
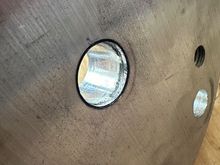
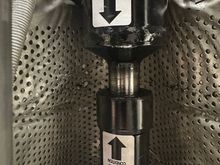
Plenty of space for flex here. I suspected as much, but - seeing is believing. The top arrow (pointing down) is towards the rear of the car. It is at this weld, and the machined neck, where the distortion was.
0
2024/07/27 09:58:11
18218
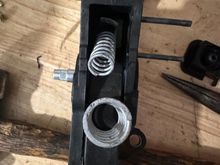
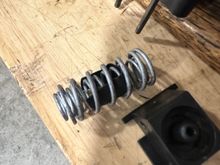
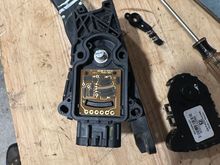
The springs sit within ringed recesses in the cover and base. I took out the outer (larger diameter) spring and left the inner one. Reassembly is just reversing things from here. Was about 10 minutes or so if I'd not taken photos.
0
2024/07/24 07:36:19
18218
A double coil setup in the OEM Camaro pedal.
0
2024/07/24 07:36:15
18218
Use a punch of appropriate size and tap them out. Keep your thumb or something over the cover as you remove the final pin. It didn't launch itself as the final one cleared, but I didn't feel like looking for little drift pins if it did.
0
2024/07/24 07:36:12
18218
Two small, metal drift pins hold it in place. (Yes, that's a shattered rear stop light housing in the background. Am going to try and get a replacement one 3D printed)
0
2024/07/24 07:36:06
18218
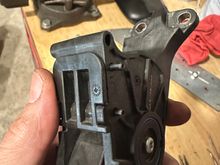
This is the cover under which the springs are located.
0
2024/07/24 07:36:03
18218
The potentiometer sweep arm can be (gently!) pried off. Make close note of its positioning, the arm has ridges to line it up.
0
2024/07/24 07:36:00
18218
First
Page
1 of 2
Last
Go To
Page
1
2
1 of 2
Go To
GO
Go to page
of 2
pages
1
2